Pyaz Paratha | Onion Paratha | Kitchenstagram

Onion Paratha, a delectable variation of the traditional plain paratha, is a mouthwatering delight that captures the essence of North Indian cuisine. Bursting with flavours, these flatbreads are generously stuffed with finely chopped onion, fiery green chilies and a medley of savory spices. A popular choice for breakfast or a satisfying accompaniment, Pyaz ka paratha is a go-to comfort meal, especially when your pantry is scantily stocked, relying on the humble onion as its hero ingredient.
This simple and fuss-free recipe requires minimal planning and preparation, making it ideal for quick meals or snacks. The stuffing, a harmonious blend of onions and spices, brings out the rich and robust flavours that make these paratha s irresistible. Enjoy them for breakfast, lunch or as an after-school snack. Paired with raita, chutney or pickles, Pyaz Paratha transforms into a wholesome meal.
For complete dinner experience, serve Onion Paratha with dishes like Mushroom Makhani or paneer butter masala etc. additionally, this versatile dish makes for a convenient addition to a child’s lunchbox or family dinner or lunch, those onion parathas, accompanied by a sauce and yogurt or curd rice, promise a delightful and fulfilling culinary experience.
Why you’ll love this recipe:
Simple ingredients: With only few everyday ingredients, its a breeze to whip up, leaving you with no excuses not to try it. This Recipe is perfect for days when you have nothing more than a few onions in your pantry.
Effort: What sets this recipe apart is the minimal effort required, the stuffing, comprising raw onions and spices, is effortlessly prepared. Any concerns about the raw onions are dispelled as they undergo a transformative cooking process while the paratha is being roasted.
Taste: The taste is unparalleled thanks to the stuffed method, which allows for a more flavourful experience compared to simply mixing onions into the dough.
Texture: The texture is a delightful combination of crispy outer layers and a filling of softened onions, complemented by a subtle heat from green chilies.
Ingredients for Onion Paratha:
Dough Ingredients:
Whole wheat flour: Whole wheat flour provides a wholesome experience. You can use 50% Whole wheat flour and 50% all purpose flour for a tastier paratha.
All-purpose Flour: A versatile addition, blending well with whole wheat flour for improved texture.
Water: Essential for forming a soft dough. Ensure it’s at room temperature for optimal results.
Salt: Adds flavour to the dough, enhancing the overall taste.
Oil: Any neutral-flavored oil like, sunflower oil, soya bean oil works well.
Stuffing ingredients:
Onions: The onions are star in this recipe, as they adds plenty of flavour and punch to the paratha. You can use white, yellow or red onions, shallots, pearl onions, spring or green onions. My preference is always for red onions for their rich taste. Keep in mind that onions have to be finely chopped. If not, then you won’t be able to roll the parathas easily as it will tear while rolling.
Seasonings: A mix of salt, coriander seeds, cumin seeds, kasuri methi, fresh chopped cilantro, green chili, red chili powder, ajwain, chat masala and Garam masala adds layers of flavour. These spices contribute layers of complexity and depth to the paratha’s taste profile.
Frying:
Ghee or Oil: Traditionally ghee is used for frying parathas, but oil can be used for a vegan alternative.
Variations of Onion Paratha:
Opt for cooked stuffing by sauteing onions for spices in oil until soft, ensuring the mixture cools before stuffing.
Indulge in Onion Paneer or Cheese onion paratha by adding a tablespoon of grated paneer to the onion filling.
Indulge in Cheese onion paratha by adding a tablespoon of grated cheese to the onion filling.
Elevate flavours spring or green onion instead regular onion.
How to prep ahead:
To prepare this paratha ahead, start by making the dough ahead of time.
After allowing it to rest, store it in an air-tight container in the refrigerator for up to 3 days or in the freezer for a month.
When ready to cook, bring the dough to room temperature before rolling out the parathas.
Finely chop the onion in advance and store them in an airtight container for up to 3 days.
Serving options:
savor the delightful flavours of onion paratha or pyaz paratha by pairing it with an array of delectable accompaniments.
Enjoy the pyaz paratha with mix veg or your favourite veg, zesty mango pickle.
Relish the paratha with plain curd or masala curd for a simple yet satisfying combination.
For an indulgent twist, spread a layer of butter over the warm paratha or accompany with a steaming cup of chai for a comforting meal.
Create a quick and easy onion raita or cucumber raita or boondi raita, where crispy chickpea flour balls are soaked in spice-infused creamy yogurt, making it an ideal side dish.
Elevate your dinning experience with flavourful dishes like, matar paneer, paneer butter masala or Mushroom Makhani etc.
Storage Tips:
Refrigerator: To maximize the freshness and flavour of your cooked onion parathas, store them in the refrigerator for up to 2 days.
Freezer: For longer storage, the freezer is your ally. Freeze parathas for 2-3 months, separating them with parchment paper to prevent sticking.
Reheating: When reheating refrigerated parathas, a quick 15-20 seconds in the microwave or a skillet over medium heat is ideal. If they are frozen , use a skillet for best result.
Ingredients:
Dough:
1 cup Whole wheat flour
1 cup All-purpose flour
1 tsp salt
Water as required
1 tsp Oil
Stuffing:
1 ½ cup onion, finely chopped
Salt to taste
2 tsp Coriander seeds
1 tsp Cumin seeds
1 tsp Kasuri methi
2 tbsp Fresh Coriander leaves, finely chopped
2 nos. Green chili, finely chopped
1 tsp Red chili powder
¼ tsp Ajwain / Carom seeds
¼ tsp Chat masala
½ tsp Garam masala
For frying:
Ghee or oil
Preparation:
Dough:
- Step 1: In mixing bowl add whole wheat flour, all-purpose flour and salt then add water and start kneading. Add water in small increments as needed and continue to knead till the dough comes together as a ball.

- Step 2: Add oil to the dough and knead thoroughly until it becomes a soft dough, 10-12 minutes.

- Step 3: Cover and let the dough rest for minimum 30 minutes.

Stuffing:
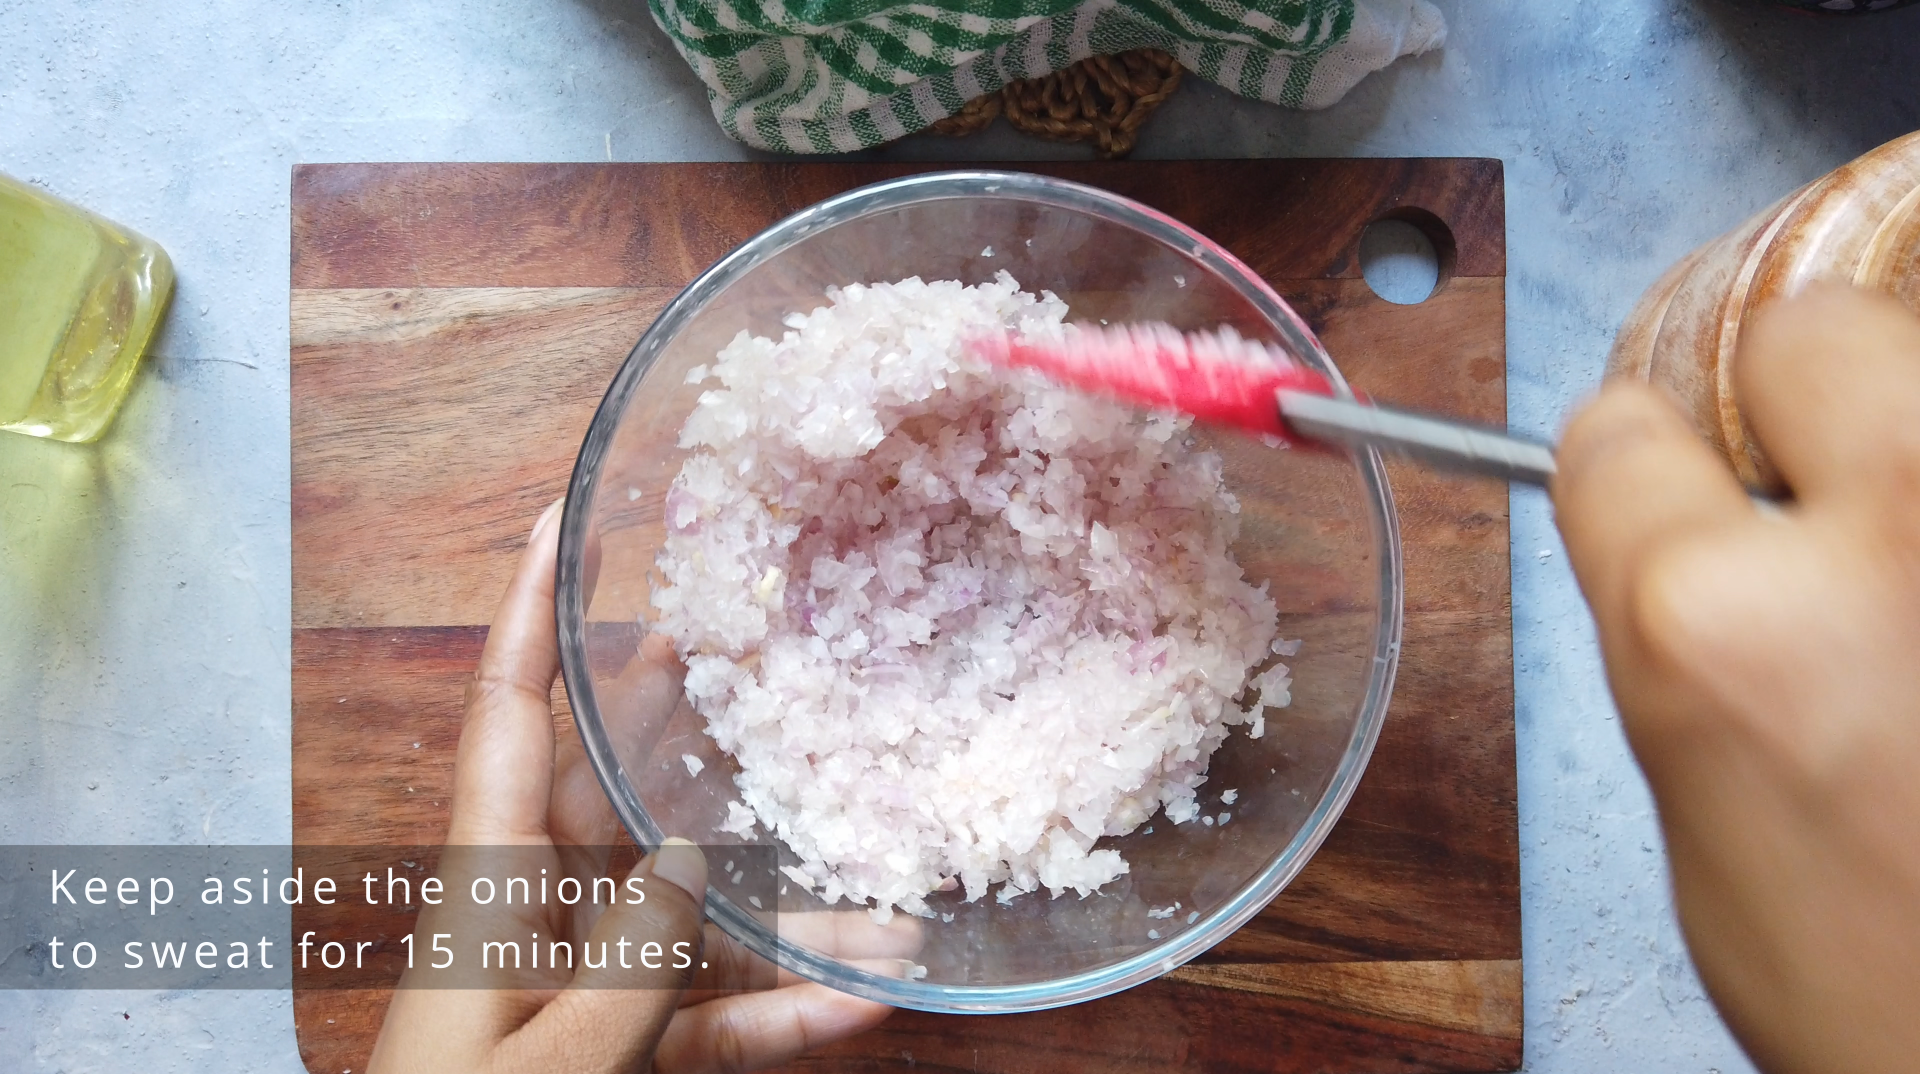
- Step 4: In a bowl add chopped onion and salt keep aside to sweat for 15 minutes.
- Step 5: Meanwhile lightly roast coriander and cumin seed till fragrant.

Apple raisin cinnamon rolls:
- Step 6: Then coarsely crush the seeds.

- Step 7: Roast the kasuri methi lightly. Transfer to a bowl.

- Step 8: Squeeze out all the water from the onions, transfer the onion in a separate bowl.

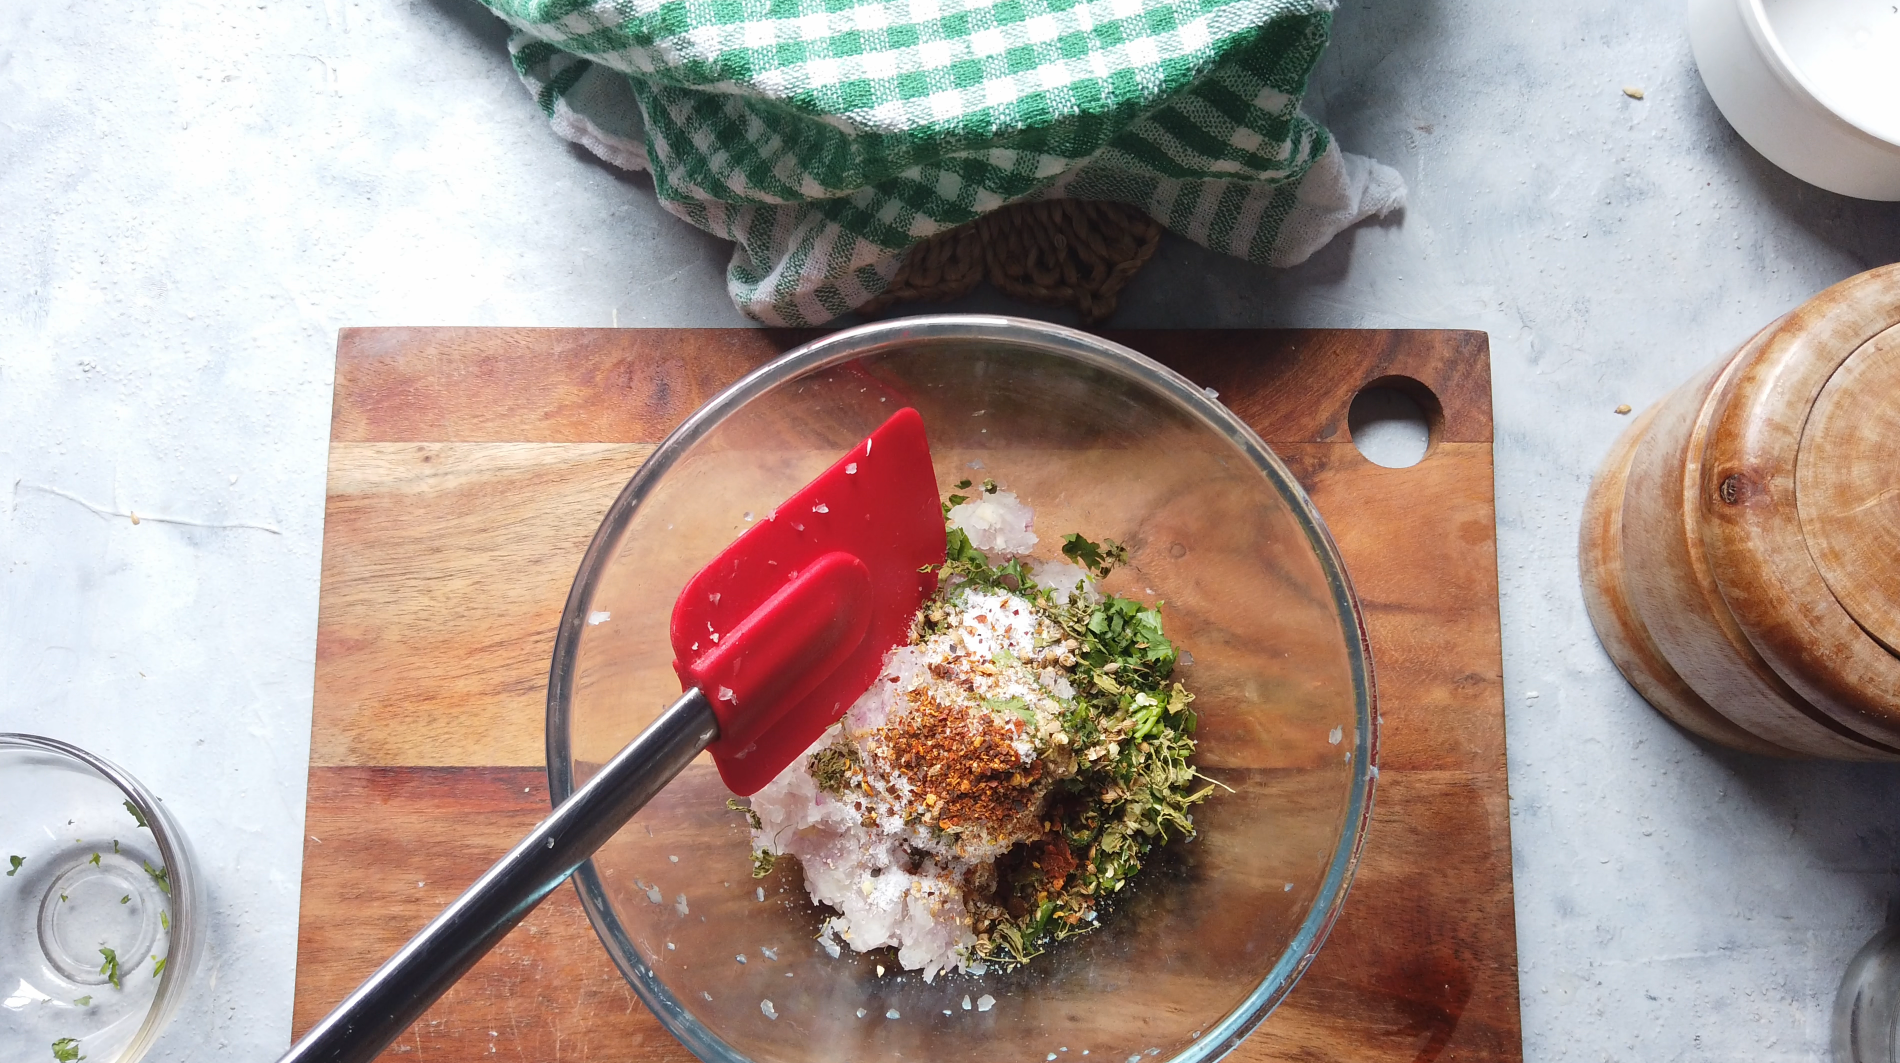
- Step 9: Then add chopped coriander, green chili, crushed kasuri methi, crushed coriander and cumin, red chili powder, ajwain, chat masala & Garam masala and mix properly. Keep aside.
- Step 10: Knead the dough again for 2 minutes, form tennis sized balls.

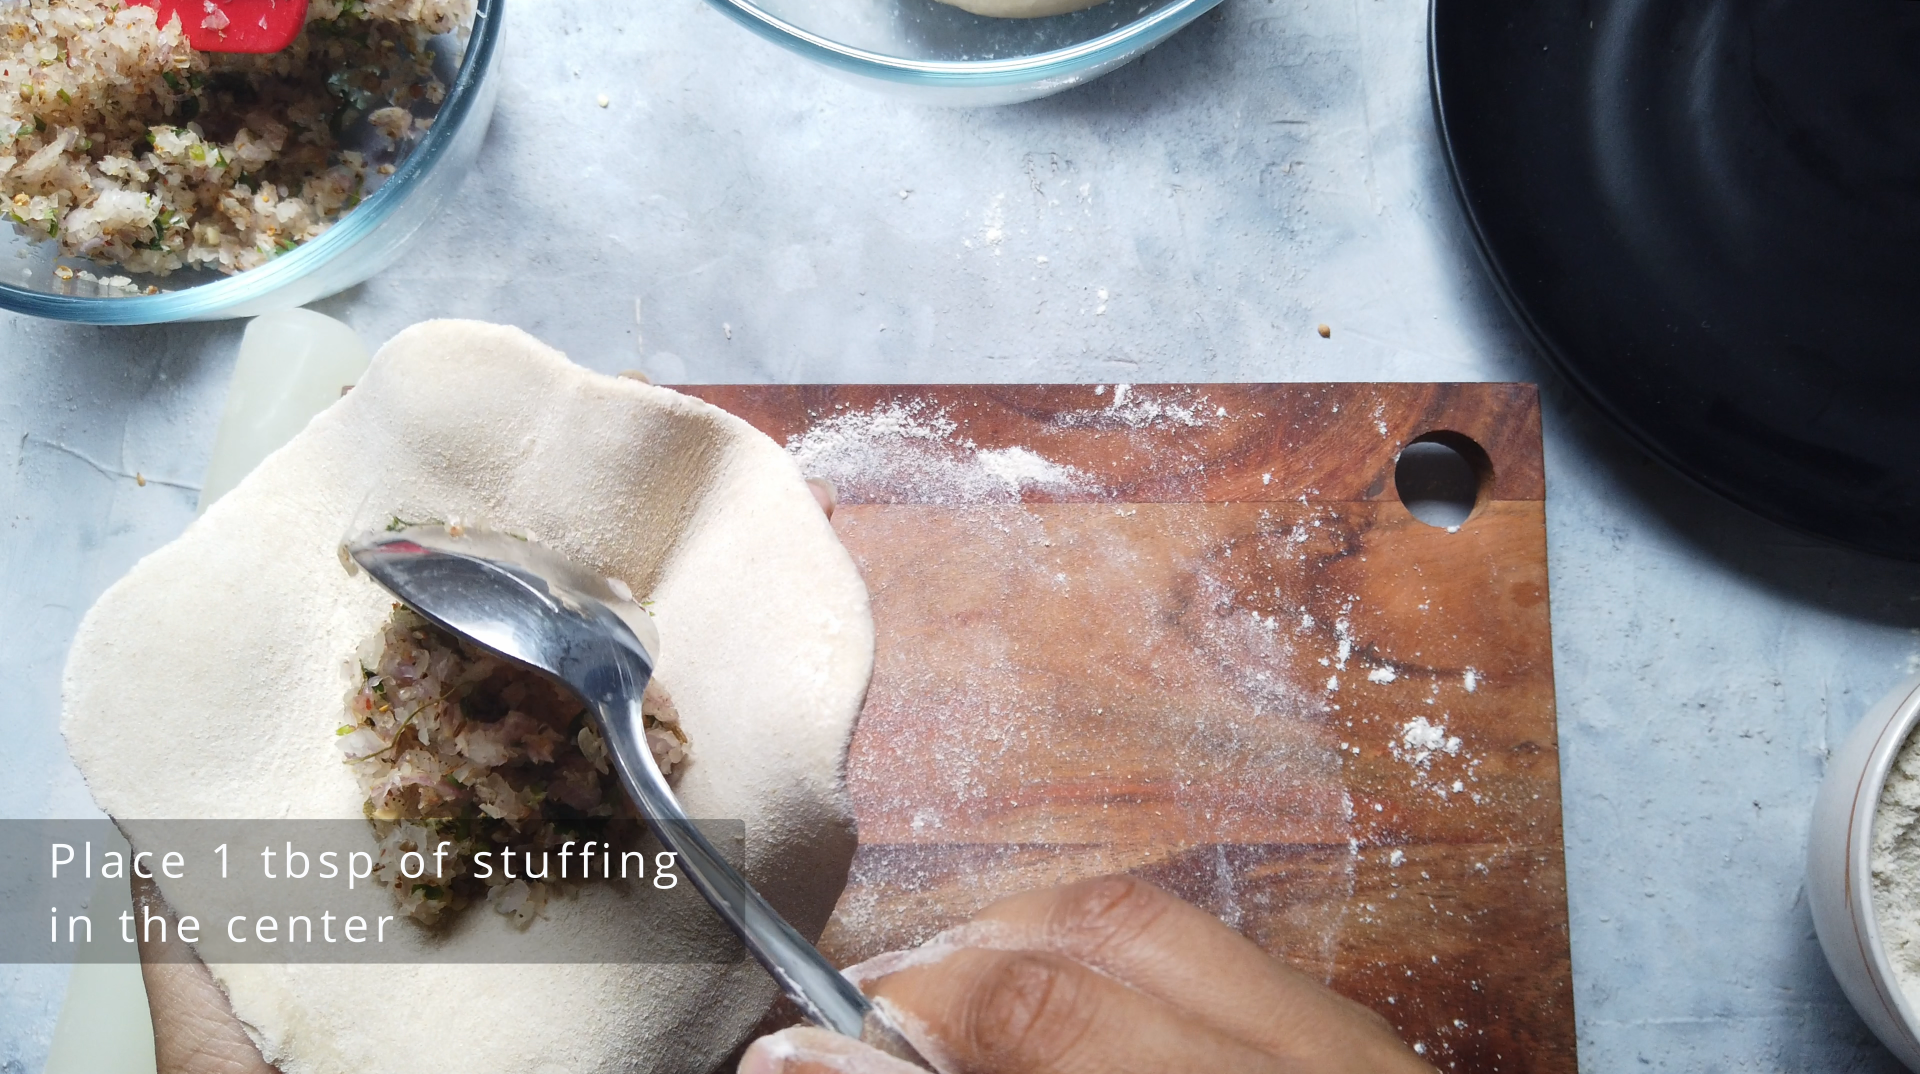
- Step 11: Flatten the balls and place 1 tbsp of the stuffing, grab the edges and pleat them together in the center and pinch to seal.
- Step 12: Roll into a ball and press the sides down.

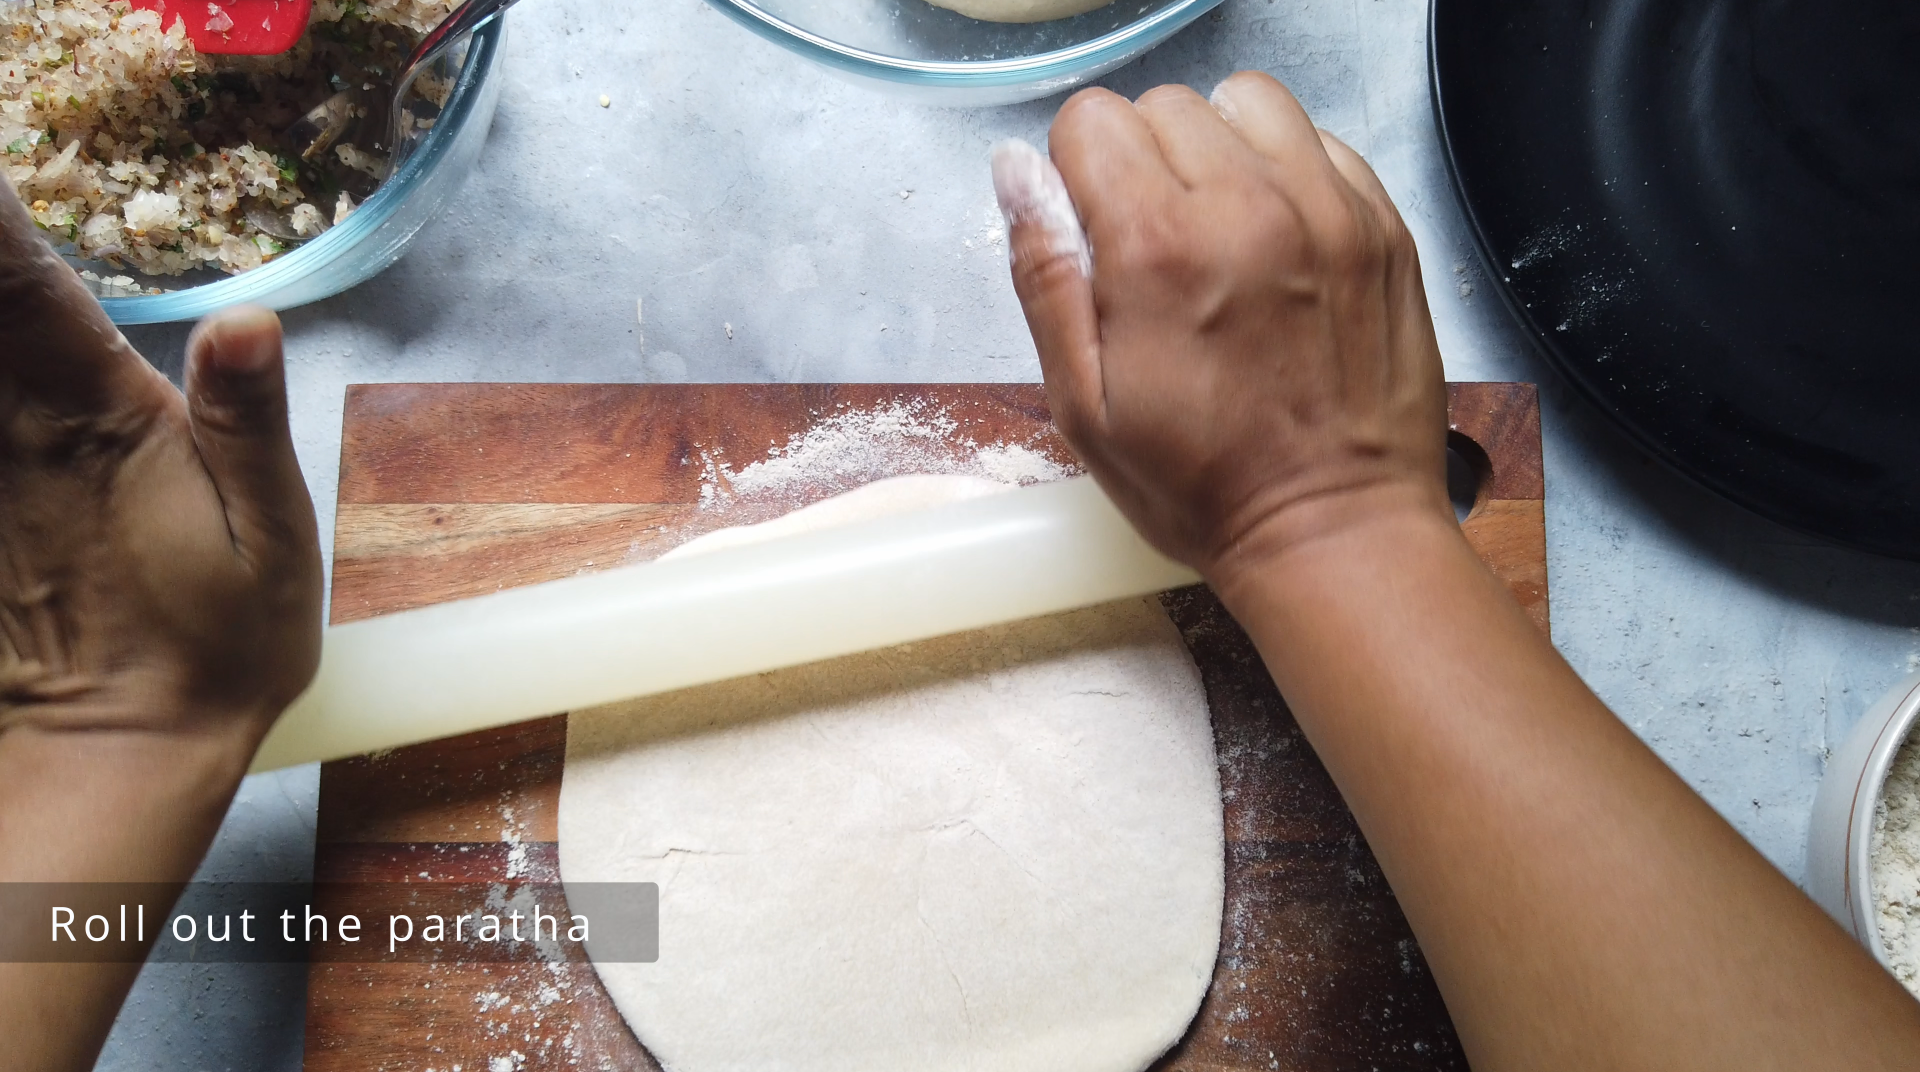
- Step 13: Now dust the surface with flour, roll the ball in flour and roll out into a paratha.
- Step 14: Heat a tawa or griddle or skillet before you start rolling the paratha. Keep the flame to medium-high or high.

- Step 15: Once the tawa becomes hot then place the rolled paratha on it.

- Step 16: Fry the paratha in hot tawa and flip when the underside gets golden spots, flip again the when the other side gets golden spots. Make sure that the paratha edges are cooked well. You can press the edges with a spatula for even cooking.

- Step 17: Apply ghee or oil on both sides and cook on both sides, press to cook till crisp.

- Step 18: Serve hot Onion Paratha with some pickle or yogurt or side dish or you can have it with Milk tea.

Pro tips:
Onion is the integral part of any good onion paratha. The key to a perfect onion paratha is finely chopped onions. This ensures that the paratha can be rolled easily without tearing.
If you prefer less spicy paratha, reduce or omit green chilies and red chili powder
Knead the dough until it becomes soft, supple and smooth. A soft dough ensures that parathas turn out light and fluffy. If the dough is too hard, it will result in dense and chewy parathas, while a loose and sticky dough makes it difficult to stuff and roll.
If the dough is hard, sprinkle a tablespoon of water and knead until it reaches the desired consistency. If the dough is sticky, sprinkle a spoonful of flour and knead until it’s no longer sticky.
Resting the dough is essential, allowing gluten to form and making it easier to roll out, resulting in softer parathas.
Dust off flour from the parathas before frying to prevent it from drying up and turning hard.
Use a hot skillet for roasting, maintaining a medium-high to high heat. A cold skillet can result in hard or chewy parathas, while an excessively hot tawa may burn the surface while leaving the stuffing undercooked.
If you plan to store or pack them, let the parathas cool down for – minutes before sealing in an airtight container to prevent sogginess.
About Me

DEBJANI MONDAL
Welcome to Kitchenstagram, the home of delicious recipes, culinary inspiration and cooking adventures. I’m Debjani and I’m thrilled to be your guide through the wonderful world of food. I’m a self-taught professional baker, home chef, recipe developer, author of Kitchenstagram and an aspiring YouTuber.
My passion for food and cooking began at a very young age, when I would watch my mom and dad cook for me and my brother. My dad, in particular is a great cook whose culinary skills made a lasting impression on me. My dad would cook up a storm on special occasions by cooking variety of dishes, from delicious biriyani to samosa, fish fry, rasgullas and kachoris (sweet & spicy deep fried pastry with filling of lentils, meat or fish…>>>>>
FOLLOW ME
My Latest Posts
- post 1
- post 2