Easy Homemade Lemon Curd Recipe | Kitchenstagram

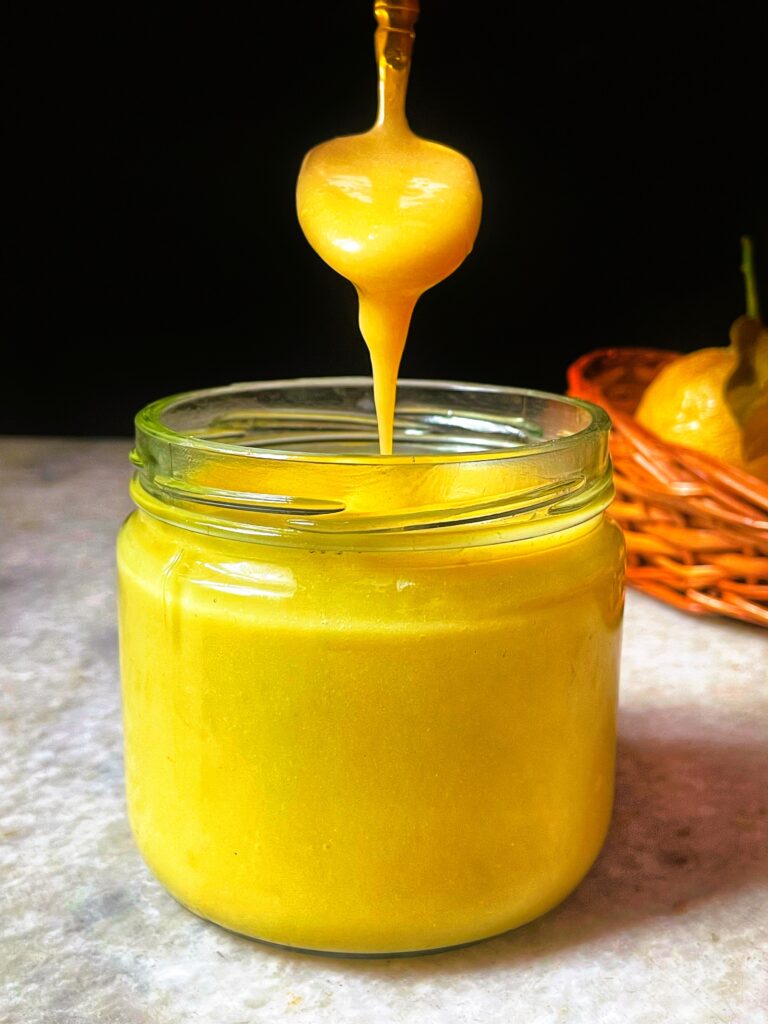
Lemon Curd is a classic citrus spread that proves how a few basic elements can create something truly special. With just four everyday ingredients, this homemade version delivers a balance of sweetness and gentle tang, finished with a luxuriously smooth, creamy texture. It’s vibrant, glossy and bursting with fresh lemon flavour.
Prepared on the stovetop, lemon curd comes together quickly and requires no complicated techniques. As it cooks, the mixture thickens into a velvety spread that feels rich without being heavy. The lemons used in this recipe are freshly picked from my own organic garden, adding natural freshness and vibrant flavour. The flavour is bright and lively, yet mellow enough to enjoy by the spoonful. Think of it as a creamy citrus preserve- bold, sunny and comforting all at once.
This versatile curd fits effortlessly into both baking and everyday treats. Use it as a filling for cakes, tarts and cupcakes, swirl it through frosting, or spoon it over meringues. It’s equally lovely served simply with pancakes, scones or toast, adding a pop of freshness to breakfast or tea time.
One of the joys of making lemon curd at home is the texture. Finishing with cold butter transforms the mixture, creating a silky softens and beautiful thickness that store-bought versions rarely match. It’s also a practical recipe, especially when you have an extra egg yolks waiting to be used.
Why you’ll love this recipe:
Simple, no-fuss method with minimal steps and easy stirring.
No overpowering egg flavour, the lemon taste stays fresh and clear.
Bright, tangy citrus flavour that feels lively and refreshing.
Exceptionally smooth texture with a rich yet light finish.
Perfect balance of sharpness and creaminess in every spoonful.
Ingredients needed for Lemon Curd:
To make a smooth, bright and well-balanced lemon curd, a handful of simple ingredients is all you need. Each one plays an important role in achieving the right flavour and texture.
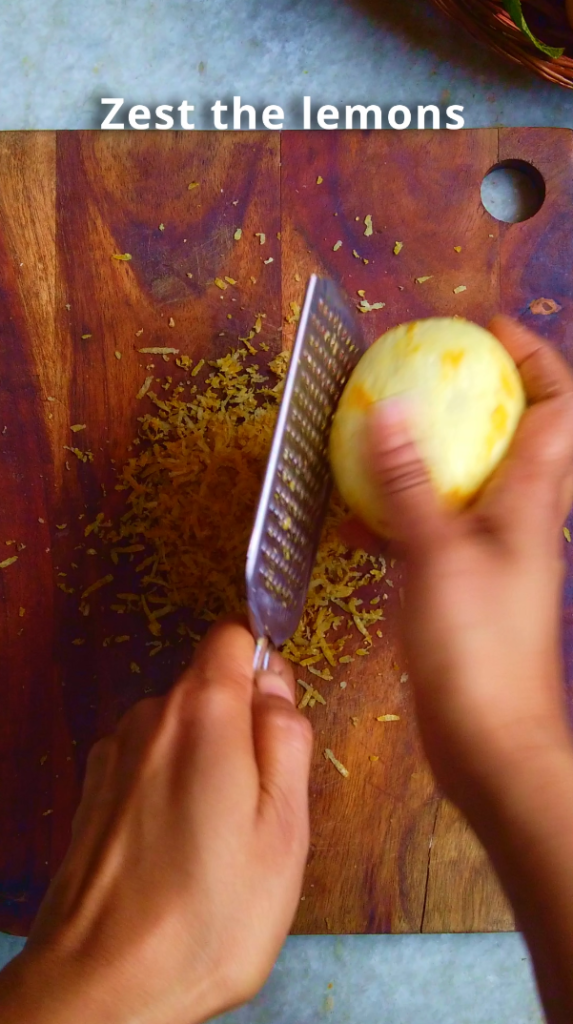
Lemons: Fresh, high-quality lemons make all the difference. Both the zest and juice are used to give the curd its bold citrus character. For this recipe, the lemons come straight from my organic garden, which is ideal when using a generous amount of zest. If you’re buying lemons, choose organic or wash them thoroughly before zesting. The number of lemons needed will vary depending on their size and how much juice they contain.
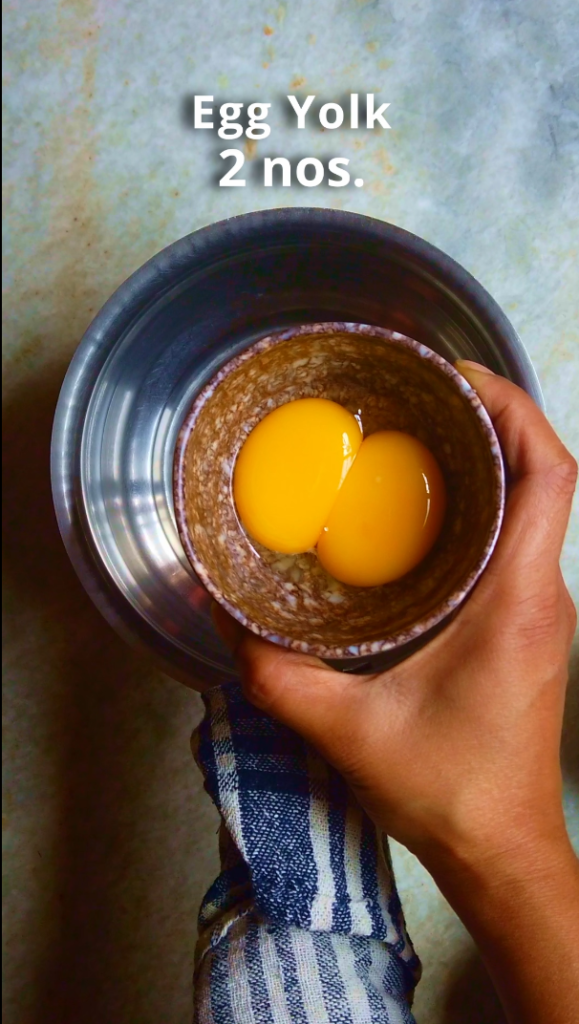
Egg Yolks: Egg yolks are responsible for thickening the curd and creating its silky texture. The white’s aren’t needed here, but they don’t have to go to waste- freeze them and save them for recipes like light sponge cakes or meringue-based frostings.
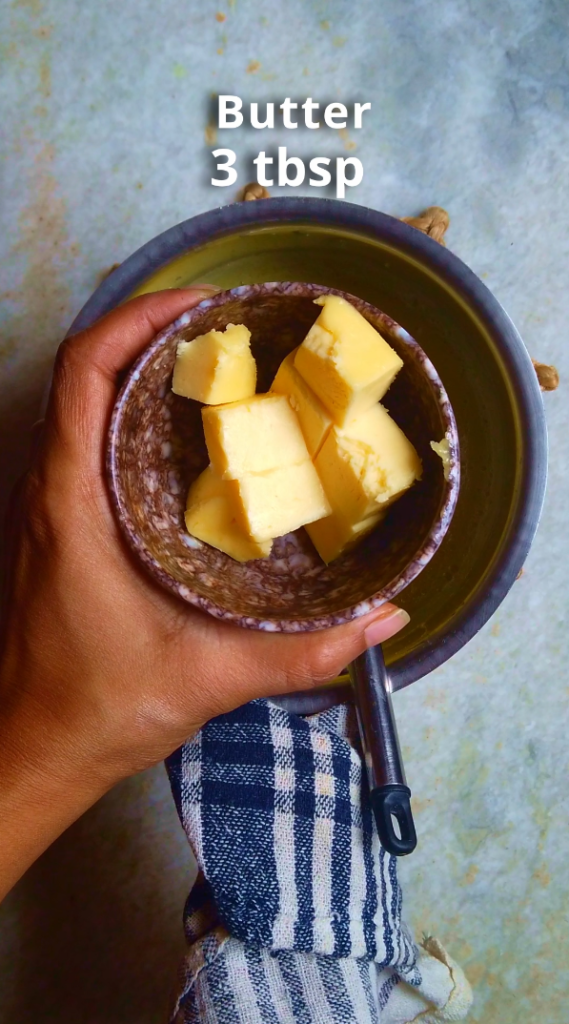
Butter: Butter adds richness and a creamy mouthfeel while also helping the curd set properly. Unsalted butter is best, as it gives you full control over the flavour. Adding it while cold helps the curd thicken efficiently and results in a smoother finish.
Sugar: White granulated sugar provides sweetness and structure. It balances the sharpness of the lemons and contributes to the final consistency. Don’t use brown sugar as it will alter both the colour and taste, so sticking to white sugar ensures classic lemon curd results.
Use of Lemon Curd:
Lemon Curd’s rich, creamy texture and bright citrus flavour make it far more versatile than a simple sauce. Its thick, spoonable consistency means it works beautifully as a spread, filling, swirl or topping across sweet dishes. Here are plenty of delicious ways to enjoy it:
Spread generously on toast, scones, crumpets, muffins, croissants or warm biscuits.
Spoon over pancakes, waffles, Dutch baby pancakes or breakfast crepes.
Add a dollop to yogurt bowls, cottage cheese, granola, fresh fruit or ice cream.
Use as an easy filling for cakes, sponge layers, roulades or cupcakes.
Swirl through whipped cream or buttercream for a light, citrusy frosting.
Pipe into macarons, choux buns, éclairs or cream puffs.
Fill tart shells for quick lemon tarts or mini dessert bites.
Layer into trifles, parfaits or berry desserts for added brightness.
Top pound cake, loaf cakes, cheesecake or cheesecake pie.
Spoon over pavlova or mini pavlovas for a classic pairing.
Fill thumbprint cookies or sandwich cookies.
Storage Tips:
Refrigeration: Homemade lemon curd keeps well when chilled. Stored in airtight contains in fridge, it stays fresh, safe and flavourful for up to four weeks.
Freezing: Lemon curd can be frozen successfully for long-term storage. Keep in a freezer-safe, airtight container, it maintains quality for months. Defrost slowly in the refrigerator overnight before using to prevent its smooth, creamy texture.
Ingredients
2 nos. Egg Yolks
70 gm Granulated Sugar
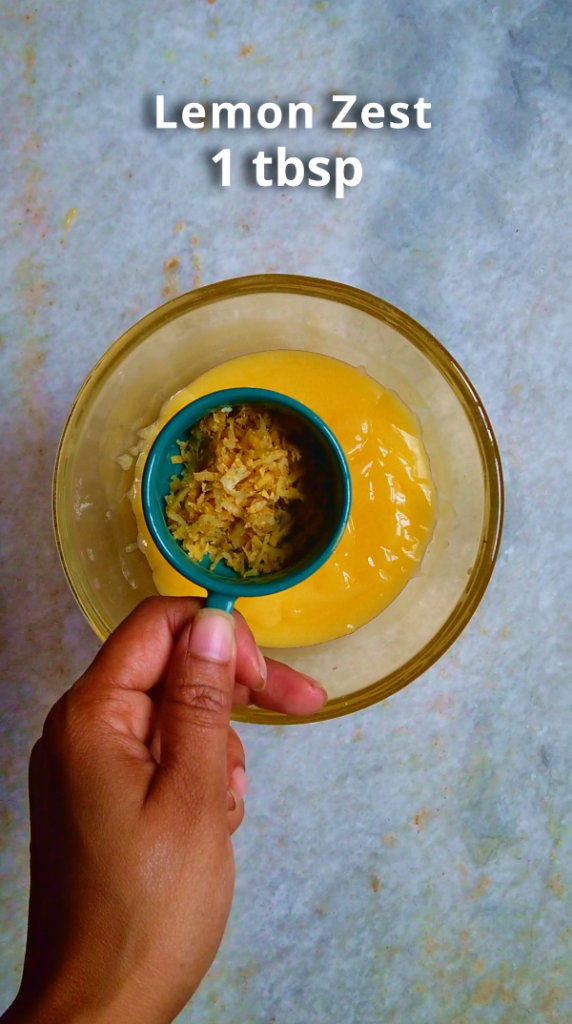
1 tbsp Lemon Zest
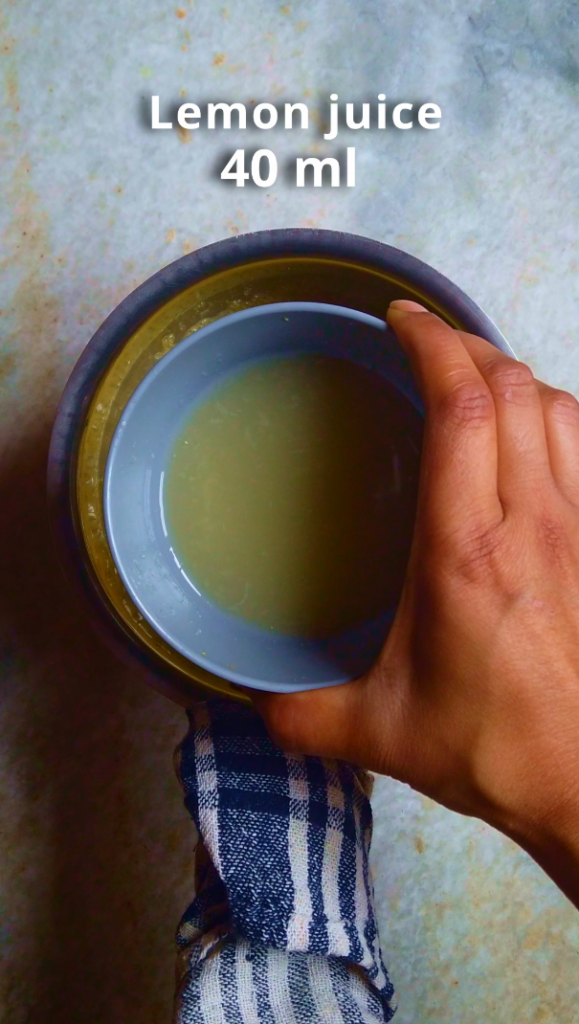
40 ml Lemon juice
3 tbsp Butter
Preparation
- Step 1: Zest the lemons and set aside. Then juice the lemons until you have about 40 ml of lemon juice.

- Step 2: In a heavy-bottom saucepan, add the egg yolks and beat lightly with a wire whisk. Whisk in the sugar and give it a good mix until lighter in colour. Stir in lemon juice gradually.
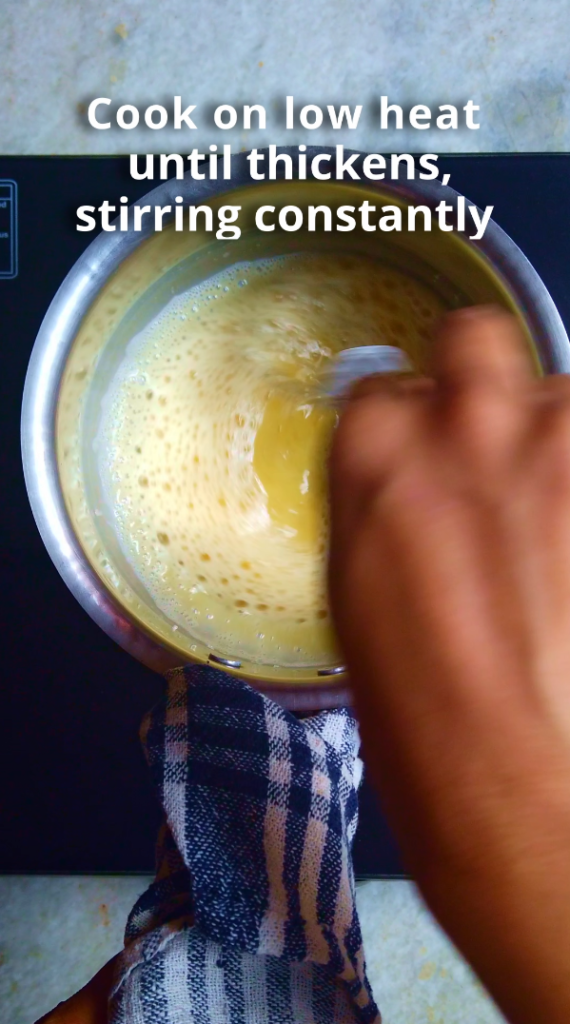
- Step 3: Heat on low, while stirring constantly with a wire whisk until mixture thickens, just starts to bubble and coats the back of wooden spoon.
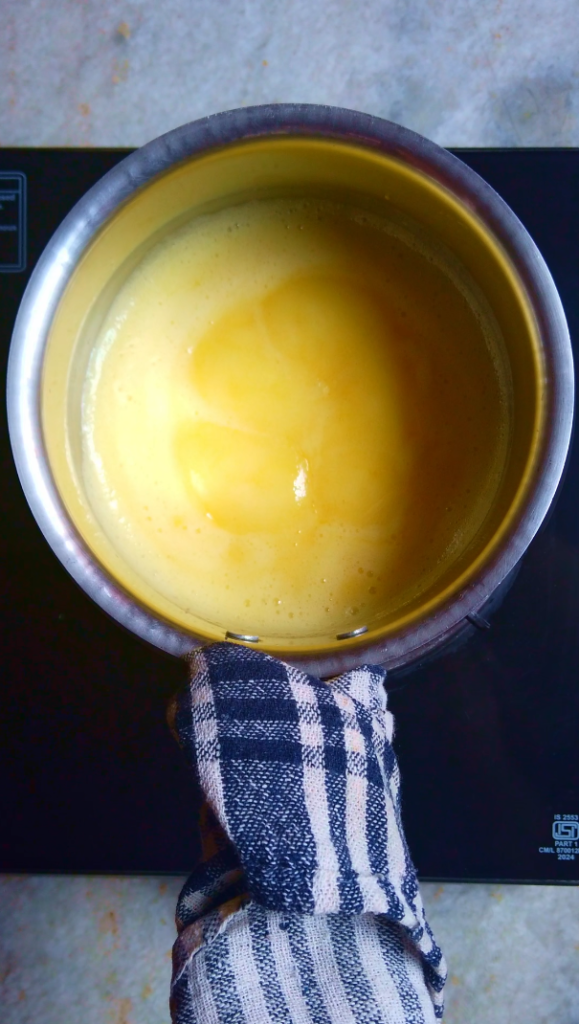
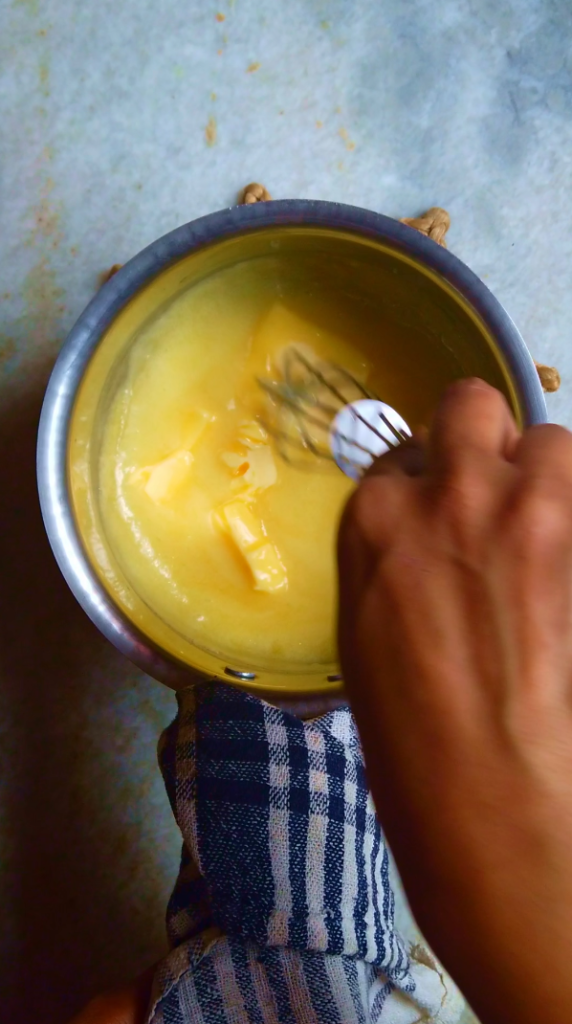
- Step 4: Remove the saucepan from the heat, then add cold butter and mix until melted.
- Step 5: Then strain the curd and add the zest, stir to combine.
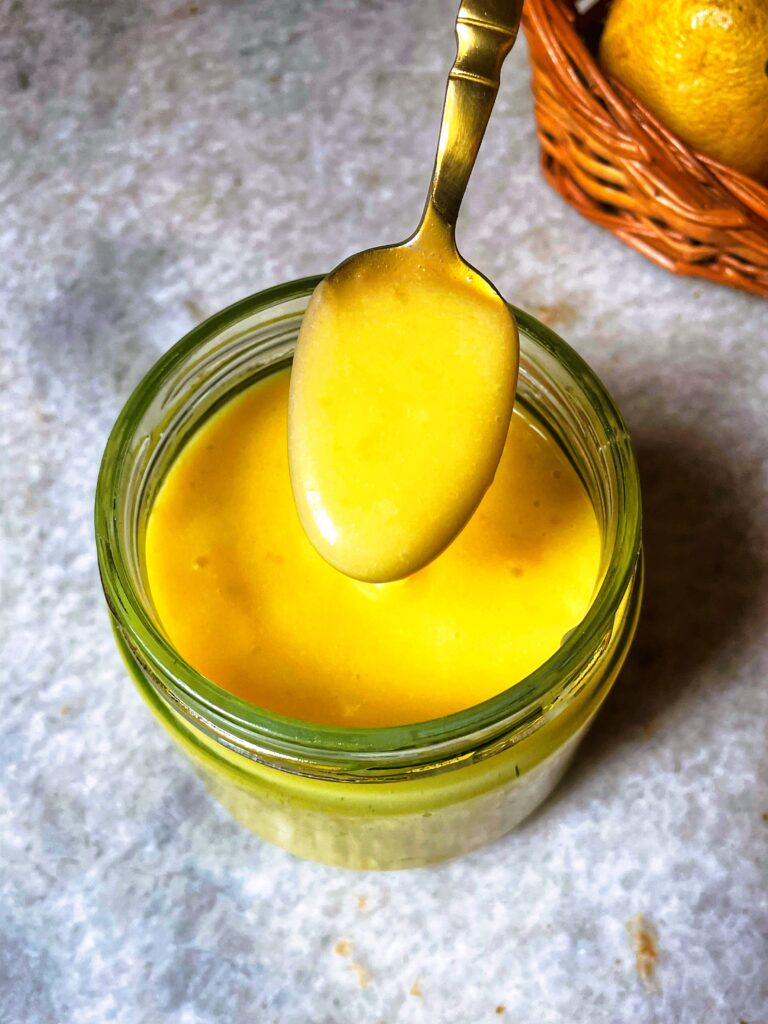
- Step 6: Pour in a bowl and immediately cover with cling wrap touching the surface. Cool on the counter for 30 minutes then refrigerate for 1 hour before using. Transfer the curd to an airtight container and store in refrigerator.
Pro Tips:
Choose fresh lemons every time. Freshly squeezed juice gives a bright, balanced tang. Bottled juice is harsher and can overpower the curd’s delicate flavour.
Boost citrus aroma from the start. If you’re skipping a food processor, rub the lemon zest into the sugar using your fingers. This releases the oils and perfumes the sugar beautifully.
Low and steady heat is key. Patience matters here. Gentle heat allows the mixture to thicken smoothly without cooking the eggs too quickly.
Whisk constantly while cooking. Continuous whisking keeps the mixture moving, preventing hot spots at the bottom that can lead to scrambled eggs or a grainy texture.
Use a double boiler if needed. If your stove doesn’t maintain very low heat, cooking over simmering water gives better control. It takes slightly longer but results in a silkier curd.
Watch the texture, not the clock. The curd is ready when it thickens noticeably and coats the back of a spoon. For a firmer curd, cook a little longer until which lines briefly remain visible.
Strain for extra smoothness. Passing the finished curd through a fine sieve removes zest bits or any tiny cooked egg particles.
Once transferred to a jar or bowl, press plastic wrap directly onto the surface of the curd before chilling to keep it glossy and smooth.
Lemon curd continues to firm up as it cools. Chill completely before using it as a filling so it reaches the right consistency.
Preparing lemon curd a day or two advance ensures perfect texture and removes last minute stress when assembling desserts.
About Me

DEBJANI MONDAL
Welcome to Kitchenstagram, the home of delicious recipes, culinary inspiration and cooking adventures. I’m Debjani and I’m thrilled to be your guide through the wonderful world of food. I’m a self-taught professional baker, home chef, recipe developer, author of Kitchenstagram and an aspiring YouTuber.
My passion for food and cooking began at a very young age, when I would watch my mom and dad cook for me and my brother. My dad, in particular is a great cook whose culinary skills made a lasting impression on me. My dad would cook up a storm on special occasions by cooking variety of dishes, from delicious biriyani to samosa, fish fry, rasgullas and kachoris (sweet & spicy deep fried pastry with filling of lentils, meat or fish…>>>>>
FOLLOW ME
My Latest Posts
- post 1
- post 2
- Step 7: To serve, in a glass add ice cubes, mango syrup, black salt, prepared masala, mix well. Then add ice cold water, mix well.