
Look no further for the Ultimate Super crispy Fried Chicken recipe- I‘ve got the secret to the crispiest, juiciest fried chicken you have ever tasted! The key lies in a perfect blend of flour and cornstarch or corn flour, ensuring an unbeatable crunch that lasts from the first bite to the very end. This recipe guarantees a flavourful and moist interior, with a crunchy coating.
Crispy fried chicken is the epitome of comfort food, a dish boasting a glistening coating with a symphony of crunchy ripples, herbs and spices that makes it nearly impossible to resists. Infused with garlic, onion, pepper and smoky paprika, every bite is a sensational explosion of flavour that will keep you coming back for more.
However, the real magic happens in the meticulous technique and choice of ingredients. From the initial brining process to the careful selection of seasonings and frying method, each step plays a crucial role in crafting the irresistible golden-brown crust that envelops tender, succulent meat.
This classic dish has undergone years of perfection, with cooks adding their unique touches to create the perfect balance of flavours and textures. Whether you are a seasoned chef or a home cook looking to dazzle, mastering the art of crafting the best crispy fried chicken is a skill that’s well worth the effort.
What is Crispy Fried Chicken?
Crispy fried chicken is a beloved dish, involving coating the chicken pieces in a seasoned flour mix and frying to golden perfection. Its allure lies in the irresistible combination of a crispy exterior and juicy, tender meat. The harmonious contrast makes it a perennial favorite, delivering a satisfying and flavourful experience.
Why you will love this Crispy Fried Chicken?
Easy to make: First and foremost, its simplicity makes it a winner. This recipe is designed with ease in mind, cater to both novice and experienced cooks alike. The straightforward steps and minimal ingredients ensure that anyone can make the crispy fried chicken effortlessly.
Versatility: Versatility is another key feature. Tailor the seasoning to your preferences, whether you are inclined towards a spicy kick or milder flavour. The adaptability of this recipe allows it to seamlessly fit into various culinary contexts. Whether served as a delectable main course, sandwiched between buns or added to salads, its versatility makes it a go-to option for any meal.
Flexibility: Flexibility takes center stage with the ability to choose different cuts of chicken. Opt for boneless dark meat for a juicy, quick -cooking option with an extra crunch. The recipe caters to individual preferences, ensuring everyone can enjoy their preferred cut.
Taste: Deliciousness is practically guaranteed. The magic lies in the perfect harmony between the crispy, golden-brown exterior and the tender, succulent meat inside, creating a mouthwatering experience with every bite.
Crowd-Pleaser: Prepare to be a crowd-pleaser at any gathering. Whether its a cozy family dinner or a larger event, this dish is a timeless classic that wins hearts with its classic flavour and satisfying crunch.
Ingredients for Crispy Fried Chicken:
Chicken: I have used chicken legs for this recipe. But you can use any cut of meat you like or opt for mix of breasts, drumsticks, wings, legs and thighs.
For the Brine:
Buttermilk: Buttermilk serves as an excellent marinade for the chicken. The acid in buttermilk helps break down proteins, resulting in tender, moist and juicy meat. Marinate the chicken for no more than 24 hours to avoid mushiness. You can also use milk acidified with lemon juice or yogurt, with the latter’s lactic acid penetrating deeply into the meat without compromising its texture. Buttermilk not only tenderizes but also helps the flour mixture adhere to the chicken, ensuring a crispy crust.
Homemade Red Chili Paste: Red chili paste adds extra flavour and spicier kick to the brine.
Salt: Incorporate salt into the brine to enhance the chicken’s taste and ensure a juicy and flavourful result. The salt not only seasons the meat but also aids in tenderizing it.
For the Dry Coating:
All-purpose Flour: All-purpose flour is the base for the dry mix, providing a foundation for the buttermilk and seasonings. It ensures a light and crispy crust that complements the juicy interior of the chicken.
Cornflour: Combining flour with cornflour or cornstarch yields in exceptionally crispy result. This starch flour mixture results in a delicate yet crunchy exterior crust, elevating the overall texture of the fried chicken.
Seasonings: Add a burst of flavour with a mix of paprika, onion powder, garlic powder, ground mustard seeds, dried basil, dried thyme, salt and pepper. For a taste reminiscent of KFC’s fried chicken, include oregano and consider adding MSG (Monosodium Glutamate), although it’s totally optional.
Wet Coating:
Egg: Use eggs to help the breading adhere to the chicken, ensuring a uniform and crispy coating.
Seasoning: Add onion powder, garlic powder to the eggs for added flavour and also season with salt.
Breading Mix:
Bread Crumbs: Panko bread crumbs or Japanese bread crumbs, add an extra layer of crispiness to the fried chicken. Alternatively, you can use freshly ground bread crumbs for a homemade touch.
Oil: Opt for neutral oils with high smoke points, such as vegetable oil, canola or peanut oil, for frying. Their higher smoke point makes them ideal for deep frying.
How to make the Crispy Fried Chicken?
Brining the Chicken:
Prepare the Brine: In a large bowl, combine the buttermilk, red chili paste and salt. Mix thoroughly to ensure all ingredients are well incorporated.
Submerge the Chicken: Place the chicken legs into the brine, making sure they are fully submerged. Allow the chicken to marinate in the refrigerator for at least 4 hours or up to 24 hours. This step not only infuses flavour but also helps tenderize the meat.
Bring to room temperature: An hour before frying, take the chicken out of the fridge to allow it to reach room temperature. This ensures even cooking and prevents the oil temperature from dropping significantly during frying.
Make the Dry Coating Mix:
In a large mixing bowl, combine all purpose flour, corn flour and blend of spices and herbs including onion powder, garlic powder, ground mustard, salt and pepper, paprika powder, dried thyme, dried basil , dried oregano and grounded MSG (optional). Mix everything thoroughly.
Dredging and coating:
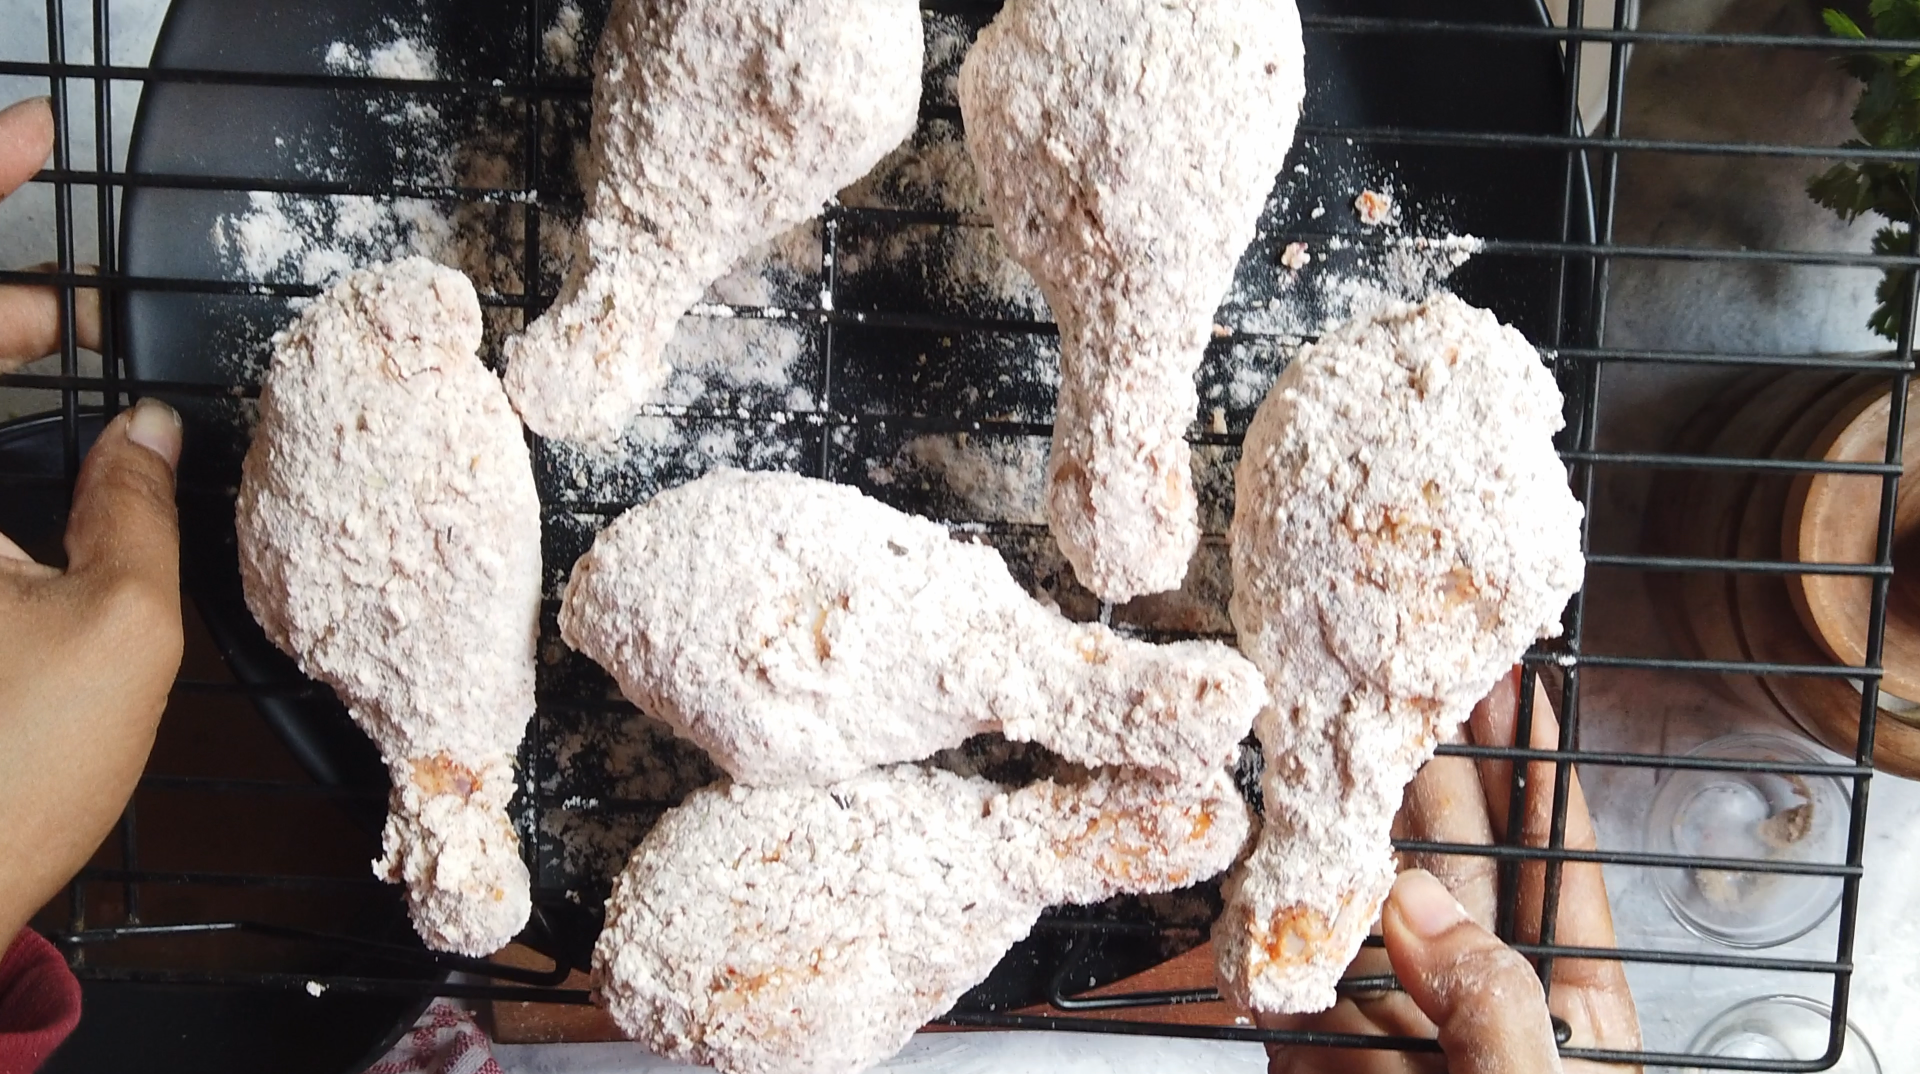
Dredge the brined chicken legs in the flour mixture, ensuring they are completely coated. Transfer the coated chicken to a baking sheet with a wire rack, allowing the flour coating to develop a paste-like consistency. Reserve the leftover flour mixture after coating all the chicken legs, for further use.
Egg mixture and Breading:
Combine the leftover flour mixture with the breadcrumbs and transfer to a ziplock bag and keep aside.
Mix in eggs with salt, onion powder and garlic powder. Dip the flour coated chicken legs into the egg mixture.
Then put the chicken legs into the ziplock bag and seal the bag and shake well to coat it thoroughly.
Frying the chicken:
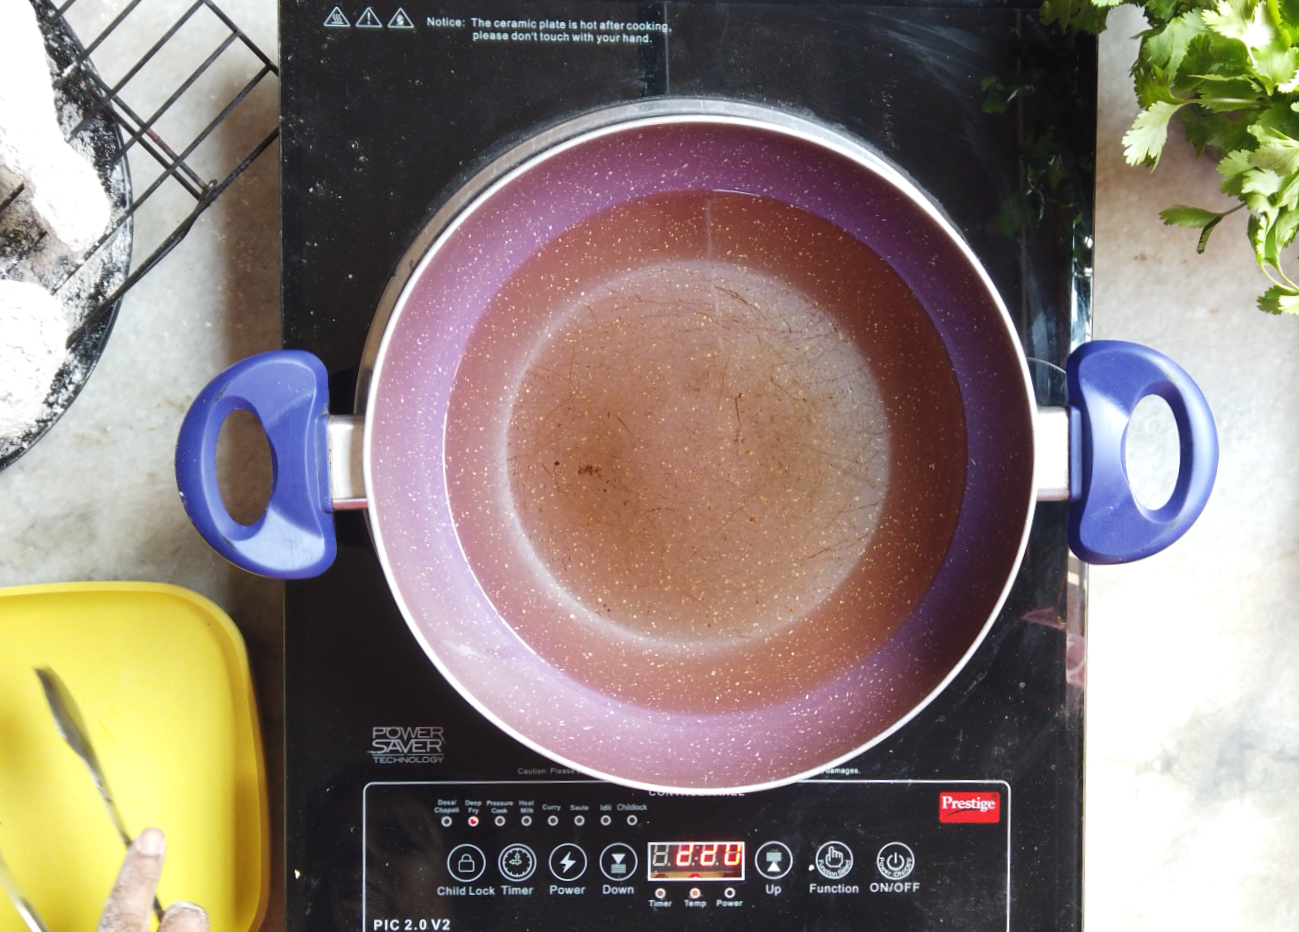
Heat the oil: Fill a wok or Dutch oven or a deep fryer with oil and heat it to 350°F (177°C). test the oil by inserting a wooden chopstick or spoon- if it bubbles vigorously, it’s ready.
Fry in Batches: Carefully add the chicken pieces to the hot oil, avoiding overcrowding. Fry for 18-20 mins (610 minutes for boneless chicken), ensuring they achieve a golden-brown colour.
Double frying Technique: For extra crispiness, employ the Korean double frying method. Return the fried chicken to the hot oil for an additional 30 seconds to 1 minute.
Drain and rest: Remove the fried chicken from the oil and let it rest on a rack or parchment paper for a few minutes to allow excess oil to drain off.
What to serve with Fried Chicken:
Fried chicken pairs exquisitely with a variety of delightful accompaniments. Traditional options like creamy mashed potatoes, tangy coleslaw, and indulgent mac & cheese complement the crispy goodness of the chicken, offering a classic and comforting combination.
For a flavour adventure, consider serving fried chicken with rich cream gravy or an assortment of chicken wing dipping sauces, adding a zesty kick to each bite. If aiming for a lighter alternative, a fresh green salad proves an excellent choice. The crispy chicken brings a satisfy crunch to the salad, while the crisp vegetables provide a refreshing balance.
Transform the fried chicken into a sandwich by nesting it between toasted bread or buns, accompanied by lettuce, tomato and preferred condiments. Elevate the experience with a spicy sriracha Mayo. For an Asian inspired flair, swap traditional buns for pillowy bao buns.
For a truly unique fusion, pair the crispy fried chicken with waffles. The contrasting textures and flavours of crispy chicken and soft waffles create a harmonious blend. Drizzle with maple syrup for sweetness or hot sauce for an extra kick, resulting a memorable culinary experience. These divers options ensure fried chicken remains a versatile and beloved centrepiece in any meal.
How to store leftover fried Chicken:
To store fried chicken, allow it to cool to room temperature, then refrigerate in a shallow, airtight container or tightly wrap in aluminium foil. Keep it for up to 4 days. Reheat in a 350°F preheated oven for 15-20 minutes, then increase to 400°F for a crispy skin. This ensures both safety and flavour preservation.
Ingredients:
6 pcs. Chicken Leg
1 LTR Vegetable oil, for deep frying
Brine:
500 ml Buttermilk
1 1/2 tbsp Red chili Paste
Salt to taste
Dry Coating:
1 1/2 cup All purpose flour
1/2 cup Corn flour/ Corn starch
1 1/2 tsp onion powder
1 1/2 tsp Garlic powder
1 1/2 tsp Yellow Mustard seeds
1 1/2 tsp Paprika powder
Salt to taste
1 tbsp White pepper, whole
1/2 tbsp Black pepper, whole
1 tsp dried Thyme
1 tsp dried Basil
1/2 tsp Dried Oregano
1/2 tsp MSG (optional)
Wet Coating:
3 Large eggs
1/2 tsp Onion powder
1/2 tsp garlic powder
Salt to taste
Breading Mix:
1 cup Bread crumb
Leftover Flour mixture
Preparation:
- Step 1: In a large mixing bowl, whisk together buttermilk, red chili paste, and salt and mix well. Add in chicken leg pieces. Cover the bowl with plastic wrap and refrigerate for at least 4 hours or up to 24 hours.

- Step 2: Add in the chicken leg pieces in the buttermilk brine.

- Step 3: Cover the bowl with plastic wrap and refrigerate for at least 4 hours or overnight, but up to 24 hours.

- Step 4: An hour before frying, take the chicken out of the fridge to allow it to reach room temperature. This ensures even cooking and prevents the oil temperature from dropping significantly during frying.

- Step 5: Make a fine powder of the black pepper, white pepper and yellow mustard. Keep them aside.

- Step 6: Next make a coarse powder of all the three herbs, dried Basil, Thyme and oregano. Keep them aside.

- Step 7: Then make a fine powder of MSG (optional) and keep aside.

- Step 8: In a mixing bowl, combine flour, cornflour, salt, ground black pepper, white pepper and yellow mustard, grounded herb mixture, onion powder, garlic powder, Paprika powder and grounded MSG and mix everything until they are well combined.

- Step 9: Then take the chicken leg out from the brine and remove any excess moisture from the chicken to guarantee a crispy coating, working with a piece of chicken at a time. Dredge the brined chicken legs in the flour mixture, use your fingers to completely coat them and then press the flour coating onto the chicken. Transfer the coated chicken to a baking sheet with a wire rack, allowing the flour coating to develop a paste-like consistency. Reserve the leftover flour mixture after coating all the chicken legs, for further use.

- Step 10: In a mixing bowl, add eggs, salt, 1/2 tsp ground garlic, 1/2 tsp ground onion and mix well.

- Step 11: Next combine the leftover flour mixture and bread crumb very well.

- Step 12: Then transfer the flour and bread crumb mixture to a ziplock bag.

- Step 13: Then dip the chicken pieces into the egg mixture and tap off the excess.

- Step 14: Then put the leg pieces in the ziplock bag of flour and breadcrumb mix, seal the bag and shake to coat well.

- Step 15: Place the coated chicken on a tray or wire rack and let it sit until the flour is of a paste like consistency, this is a crucial step.
- Step 16: Fill a wok or Dutch oven or a deep fryer with oil and heat it to 350°F (177°C). test the oil by inserting a wooden chopstick or spoon- if it bubbles vigorously, it’s ready.
- Step 17: Then carefully add the chicken pieces to the hot oil, avoiding overcrowding. Fry for 8-10 mins on each side (6-10 minutes for boneless chicken), ensuring they achieve a golden-brown colour.
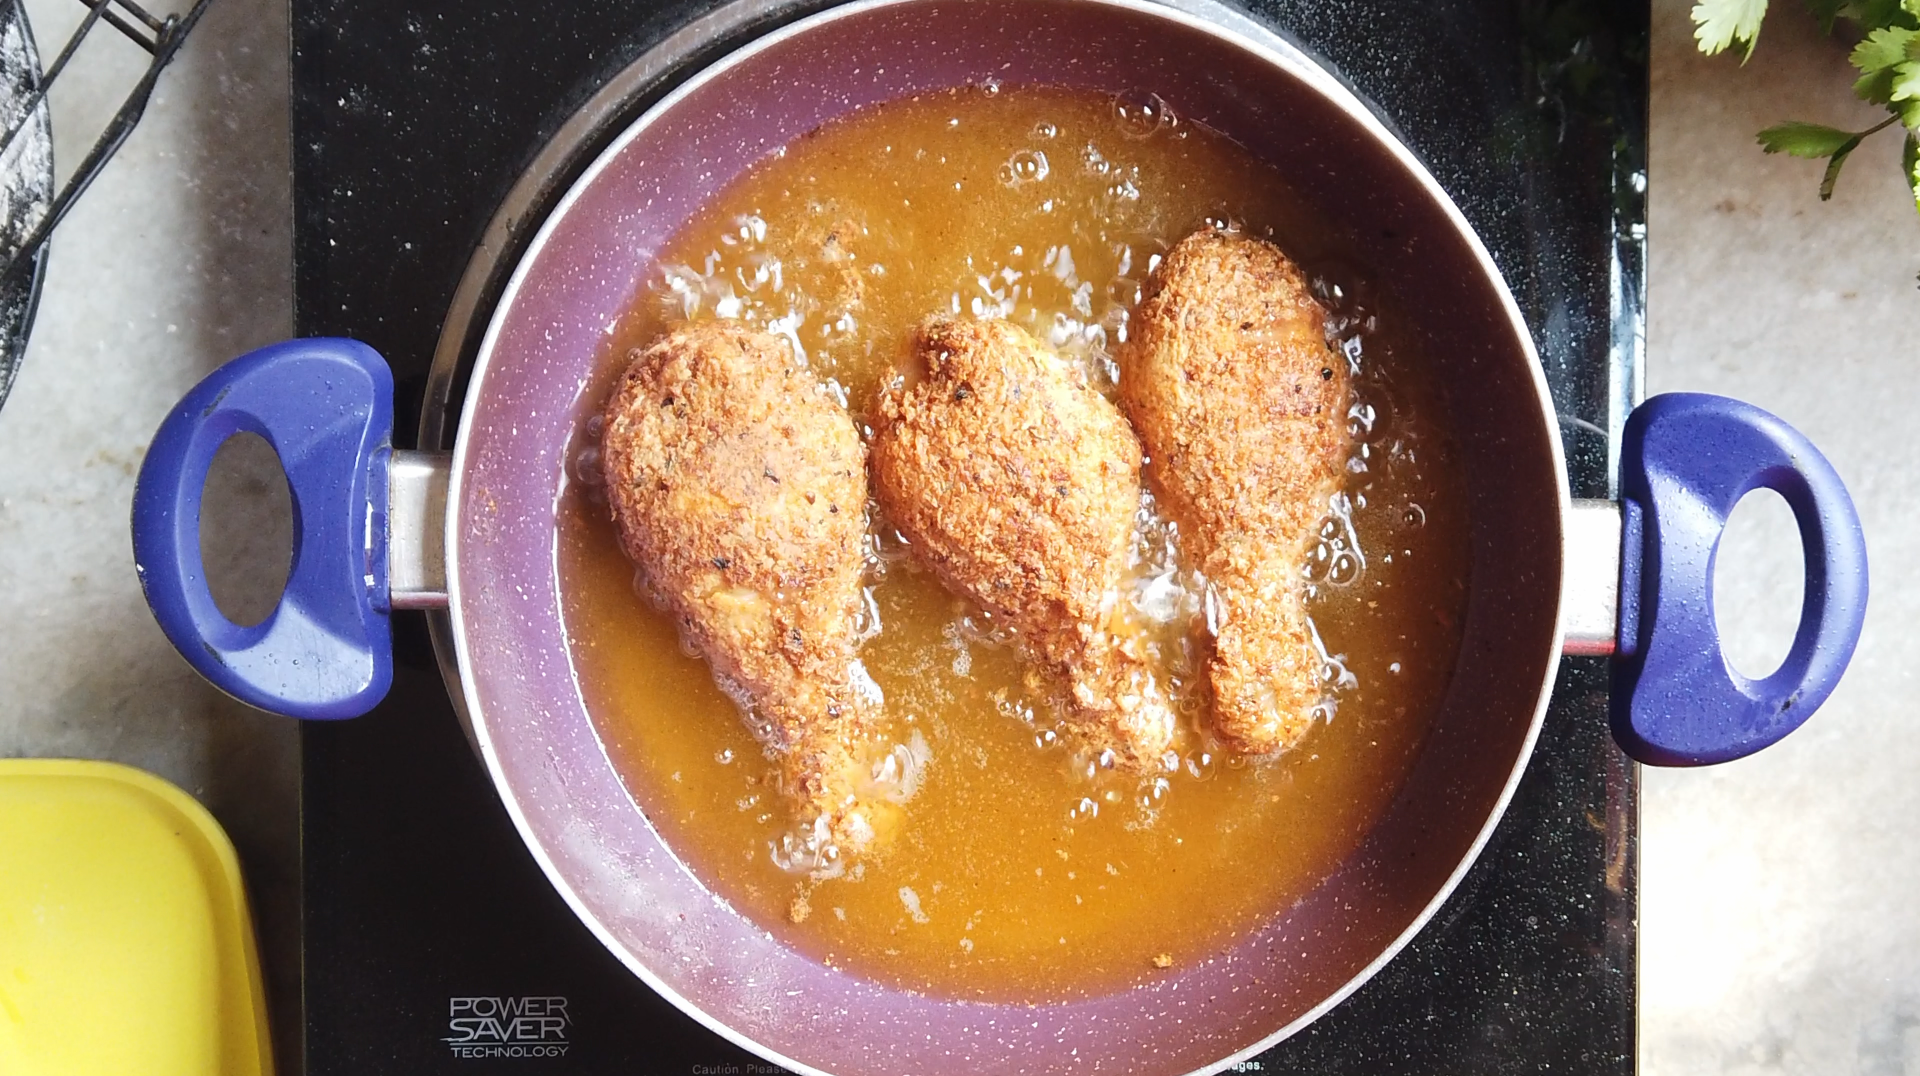
- Step 18: Once all the chicken has been fried return the fried chicken back to the hot oil and fry for an additional 30 seconds to 1 minute. This will make the chicken extra crispy.
- Step 19: Remove the fried chicken from the oil and let it rest on a rack or parchment paper for a few minutes to allow excess oil to drain off. Dig in and enjoy!!

Pro Tips:
Buttermilk substitutes: If you lack buttermilk, substitute with yogurt and milk. Yogurt serves as an excellent marinade. Or you can also substitute, stir white vinegar into milk, let sit for 10 minutes until it curdles and use it as per recipe.
Temperature management: An hour before frying, take the chicken out of the fridge to allow it to reach room temperature. This ensures even cooking and prevents the oil temperature from dropping significantly during frying.
Oil Temperature: Use a thermometer to monitor oil temperature accurately. If unavailable test the oil temperature by inserting a wooden chopstick or spoon- if it bubbles vigorously, it’s ready.
Flour vs. Cornflour: Mixing cornflour/ cornstarch with all purpose flour creates a delicate yet incredibly crispy crust for your fried chicken.
Avoid Overcrowding: To maintain crispiness, don’t overcrowd the pan. Frying too many pieces at once can drop the oil temperature, resulting in less crispy chicken.
Crispy coating adherence: To prevent your breading from falling off, tap off the excess buttermilk and flour is crucial. It prevents overly thick coating that might fall of during frying. Gently pat the coated chicken to ensure proper adherence of the flour mixture. Avid overcrowding the pan to prevent pieces from knocking off each other’s coating. Flip the chicken only once during frying to minimize disturbance to the crunchy coating. Allow the coated chicken to dry on a wire rack after dipping and dredging, especially useful for making large batches.
Double fry Technique: After initial deep fry, employ the Korean double frying method. Return the fried chicken to the hot oil for an additional 30 seconds to 1 minute to enhance the skin’s crispiness.
Reusing Oil: While you can reuse oil for another batch of the same recipe, be cautious. The heavy seasonings in the coating may make the oil too dirty for other recipes.
About Me

DEBJANI MONDAL
Welcome to Kitchenstagram, the home of delicious recipes, culinary inspiration and cooking adventures. I’m Debjani and I’m thrilled to be your guide through the wonderful world of food. I’m a self-taught professional baker, home chef, recipe developer, author of Kitchenstagram and an aspiring YouTuber.
My passion for food and cooking began at a very young age, when I would watch my mom and dad cook for me and my brother. My dad, in particular is a great cook whose culinary skills made a lasting impression on me. My dad would cook up a storm on special occasions by cooking variety of dishes, from delicious biriyani to samosa, fish fry, rasgullas and kachoris (sweet & spicy deep fried pastry with filling of lentils, meat or fish…>>>>>
FOLLOW ME
My Latest Posts
- post 1
- post 2