Homemade Mexican Corn Tortillas With Masa Harina | Tortillas De Maiz (Without Tortilla Press) | Kitchenstagram
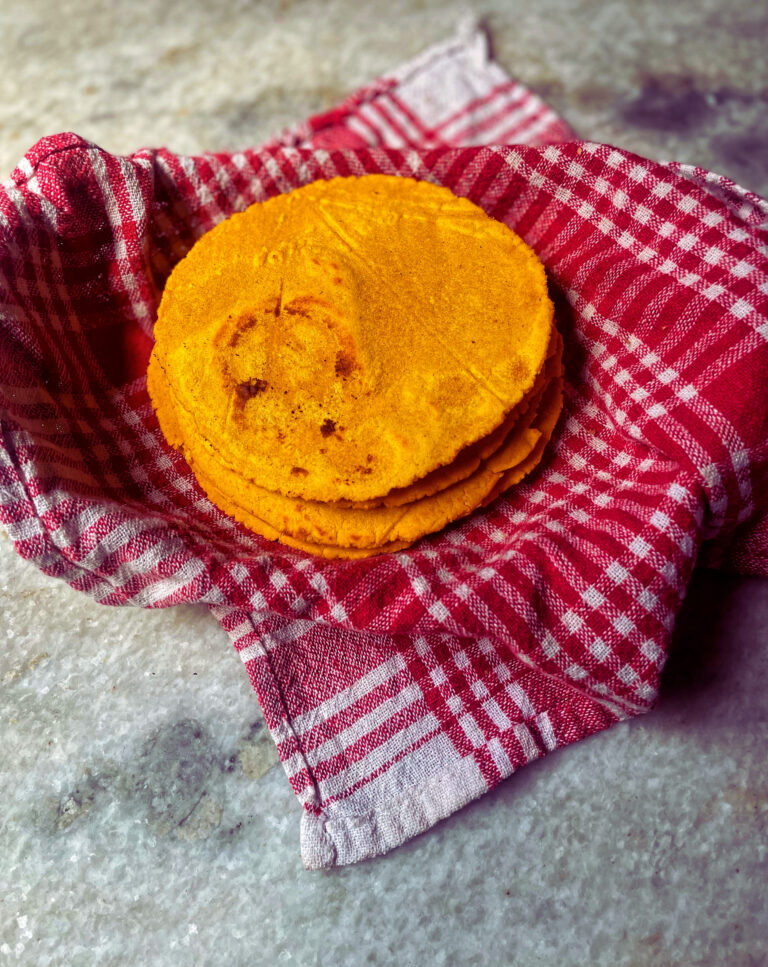
There’s nothing like the taste and texture of freshly made Corn Tortillas. With just three simple ingredients, you can create soft, warm tortillas that are tender, flexible and full of rich corn flavour. This recipe is a go-to for a reason- they’re incredibly easy to make and perfect for tacos, enchiladas or tostadas. Unlike many store-bought versions, these homemade tortillas won’t crack or tear when folded, making them ideal for any dish. Plus, they’re naturally gluten-free and cook up with a beautiful toasted aroma. Whether you’re keeping things traditional or getting creative, these tortillas are a solid foundation for any Mexican-inspired meal. Got leftovers? Turn them into crispy chips, layered nachos or a hearty plate of chilaquiles. Once you try these Homemade Corn Tortillas, it’ll be hard to go back to store-bought.
In this Ghanaian-inspired version, chickens are simmered in a velvety peanut butter sauce infused with ginger, garlic and a hint of pepper for a delightful kick. The stew’s creamy texture comes naturally from the peanut butter – no additional thickener is needed. It’s naturally dairy-free and gluten-free dish, making it accessible to a variety of dietary needs.
What is Nixtamalized Corn?
Nixtamalized corn refers to maize that has undergone an ancient process known as Nixtamalization, a traditional technique developed thousands of years ago in Mesoamerican. At its core, nixtamalization involves cooking and soaking dried corn kernels in an alkaline solution-most commonly water mixed with calcium hydroxide (also known as slaked lime or cal in Spanish). This seemingly simple step dramatically transforms corn’s flavour, texture and nutritional profile, laying the foundation for many staple foods across Mexican and Central American cuisines.
Historically, nixtamalization emerged through early experimentation by Mesoamerican cultures, who discovered that alkaline cooking not only made maize more palatable but also digestible. Today, it remains a crucial step in preserving cultural food practices while boosting the health benefits and functionality of corn-based dishes.
The process begins by boiling dried maize in a mixture of water and lime (or occasionally wood ash), then allowing it to soak for several hours. This solution loosens the outer hull (pericarp) of the corn kernels and changes the internal structure of the grain. After soaking, the corn is rinsed thoroughly to remove excess lime and hulls, leaving behind nixtamal-corn that is soft, flavourful and ready to be ground into a pliable dough known as masa.
Nixtamalization offers a range of benefits that go far beyond softening corn kernels. This ancient technique enhances the grains nutritional profile- unlocking essential nutrients like niacin (vitamin B3), calcium, and iron that are otherwise hard to absorb. It also transforms the corn’s texture, making it pliable enough to form masa, something that untreated cornmeal cannot do. This makes it essential for crafting traditional dishes like tortillas, tamales, atoles, gorditas and more. The process softens the corn and helps break down complex structures in the grain, making it easier to digest. It also helps to reduce anti-nutrients that can interfere with the body’s ability to absorb minerals.
Beyond nutrition, the process deeply impacts the flavour and aroma of the final product, lending it a rich, earthy depth and a satisfying, nutty fragrance. It improves the dough’s consistency, ensuring that it holds together well during shaping and cooking. The result is a smoother, more cohesive masa that cooks evenly and yields superior taste and texture.
Ingredients needed for Corn Tortillas:
To make authentic homemade corn tortillas, you only need three simple ingredients,
Masa Harina: Masa Harina is the heart of this recipe. Unlike cornmeal or cornflour, masa harina is made from corn that has been nixtamalized- soaked and cooked in alkaline solution, then ground into a fine flour. This gives it a distinct flavour and aroma that’s essential for traditional tortillas.
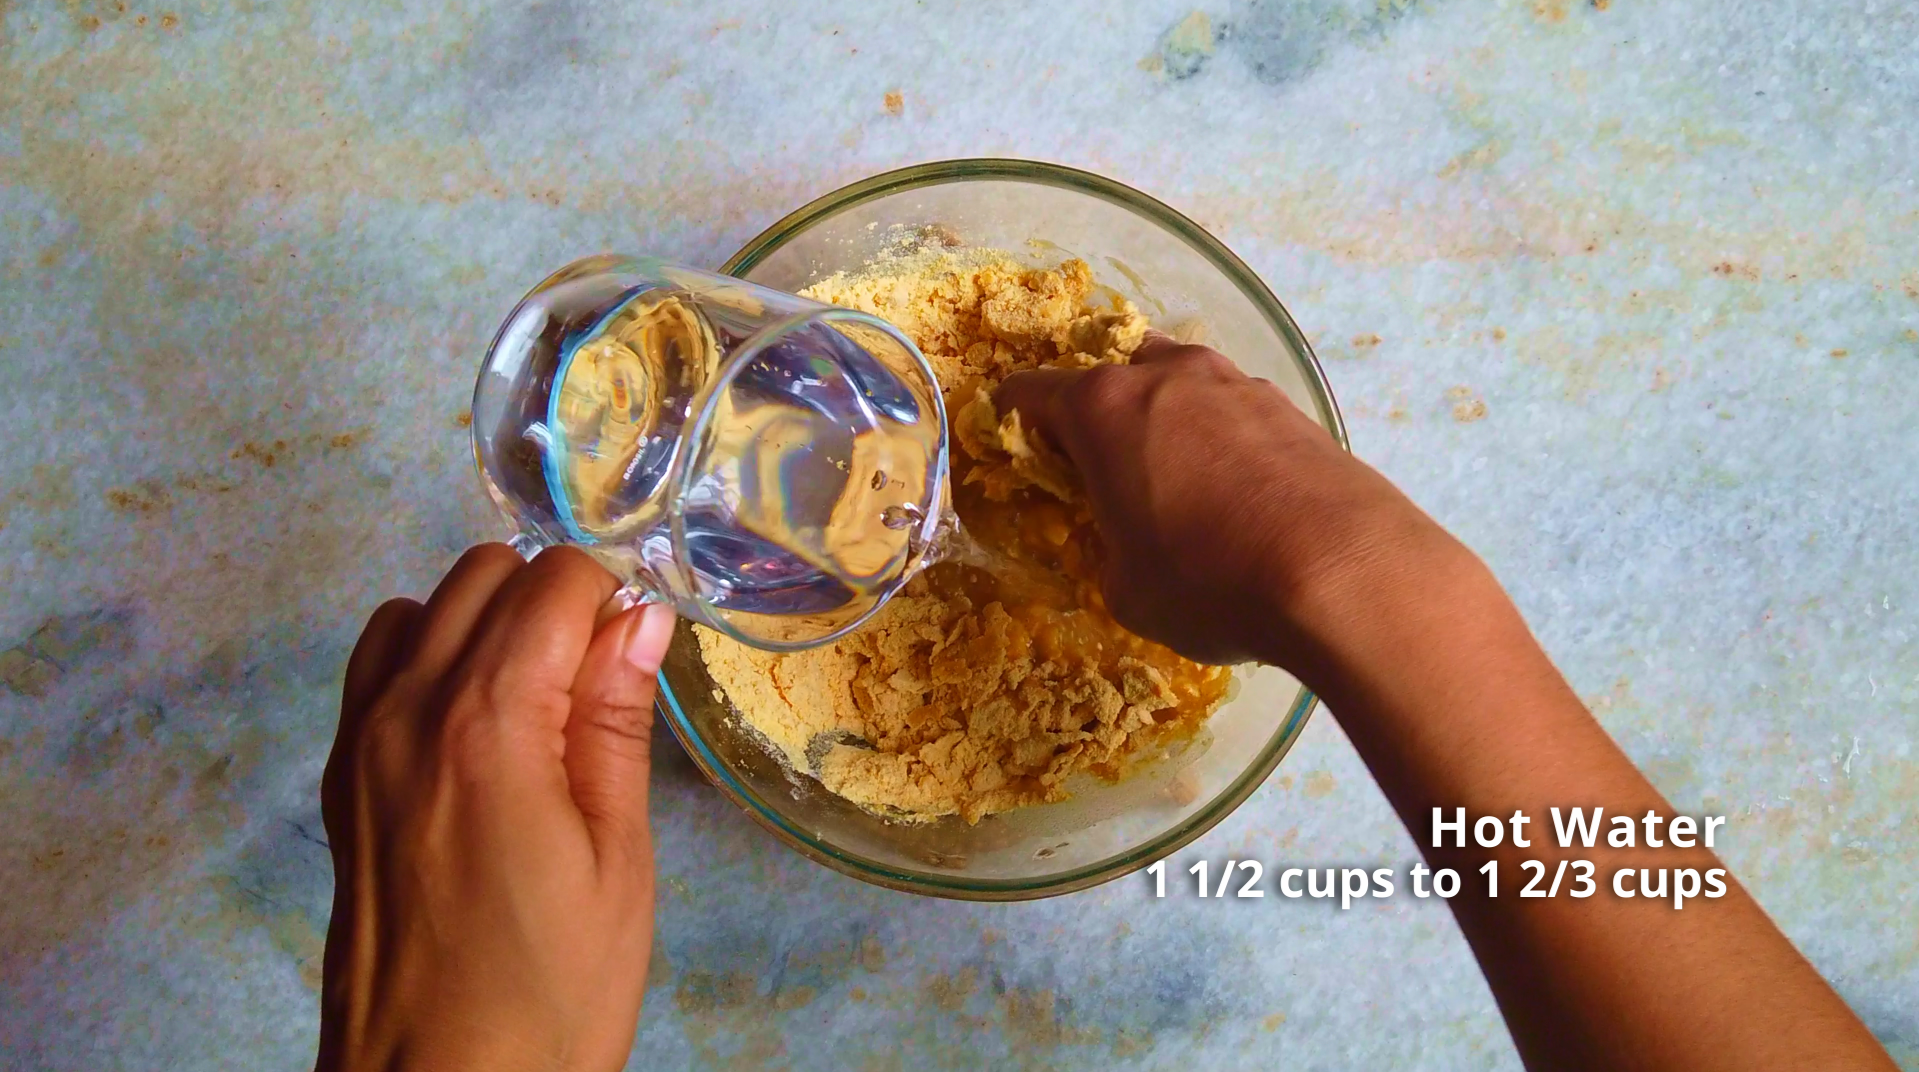
Hot Water: Hot water is used to activate the masa harina, turning it into a pliable dough. It helps the flour absorb moisture evenly and enhances the flavour of the corn. Depending on the brand you use, you may need to adjust the amount of water slightly to get the right consistency- soft, but not sticky.
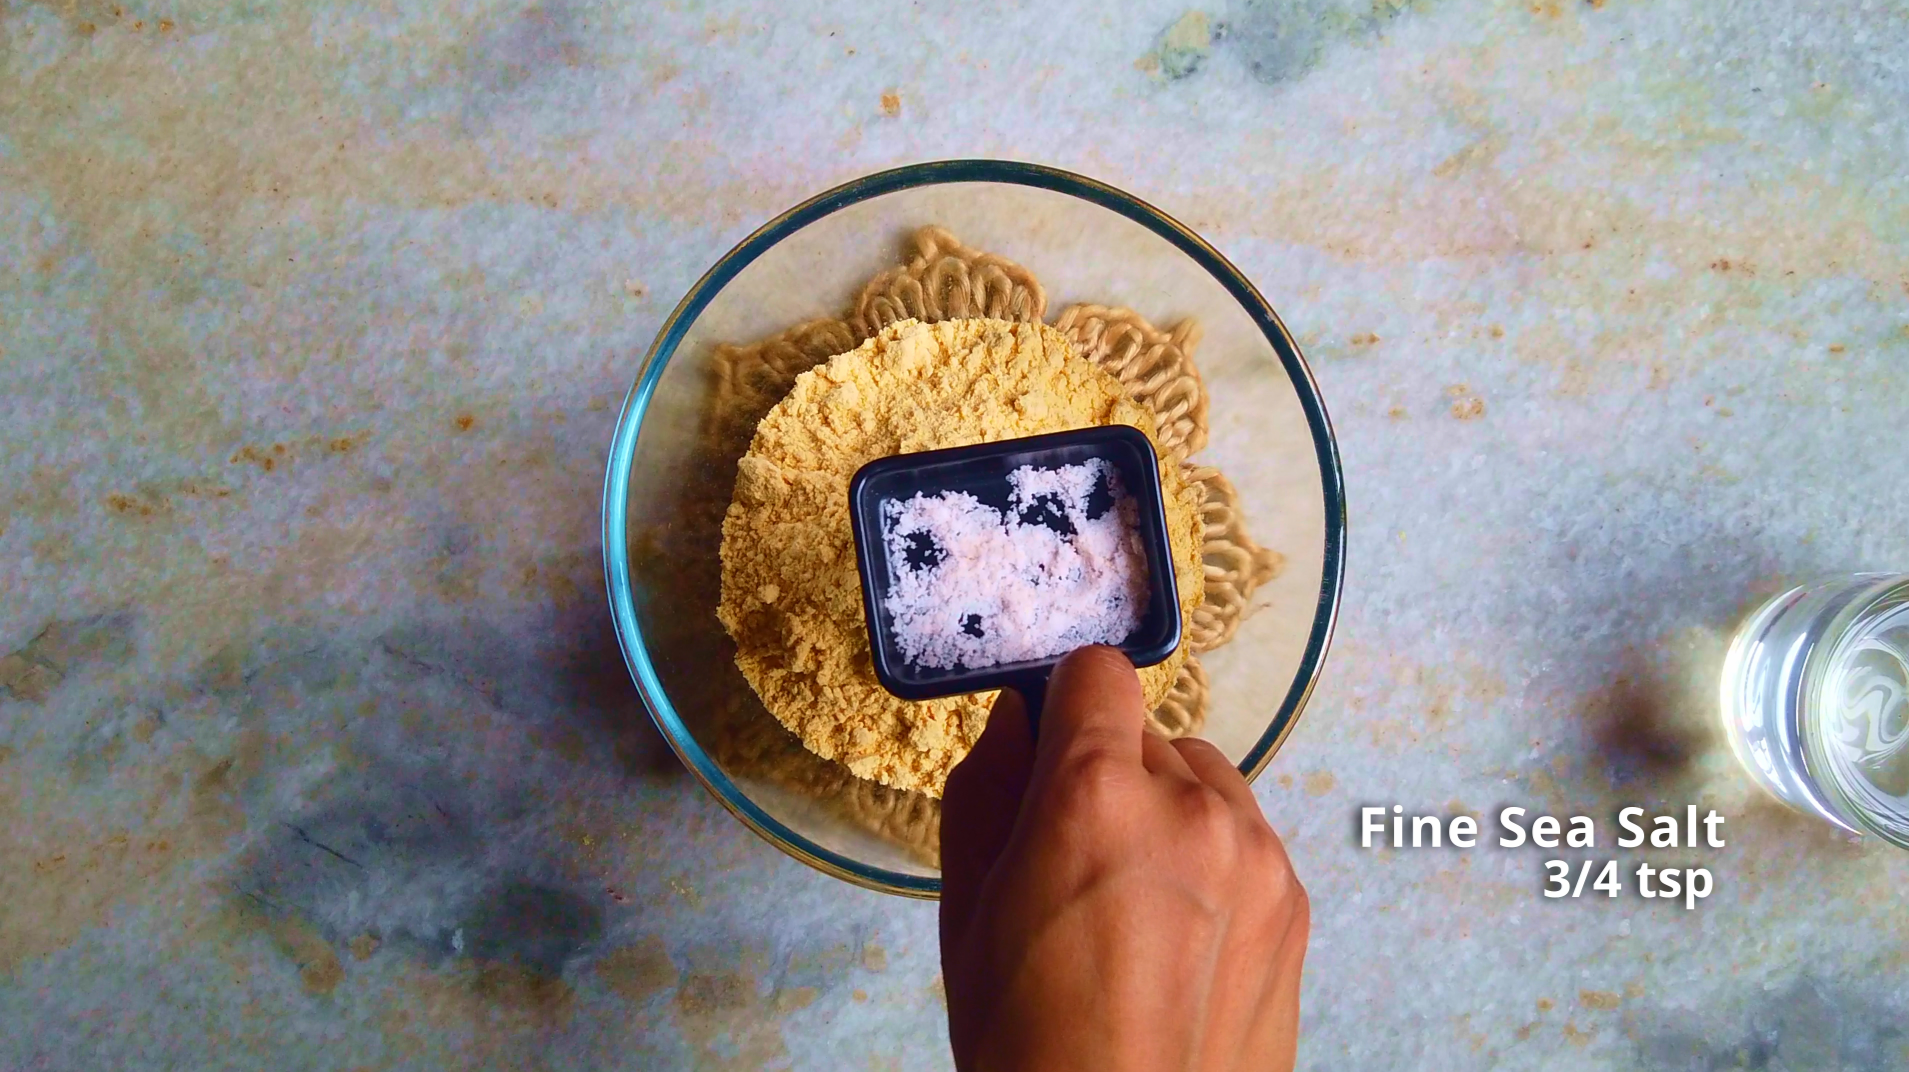
Fine Sea Salt: Salt is optional but recommended. A pinch of fine sea salt amplifies the natural corn taste, making your tortillas taste amazing even without any filling. Avoid coarse salts, which don’t dissolve as well in the dough.
Equipment needed for Corn Tortillas:
Here’s some helpful equipment to make homemade tortillas even easier and more enjoyable.
Non-stick skillet or griddle: You’ll need a flat, non-stick surface for cooking tortillas so they don’t tear or stick. A well-seasoned cast-iron skillet works beautifully and gives the tortillas a nice finish.
Tortilla Press (optional): While not essential, a tortilla press can be a game-changer if you plan to make tortillas regularly. It flattens the dough quickly and evenly, saving time and effort. If you don’t have one, no worries- you can use a flat-bottom pan, tray or even a cold roti maker (just don’t plug it in) to press the dough. A rolling pin works too, though it may take more time to get the tortillas uniformly thin.
Parchment paper or Plastic: You’ll need something non-stick to place on either side of your dough while pressing it. Cut open a large plastic zip-top bag to create a reusable sheet or use parchment paper to prevent the dough from sticking during the pressing process. Both work well, so go with whatever you have on hand.
Use of Corn Tortillas:
Corn tortillas are incredibly versatile and a staple in so many delicious dishes. They aren’t just for tacos, they’re blank canvas for countless flavourful creations like tostadas, enchiladas, tortilla chips, chilaquiles, quesadillas and nachos.
Storage Tips:
To keep corn tortillas fresh, it’s important to prevent them from drying out. Once cooled, wrap any leftover tortillas snugly in plastic wrap, beeswax wrap or seal them in zip-top bag with as much air removed as possible. Store them in the refrigerator and try to use them within 2-3 days for the best texture and flavour.
If you have leftover masa dough, shape it into a ball and wrap it tightly before refrigerating. It can stay fresh for up to 5 days. This is especially useful if you want to prep in advance. When you’re ready to make tortillas, bring the dough to room temperature, knead it briefly to refresh the texture, and check for proper hydration before forming tortillas.
For longer storage, tortillas can be frozen. Stack them with a layer of parchment paper between each one to prevent sticking, then seal them in a freezer-safe bag. This way, you can remove just the amount you need without thawing the entire batch.
When it comes to reheating, skip the microwave. Instead, warm tortillas on a hot skillet or directly over a flame until soft and pliable. This brings back their flexibility and enhances their toasty corn flavour. Microwaving tends to make rubbery or brittle, so it’s best avoided.
Ingredients:
2 cups Masa Harina
1 1/2 cups to 1 2/3 cups Hot Water
3/4 tsp Fine Sea Salt
Preparation:
- Step 1: In a large mixing bowl, whisk together masa harina and salt.
- Step 2: Gradually add 1 1/2 cups hot water and stir with your fingers until dough starts to pull together.
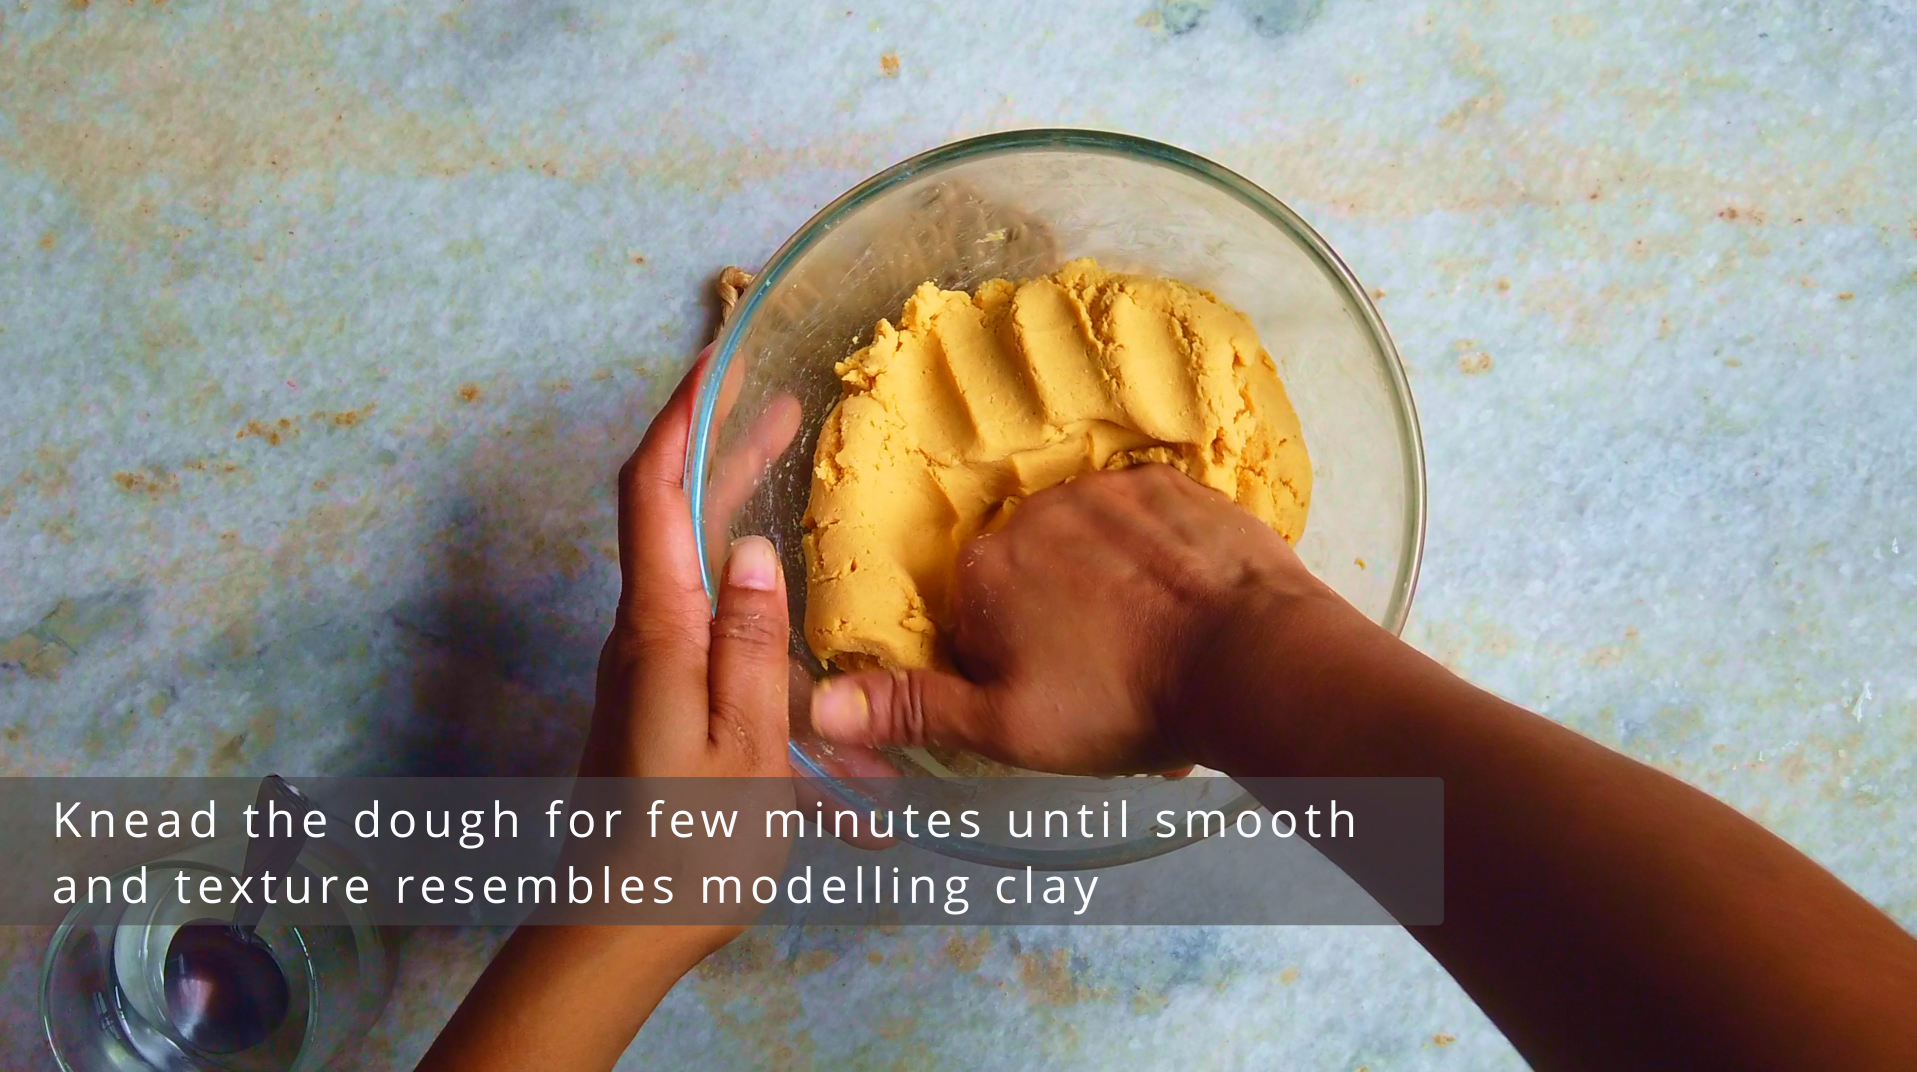
- Step 3: Knead the dough for few minutes until smooth and texture resembles modelling clay. The masa is ready when it feels soft but doesn’t stick to your hands. You will also notice that you’re able to wipe away all traces of masa when you rub the whole dough against the bowl without sticking. Test by rolling a small ball of masa between your hands and press it in a patty cake, if the masa cracks around the edges it needs more water. The success of the masa depends on how well it’s hydrated.
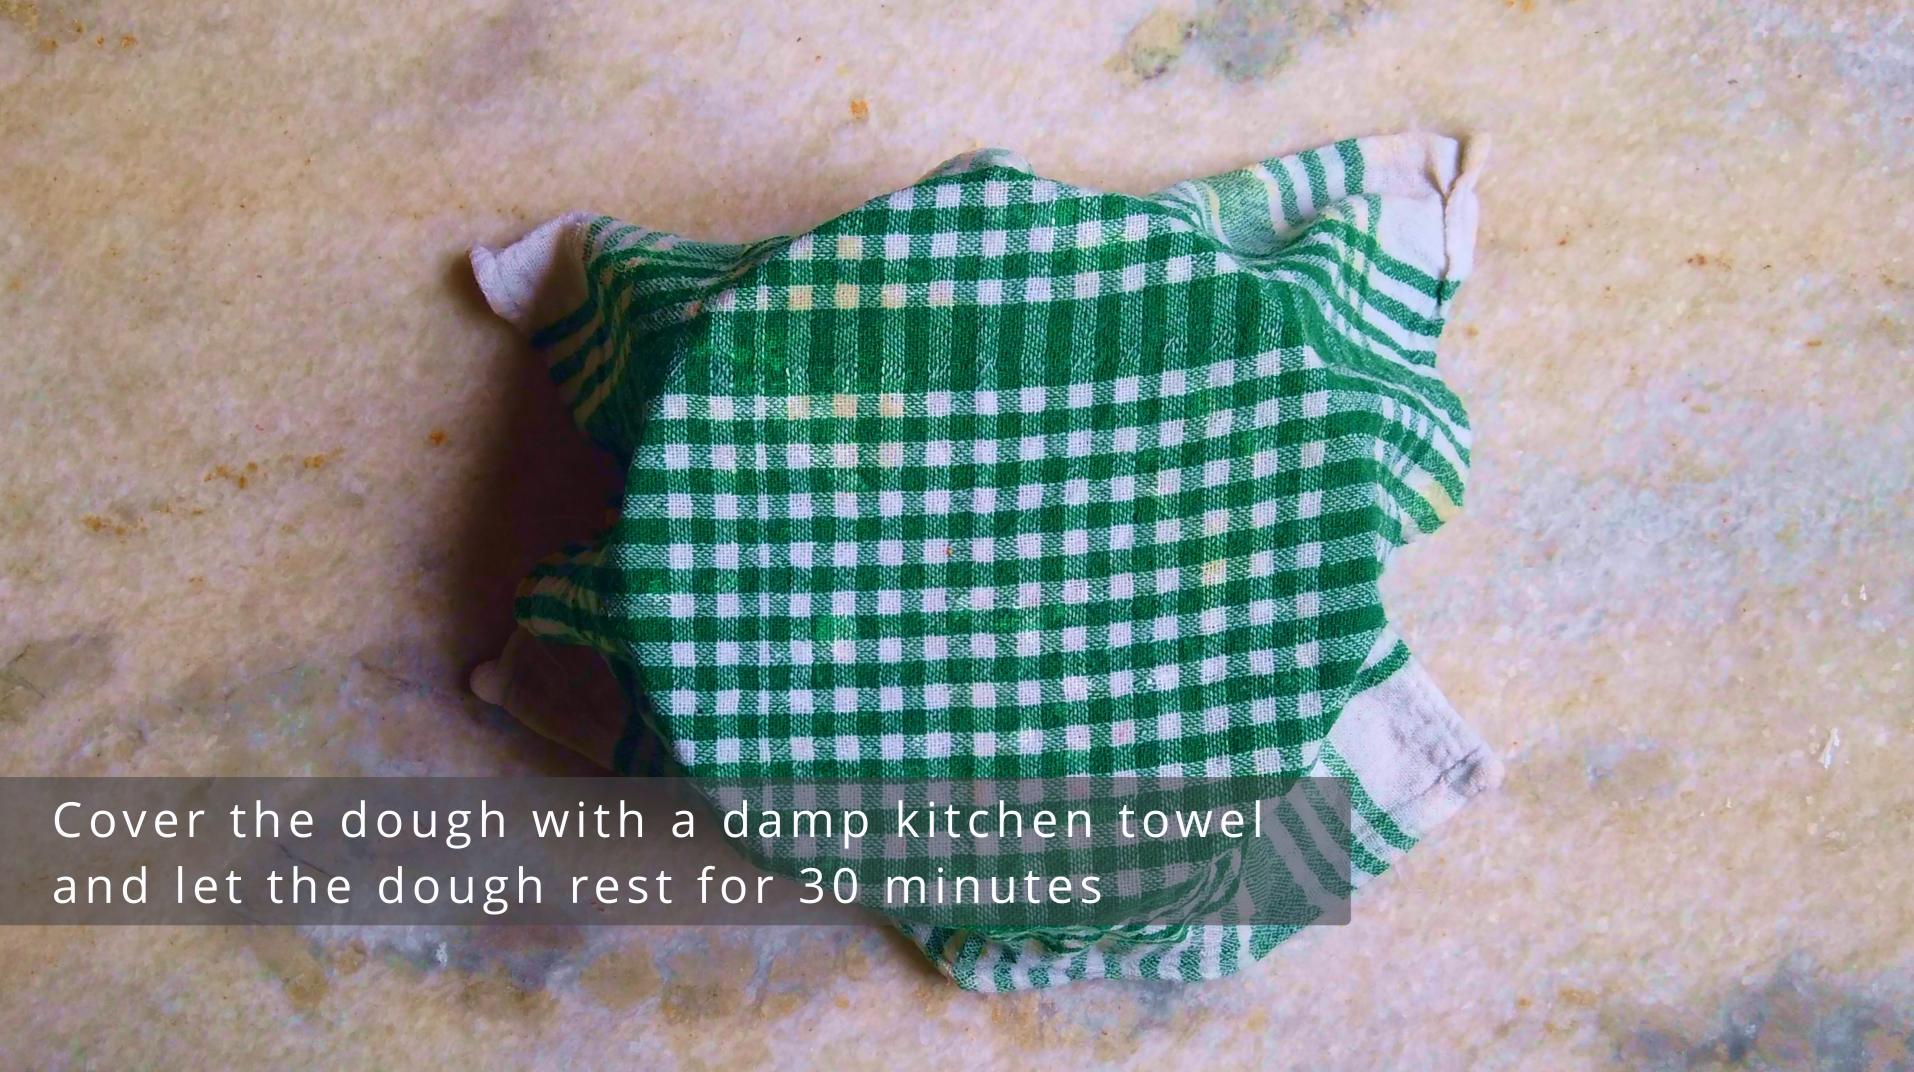
- Step 4: Cover the dough with a damp kitchen towel and let the dough rest for 30 minutes.
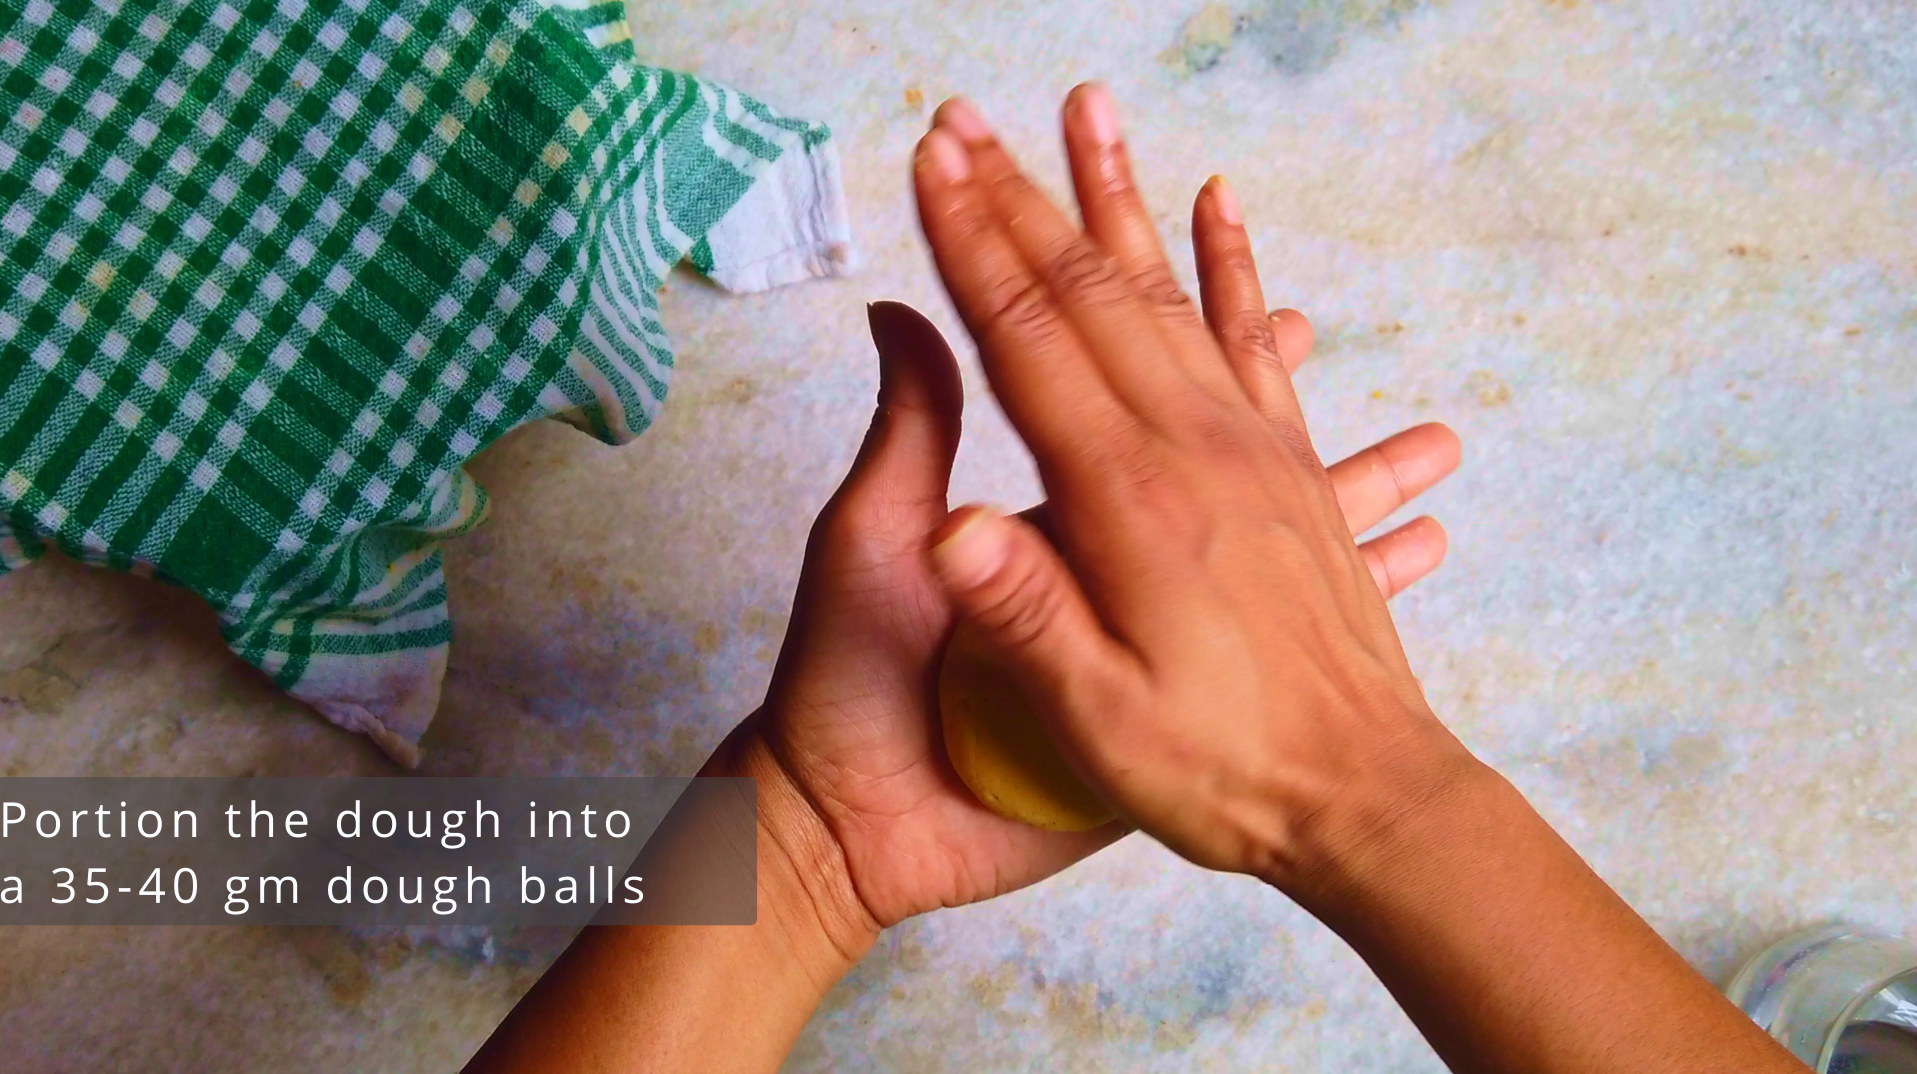
- Step 5: Portion the dough into a 35-40 gm dough balls and cover them with a damp kitchen towel while you press and cook each tortilla. Use your hands to roll the ball until it is nice and round.
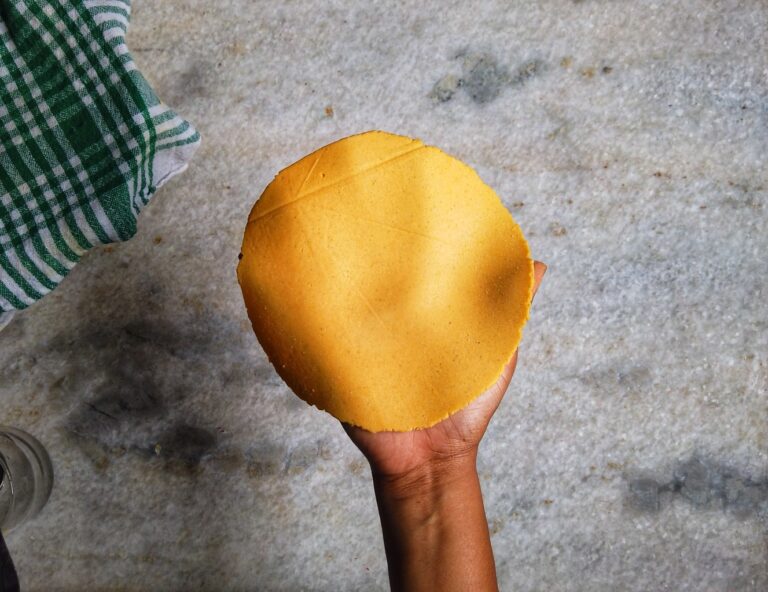
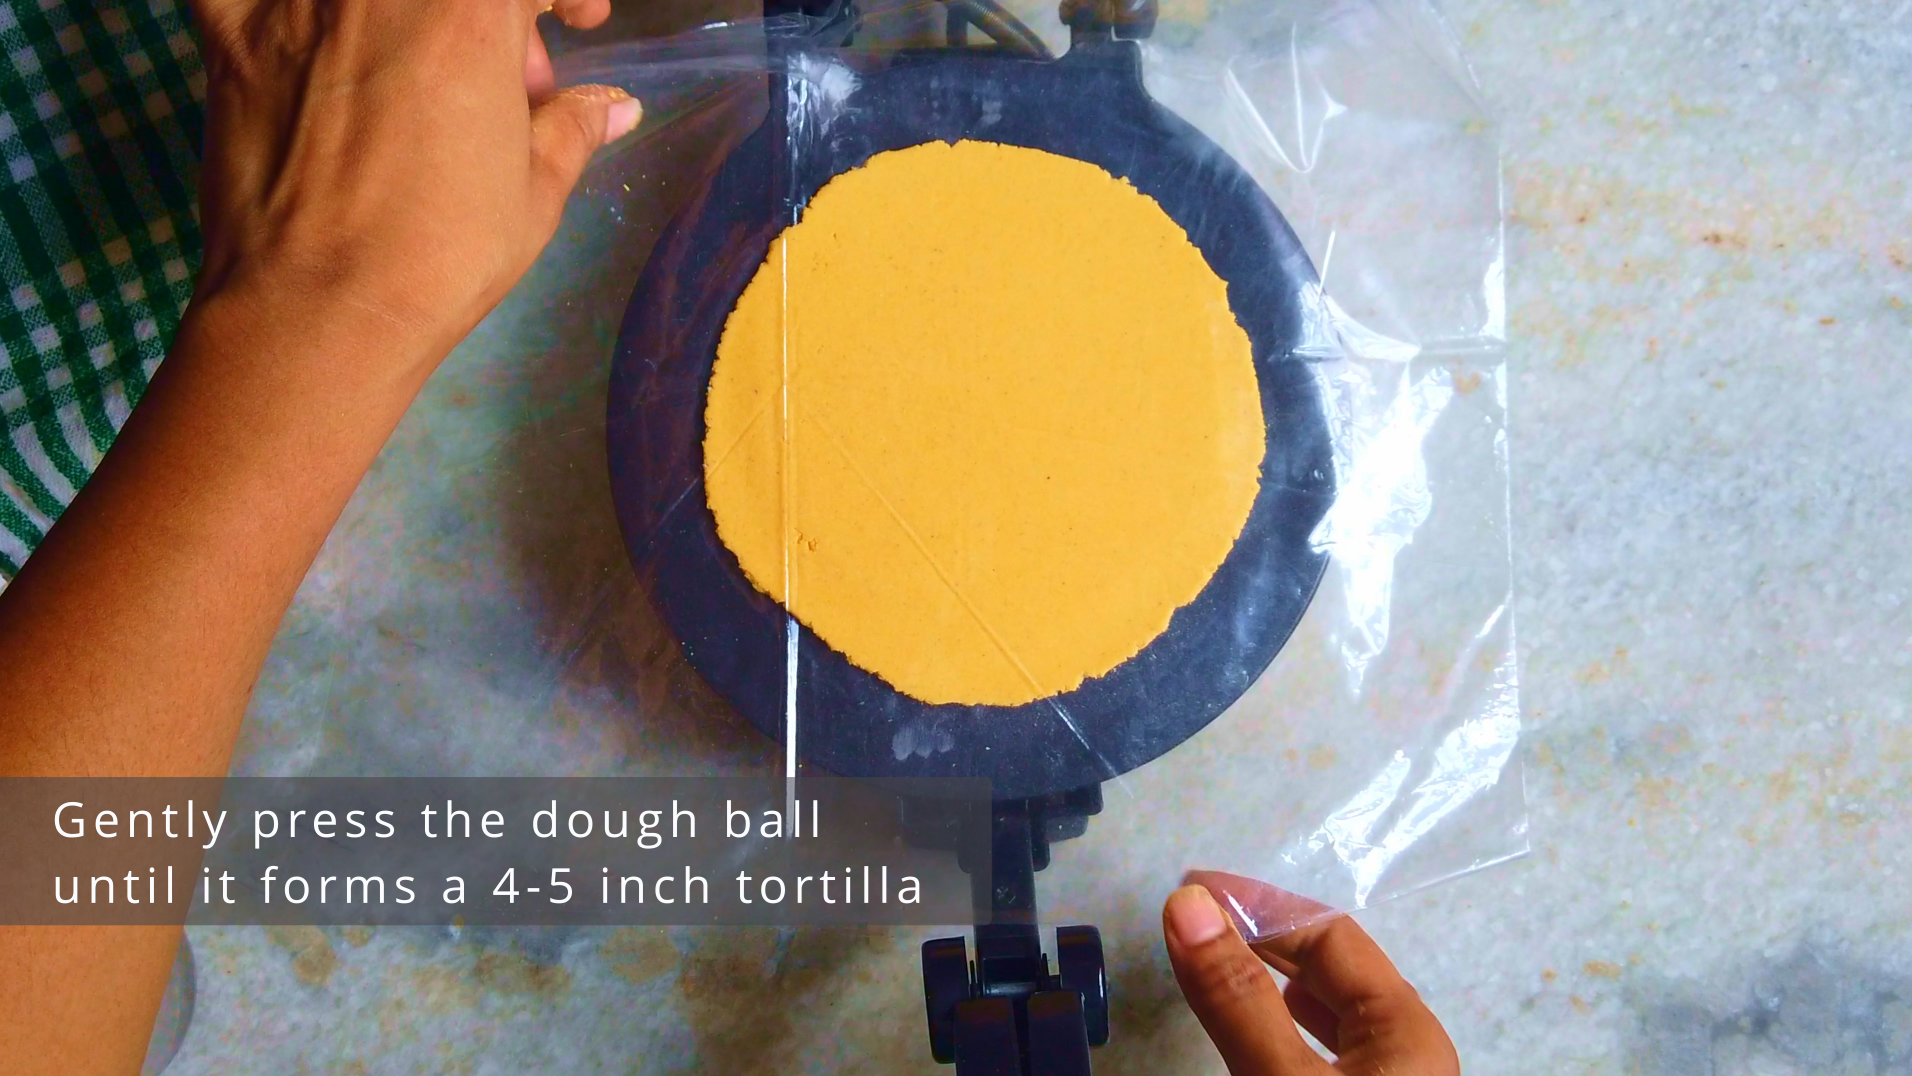
- Step 6: Place the dough ball between two pieces of plastic and use a flat-bottom pan/ tray or a tortilla press or I have used a cold roti maker (just don’t plug it in) to press the dough. Gently press the dough ball until it forms a 4-5 inch tortilla. Place a clean kitchen towel over a hotpot for cooked tortillas, set aside.
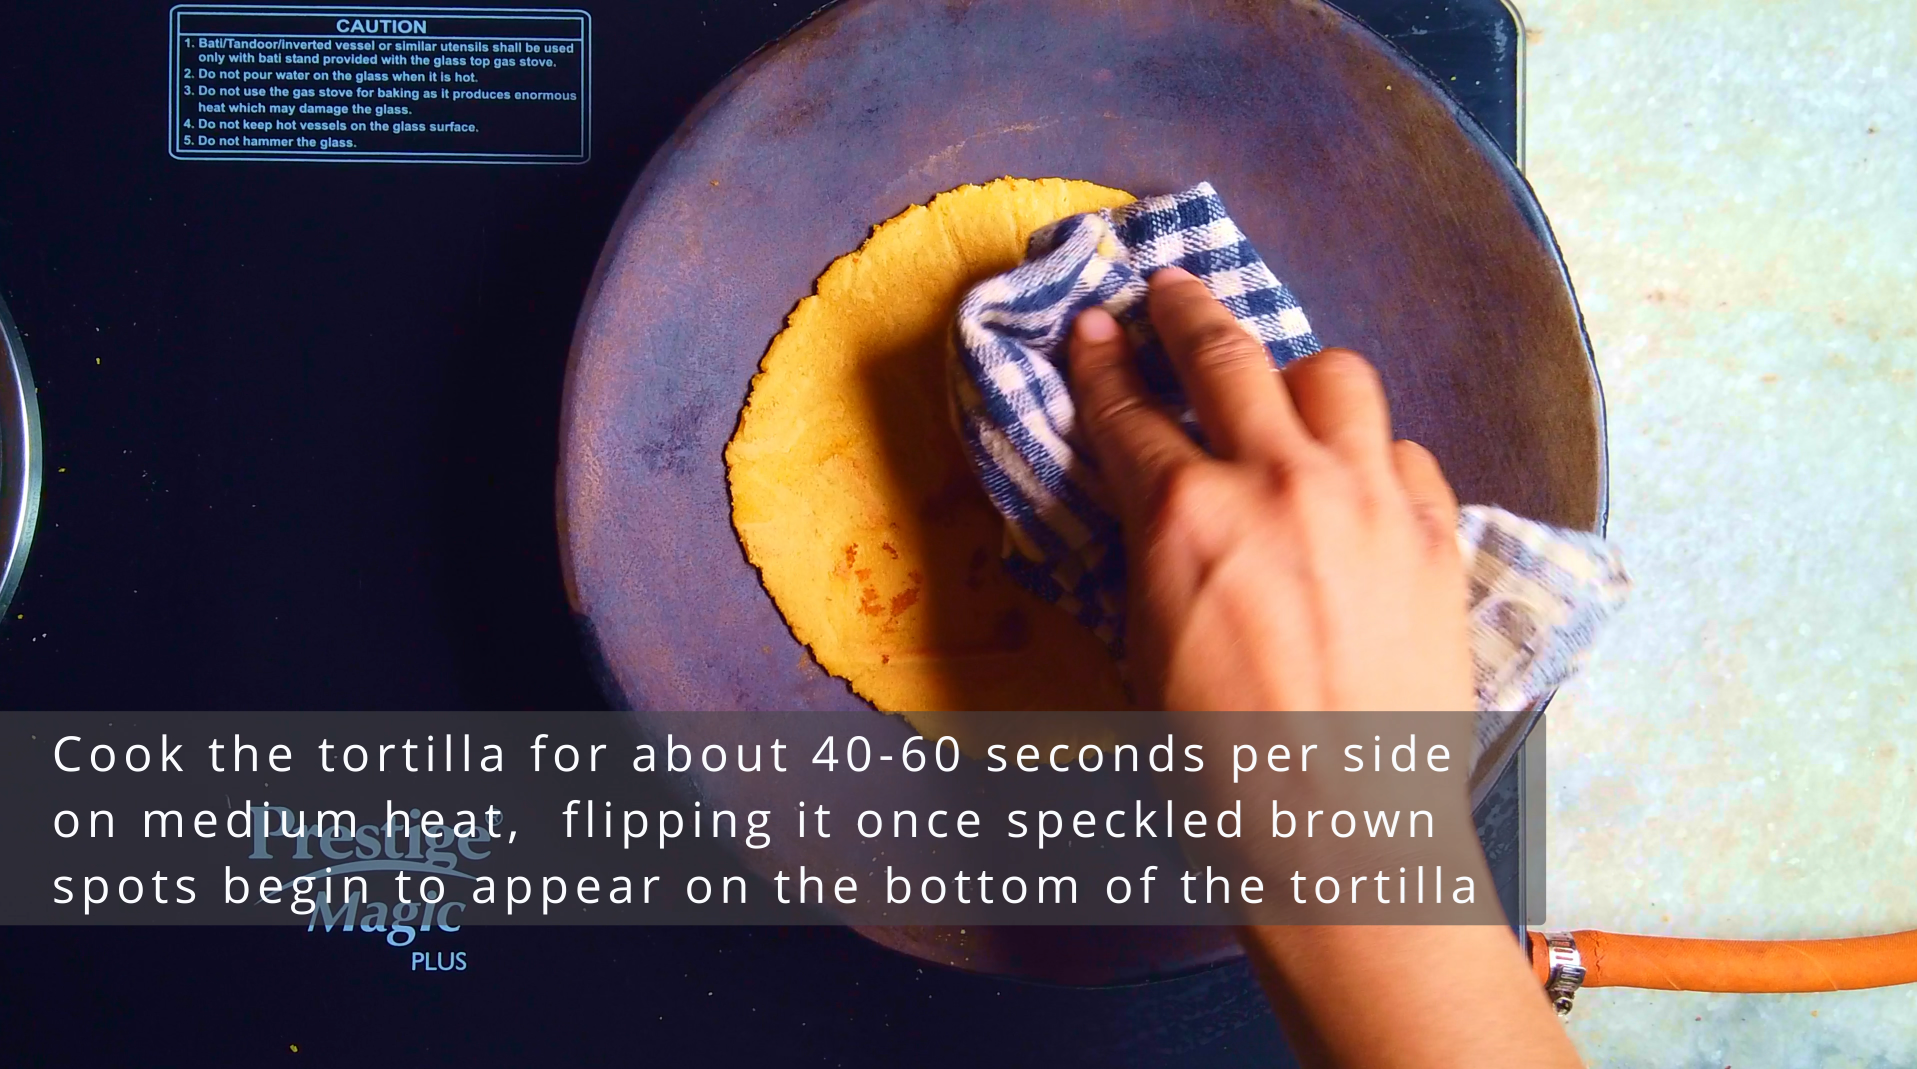
- Step 7: Heat a cast-iron skillet/tawa over medium-high heat. Once the pan is nice and hot, gently peel the tortilla away from the plastic wrap and lay the tortilla flat in a skillet/tawa. Cook the tortilla for about 40-60 seconds per side, flipping it once speckled brown spots begin to appear on the bottom of the tortilla. The tortillas will likely bubble up while cooking, especially on the second side, which is a good sign. Once its cooked, transfer the tortilla to the prepared hotpot, fold the towel over to keep warm, so the tortillas do not dry out. Repeat pressing and cooking with the remaining dough, stacking and wrapping tortillas.
- Step 8: Leave tortilla stack wrapped until soft and supple, at least 15 minutes. Serve however you like. Enjoy!!
Pro Tips:
Salt isn’t mandatory in tortilla dough, but it can subtly enhance the corn’s natural sweetness.
The most common tortillas problem is dryness, which prevents the tortillas from puffing and staying soft. Your masa should be moist, pliable and smooth, not crumbly. Ass water in small increments when adjusting the dough, even half a teaspoon can make a big difference. The goal is a consistency similar to fresh modelling clay.
Corn dough is forgiving. If you overshoot and make it too wet, simply dust in a little extra masa harina and knead briefly. You can let the dough rest uncovered for a short while, it will naturally lose moisture and firm up.
A properly preheated skillet is crucial. Medium heat works best, allowing the tortillas to cook through without scorching.
Before cooking, test your dough, roll a ball and press it flat. If the edges crack, it needs more water, knead in a tablespoon of water at a time until it presses smoothly.
About Me

DEBJANI MONDAL
Welcome to Kitchenstagram, the home of delicious recipes, culinary inspiration and cooking adventures. I’m Debjani and I’m thrilled to be your guide through the wonderful world of food. I’m a self-taught professional baker, home chef, recipe developer, author of Kitchenstagram and an aspiring YouTuber.
My passion for food and cooking began at a very young age, when I would watch my mom and dad cook for me and my brother. My dad, in particular is a great cook whose culinary skills made a lasting impression on me. My dad would cook up a storm on special occasions by cooking variety of dishes, from delicious biriyani to samosa, fish fry, rasgullas and kachoris (sweet & spicy deep fried pastry with filling of lentils, meat or fish…>>>>>
FOLLOW ME
My Latest Posts
- post 1
- post 2