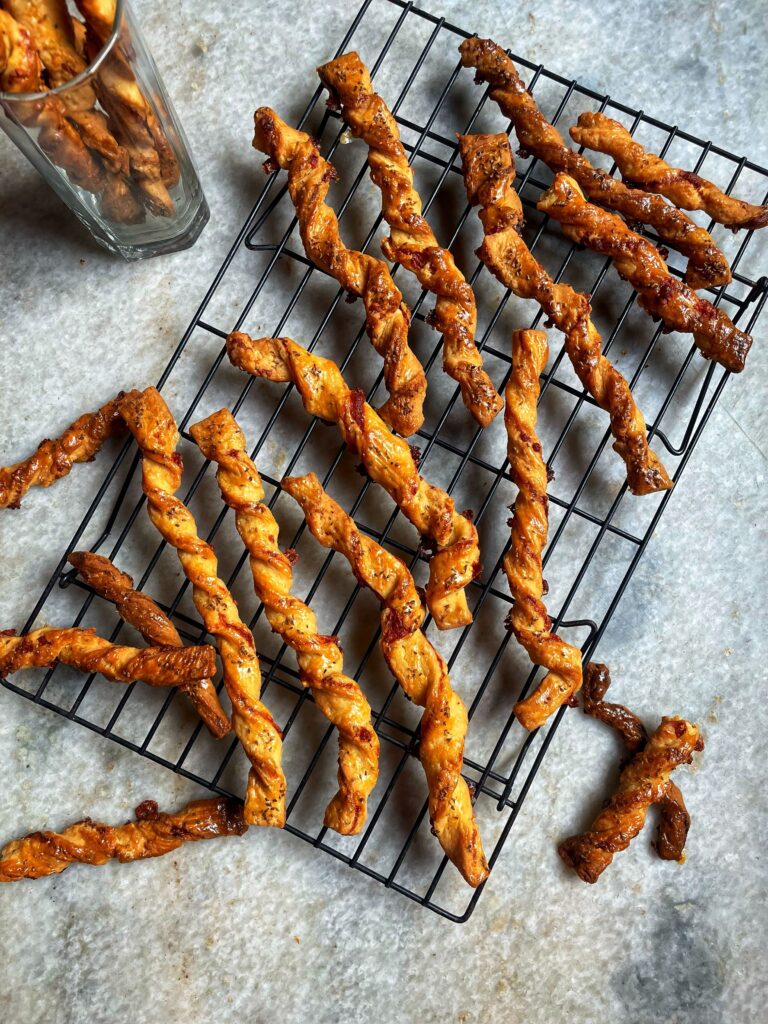


Cheese Straws are the ultimate snack for cheese lovers-light, crisp and bursting with flavour in every bite. Made with just a handful of ingredients, they strike the perfect balance between a buttery shortbread and a crunchy cheese cracker. These irresistible sticks are ideal for entertaining, pairing beautifully with drinks or as a quick treat straight from the oven. Their delicate texture and bold, cheese taste makes them hard to stop at just one. Simple to prepare yet impressive to serve, homemade cheese straws prove that a few basic ingredients can create something truly special. Perfect for parties, picnics or gifting- they’re timeless classic that always delights.
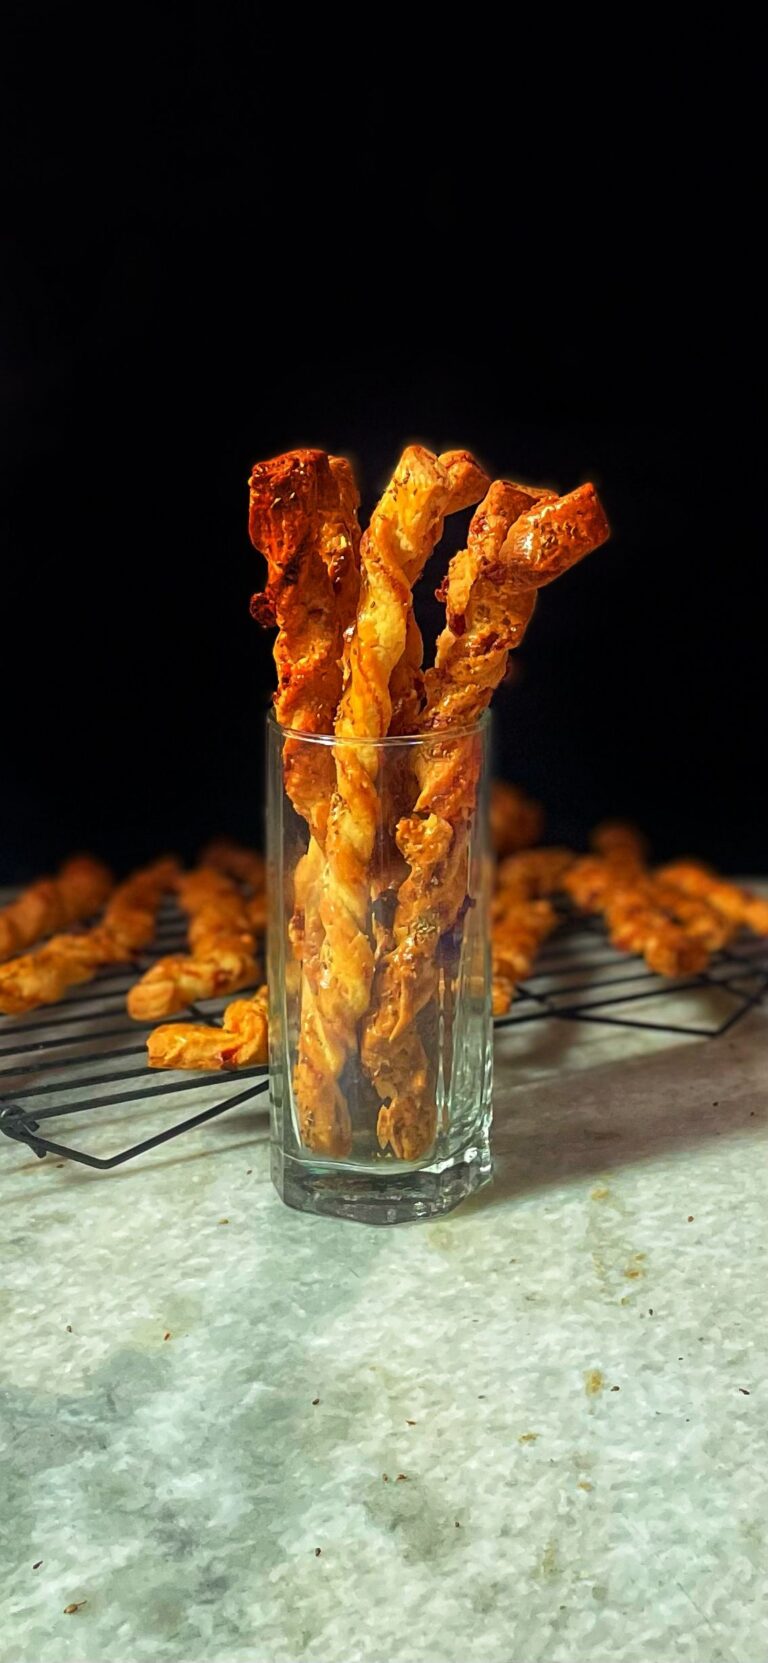
Made with everyday ingredients, these cheese straws some together quickly and easily.
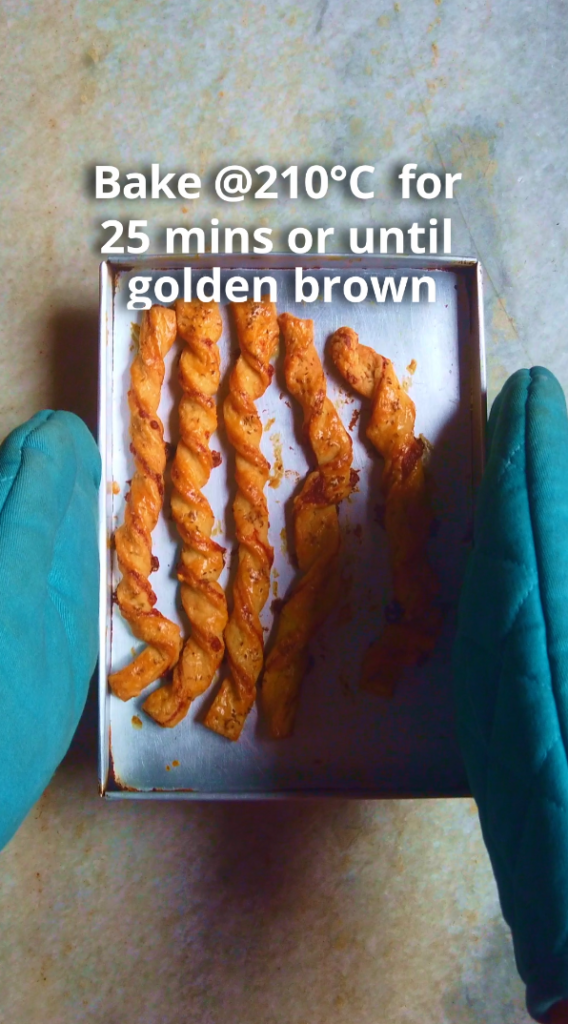
Their crisp, buttery texture and rich cheese flavour make them perfect alongside drinks or as a party snack.
You can easily switch up the cheese or seasonings to suit your taste and occasion.
Yes! Cheese Straws are perfect for making ahead. Once baked, they keep beautifully in an airtight container for several days without losing their signature crunch. For longer storage, freeze them-either baked or unbaked. If freezing unbaked straws arrange the cut pieces on a tray until solid, then transfer to a bag or container. Bake straight from frozen, adding just a minute or two to the oven time. You can also freeze fully baked cheese straws and reheat them briefly to refresh their crisp texture. This make-ahead method makes them ideal for parties or last-minute entertaining.
Cheese Straws are at their best when freshly baked, but they can be stored for short periods or frozen for later. Once cooled, keep them in an airtight container at room temperature for up to two days to maintain crispness. For longer storage, freeze unbaked straws on a tray until firm, then transfer to an airtight bag or container. They’ll keep well in the freezer for about a month. When ready to bake, simply thaw them in the refrigerator for around an hour before piping them in the oven. This method ensures you can always have a batch ready to serve warm and flaky- perfect for last-minute entertaining or unexpected guests.
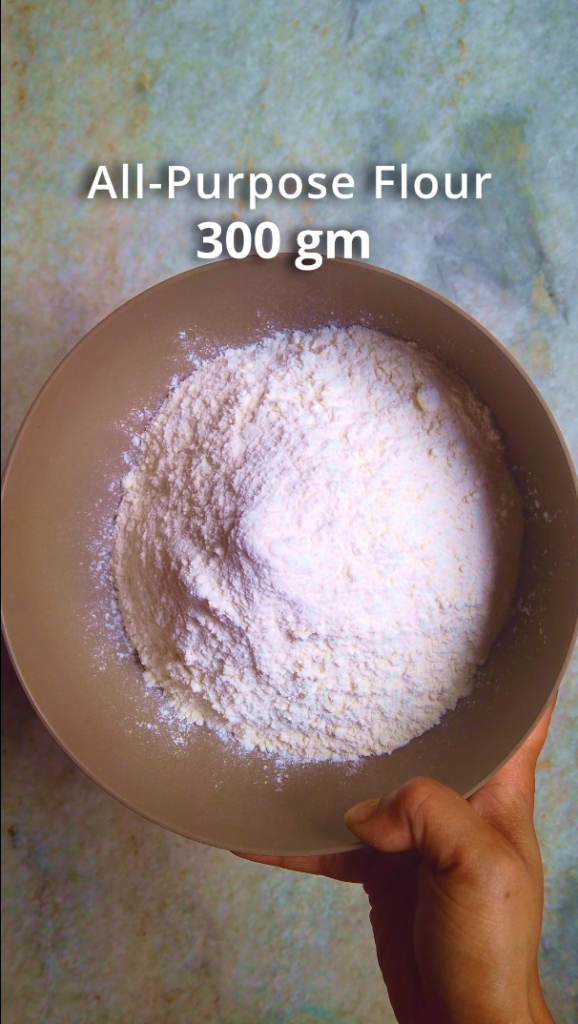
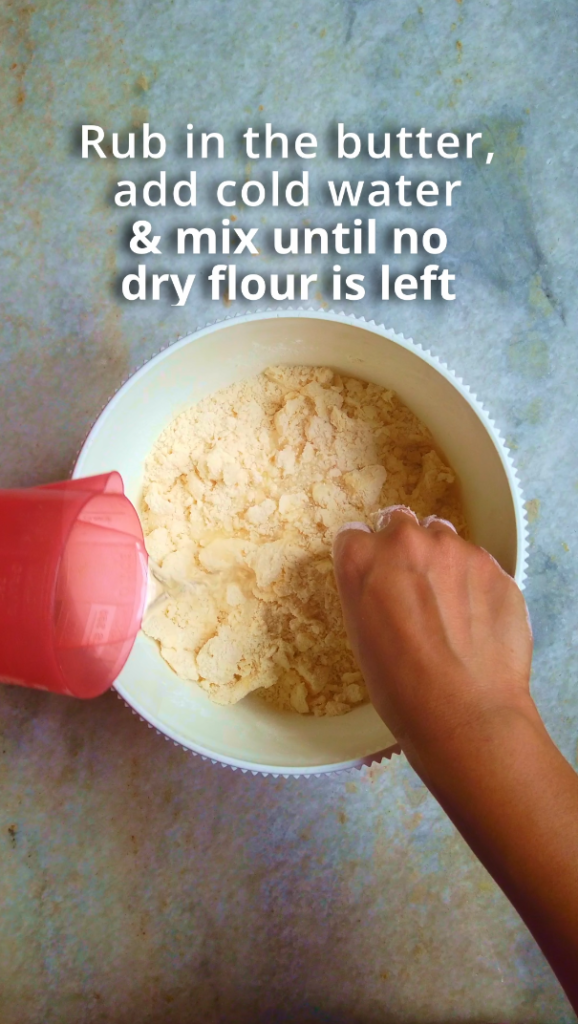
300 gm All-Purpose Flour
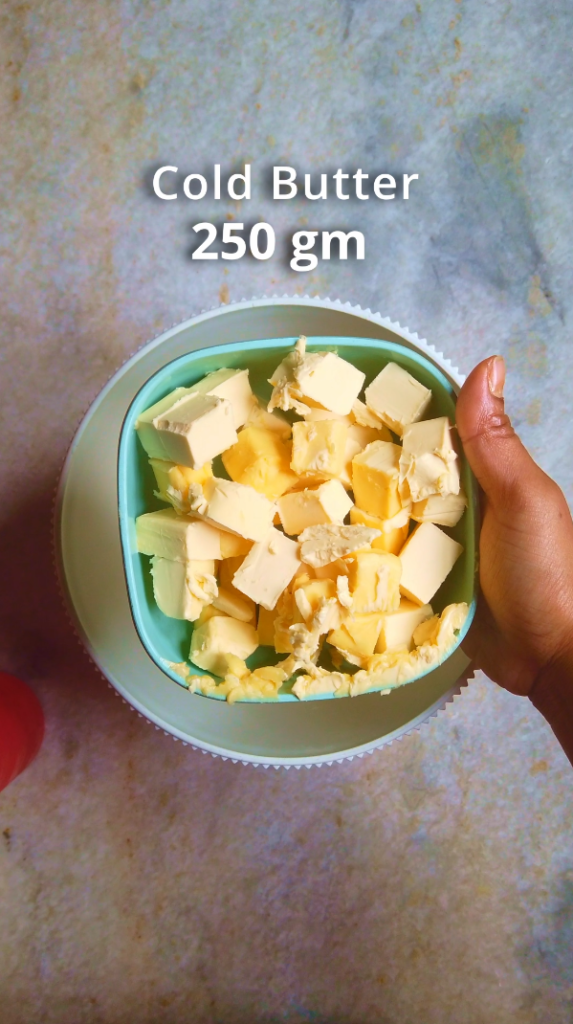
250 gm Cold Butter, cut into large cubes
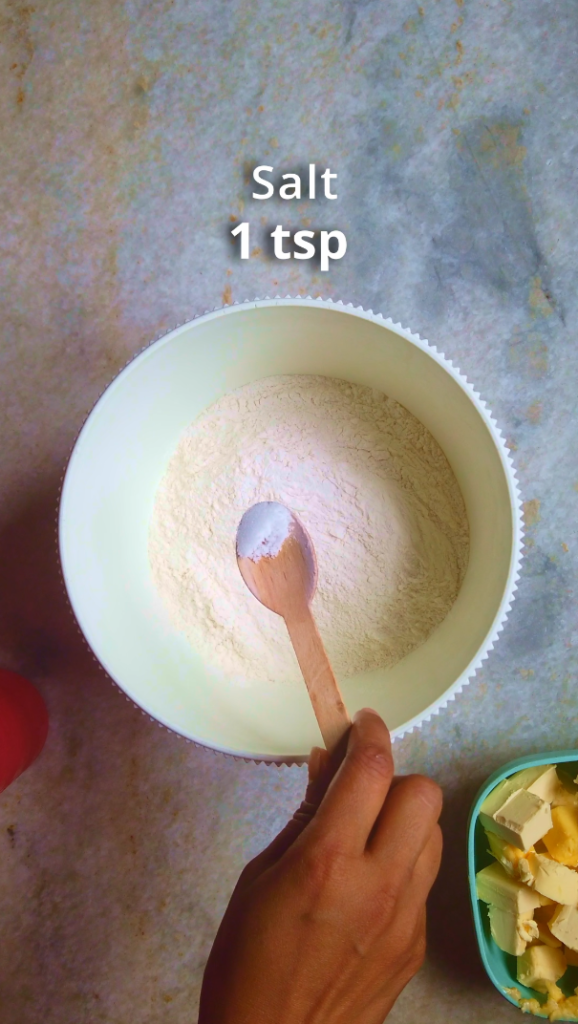
1 tsp Salt
3-5 tbsp Cold Water
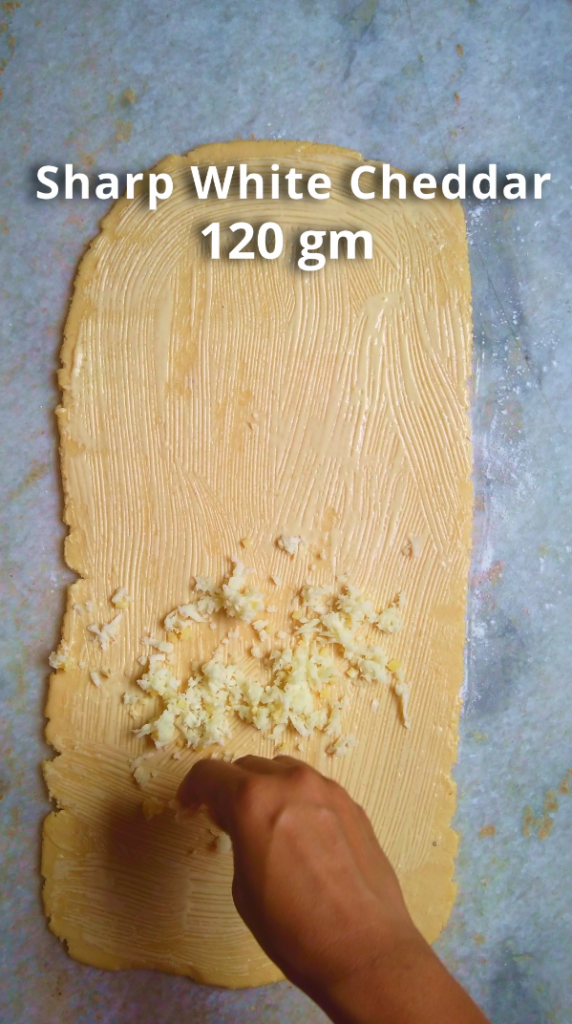
120 gm Sharp White Cheddar, shredded
50 gm Aged Mozzarella Cheese, shredded
Egg wash
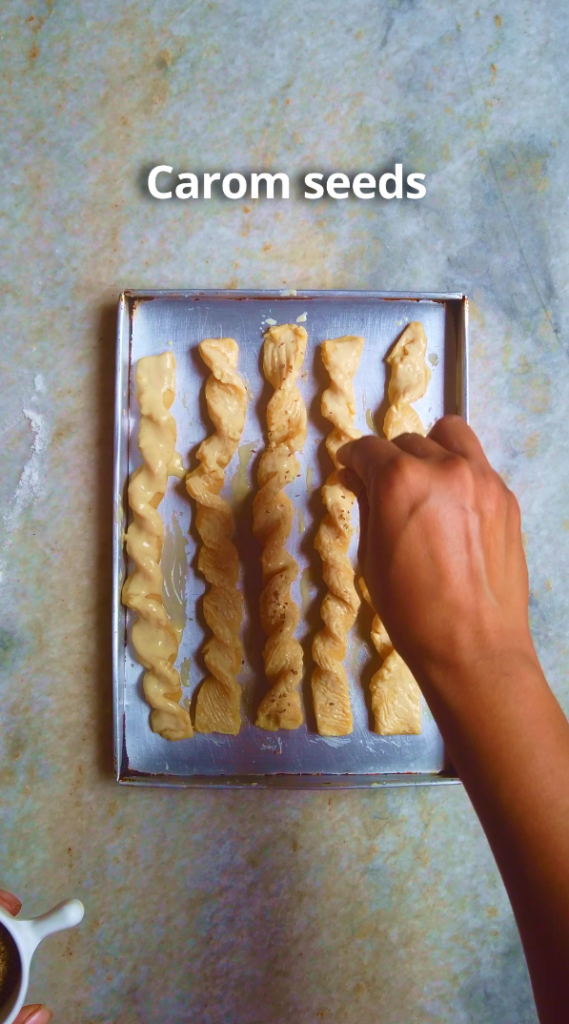
1 tbsp Carom seeds
DEBJANI MONDAL
Welcome to Kitchenstagram, the home of delicious recipes, culinary inspiration and cooking adventures. I’m Debjani and I’m thrilled to be your guide through the wonderful world of food. I’m a self-taught professional baker, home chef, recipe developer, author of Kitchenstagram and an aspiring YouTuber.
My passion for food and cooking began at a very young age, when I would watch my mom and dad cook for me and my brother. My dad, in particular is a great cook whose culinary skills made a lasting impression on me. My dad would cook up a storm on special occasions by cooking variety of dishes, from delicious biriyani to samosa, fish fry, rasgullas and kachoris (sweet & spicy deep fried pastry with filling of lentils, meat or fish…>>>>>
FOLLOW ME