
Create a striking Dark Chocolate 3D Christmas Tree Cake that becomes the centrepiece of your holiday table. Carefully the layers are stacked to form a tree shape, then bought to life with piped green buttercream using a star tip and a touch of festive flair. This cake features 4 soft chocolate sponge layers, generously sandwiched with dark chocolate ganache and finished with swirls of buttercream frosting. Rich dark chocolate ganache coats the cake, adding depth and elegance, while vanilla buttercream provides a beautiful contrast. Baked entirely from scratch, the cake is tender, fluffy and full of chocolate flavour. It’s as enjoyable to decorate as it is to serve, making it a truly special Christmas dessert.
Ingredients needed for Christmas Tree Cake:
For Chocolate Sponge:
Flour: All-purpose flour or pastry flour works best, as their lower protein content produced a tender crumb. Sifting the flour is important to remove lumps and ensure an even batter.
Powdered Sugar: Grind the granulated sugar into powdered sugar. White sugar adds balanced sweetness and moisture.
Cocoa Powder: Use unsweetened cocoa powder for baking. Dutch-processed cocoa gives a darker colour and smoother chocolate taste. Sifting the cocoa prevents clumps and improves consistency.
Eggs: Always bring eggs to room temperature before baking. Warmer eggs blend smoothly into the batter, creating a stable emulsion and an even cake texture.
Oil: This recipe uses oil instead of butter, which helps the cake stay soft and moist even after refrigeration. Choose a neutral vegetable oil so the chocolate flavour remains front and center.
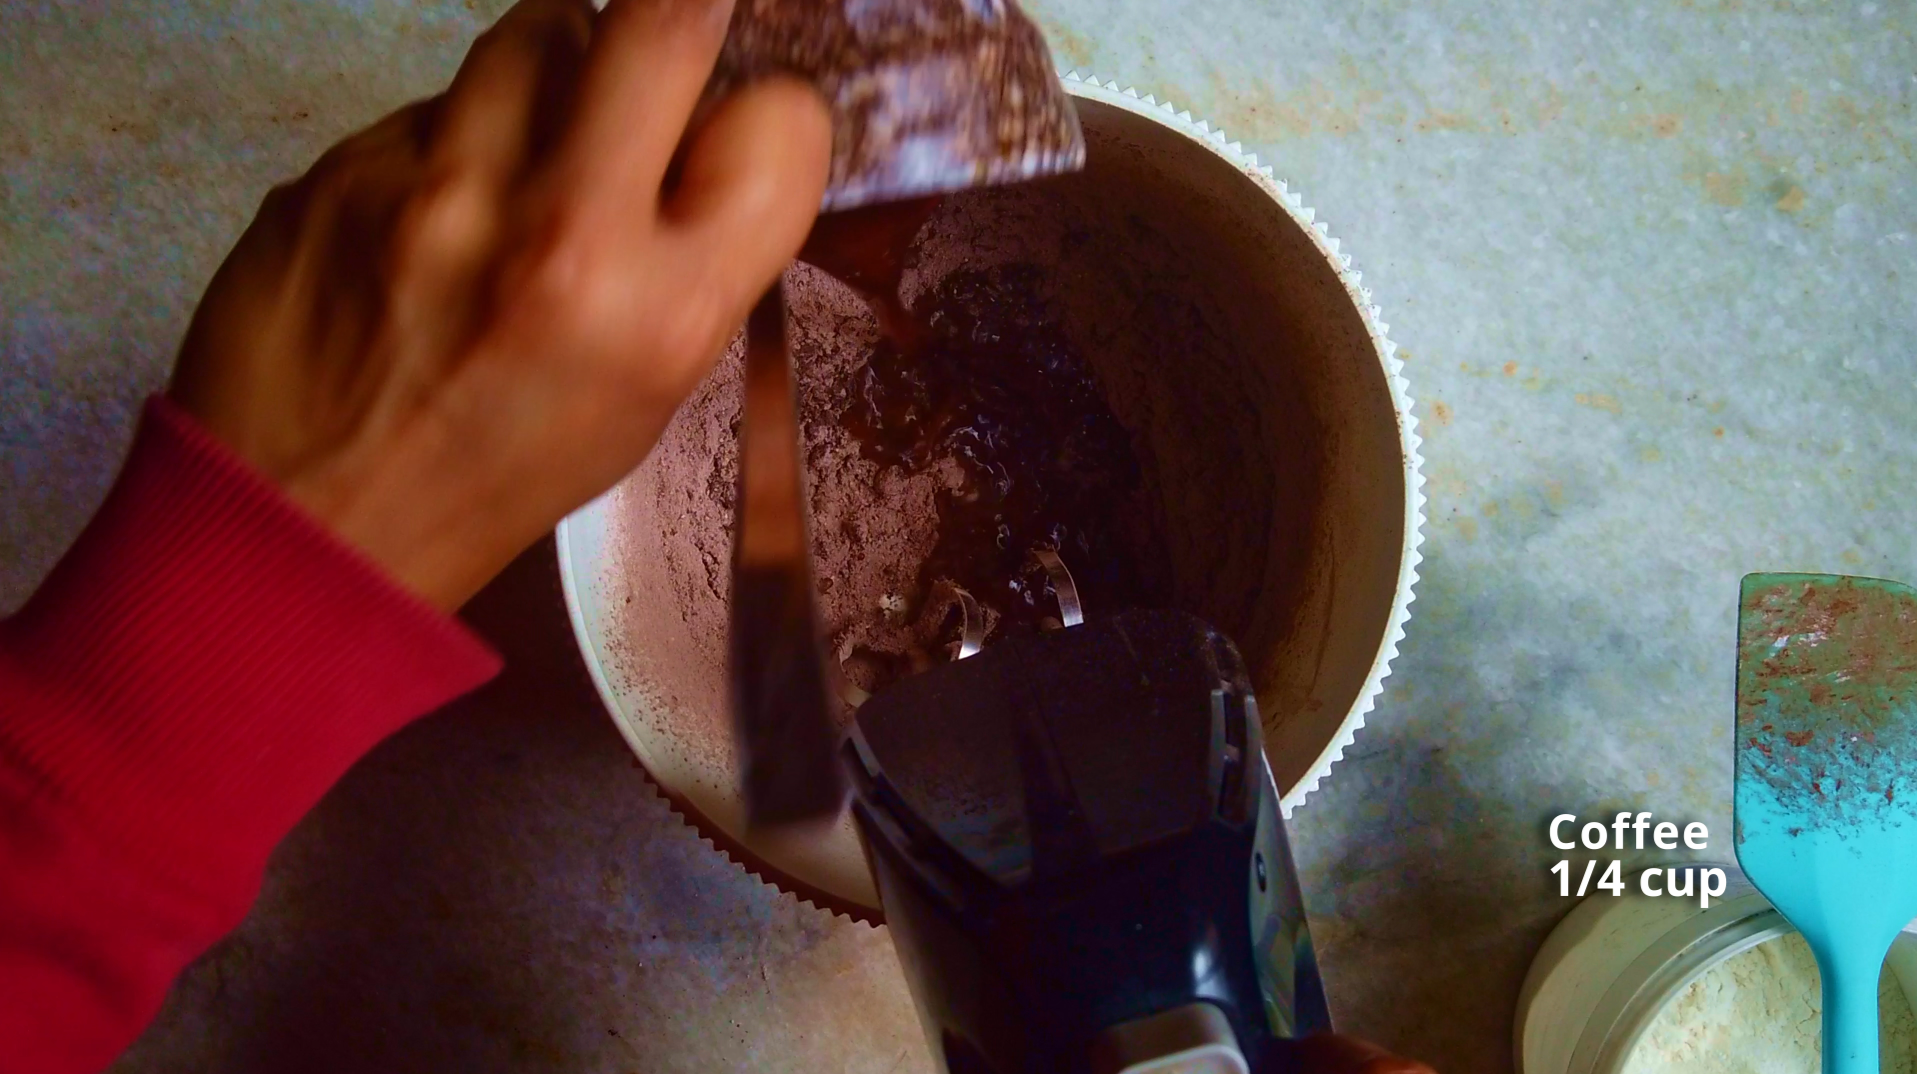
Coffee: Instant coffee deepens the chocolate flavour without making the cake taste like coffee. Use t once cooled to room temperature. If unavailable, lukewarm water works as a substitute.
Baking Soda and Baking Powder: Both baking soda and baking powder are used to help the cake rise and achieve a light, airy texture. Each plays a unique role, so using both is essential.
Salt: A small amount of salt enhances the chocolate flavour and balances the sweetness, making the cake taste more pronounced and well-rounded.
For Chocolate Ganache:
Chocolate: High-quality dark chocolate produces a smooth, glossy ganache with deep flavour. Chocolate callets or finely chopped chocolate melt evenly and give the best results.
Heavy Cream: Use whipping cream with a fat content around 36%. this ensures a rich, creamy ganache that sets beautifully without becoming greasy or stiff.
For Buttercream Frosting:
Butter: Soft, room-temperature butter is essential for a light, fluffy buttercream. High-fat butter delivers better flavour and structure.
Icing Sugar: Finely milled icing sugar creates a silky, lump-free frosting. Good-quality sugar makes a noticeable difference in texture.
Water: Boiling water is used to dissolve the sugar fully, resulting in a smooth buttercream with no graininess.
Gel Food Colour: Gel colouring is ideal for achieving vibrant green frosting without altering the consistency of the buttercream.
For Decoration:
Sprinkles: A mix of colour adds a festive touch, but feel free to personalize with any shades or decorative elements you like.
Star topper: If a ready-made topper isn’t available, a homemade chocolate star works beautifully. Shaped from tempted chocolate and finished with edible gold dust, it adds an elegant finishing touch to the cake.
Instruction for making the Christmas tree cake:
Bake the cake: Prepare one 5-inch round cake, two 4-inch round cake and one small half round cake.
Buttercream Frosting: Make the buttercream and keep it ready for assembling and decorating.
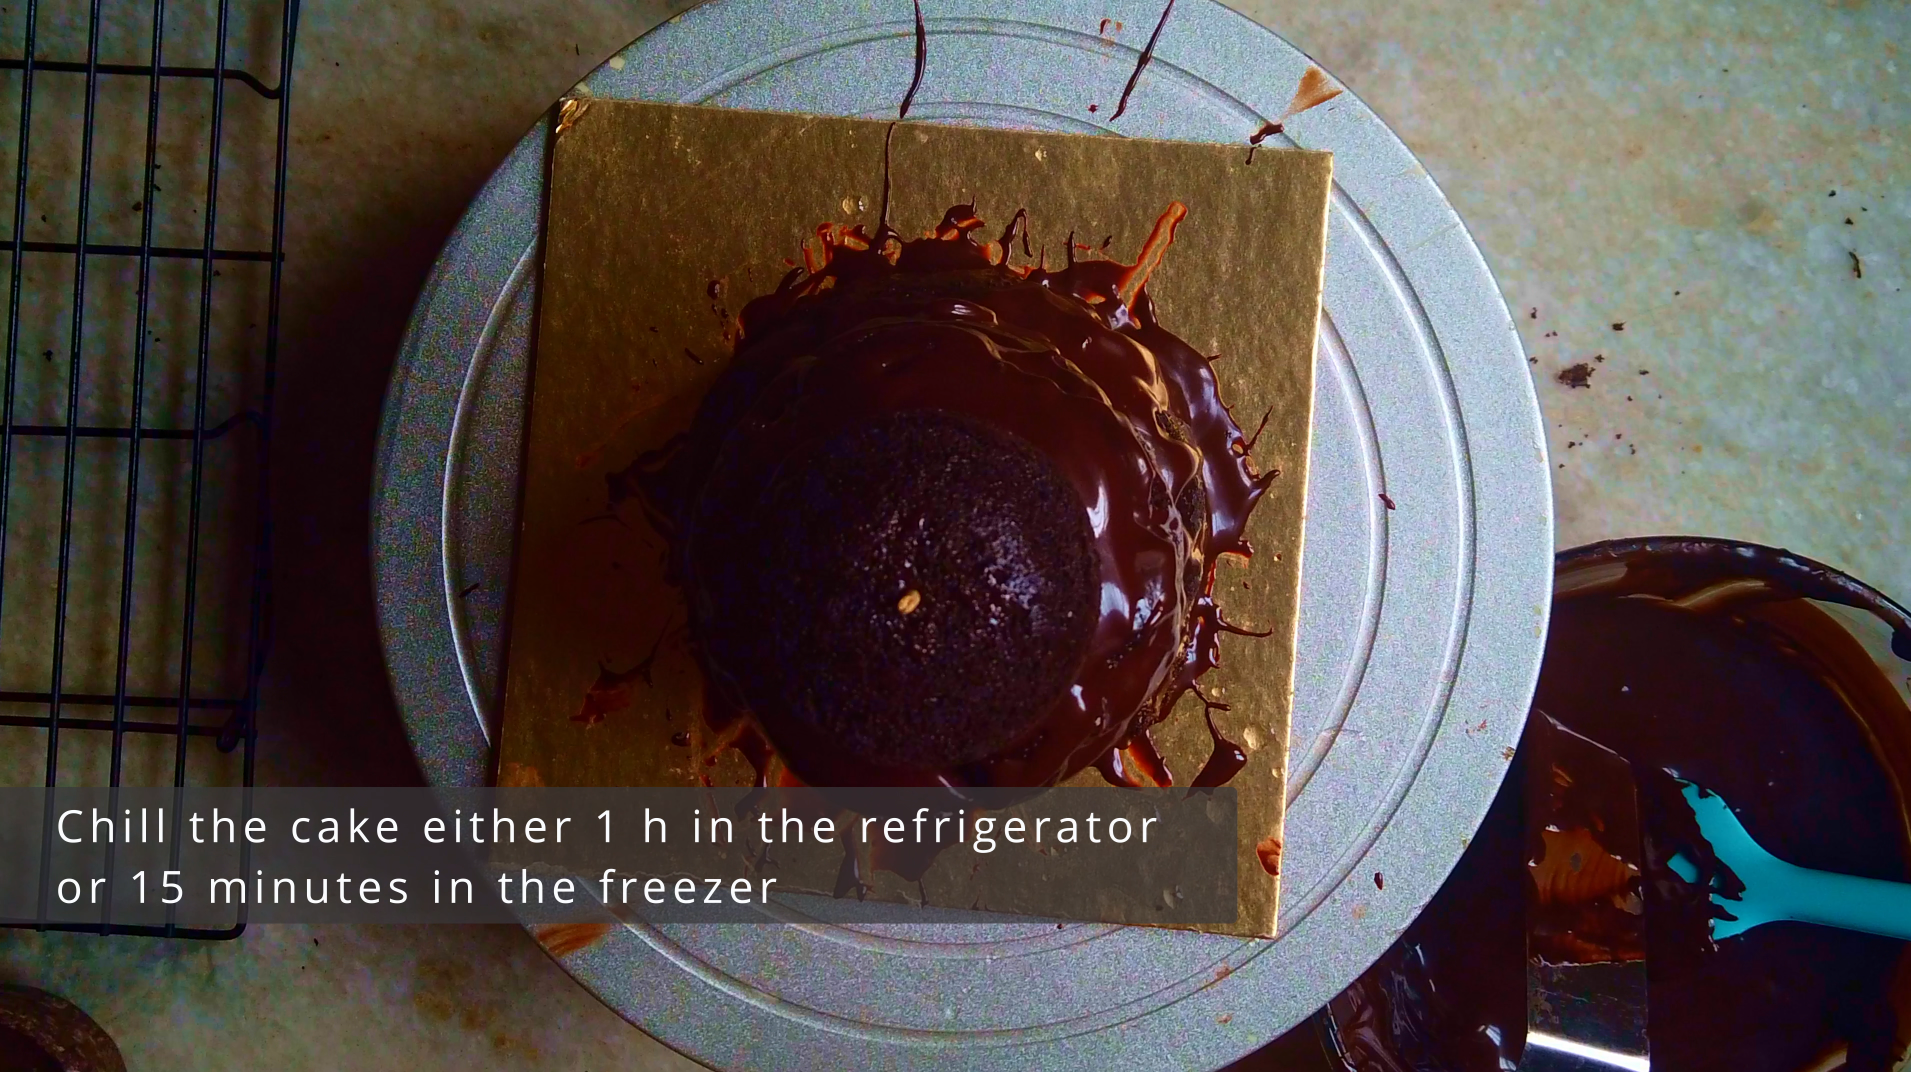
Assemble the layers: Stack the cake rounds, spreading roughly 1/2 inch of chocolate ganache between each layer.
Chill: Chill the stacked cake in the refrigerator for at least 15 minutes to help it firm up before shaping.
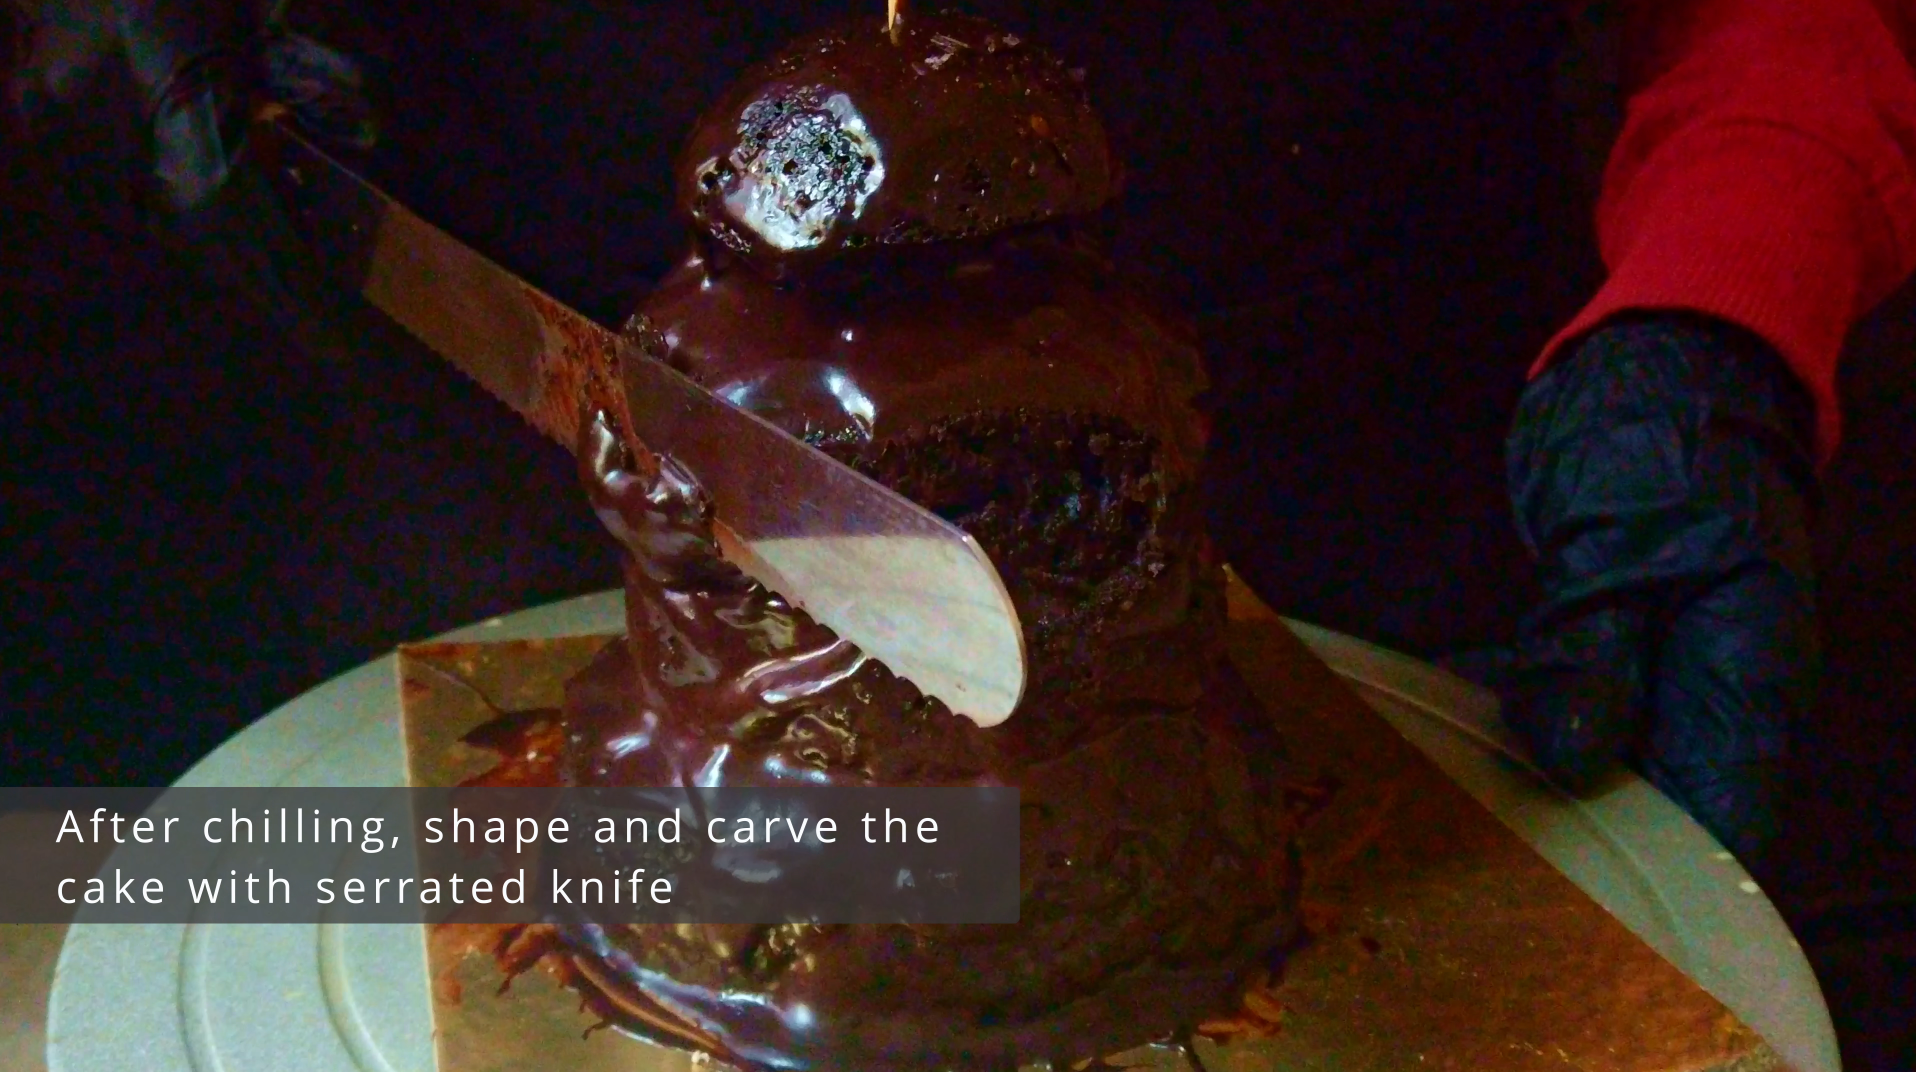
Carve the Cake: Use a serrated knife to carefully carve the chilled cake into a cone, trimming gradually and saving the offcuts.
Crumb Coat: Cover the entire cake with a thin layer of ganache to lock in crumbs.
Decorate the Tree: Tint the buttercream green and pipe shells using a star tip, starting from the bottom and working upward. Finish with sprinkles, adding them as you pipe so they stick before the frosting sets.
Making ahead and Storage Tips:
Prepare the cake layers ahead of time and freeze them. This spreads the work over a few days and makes assembly much easier.
Buttercream can also be made in advance. Keep it sealed in an airtight container in the refrigerator for several weeks, or freeze it for longer storage. Once thawed, mix well to restore a smooth texture.
A fully frosted cake keeps well in the refrigerator for several days. The buttercream acts as a protective layer, helping the sponge stay soft and moist.
If the cake has been sliced, use extra frosting to coat the exposed edges before refrigerating. This prevents the cake from drying out and keeps leftovers fresh.
For serving, bring the cake to room temperature so the texture and flavour are at their best.
The assembled cake can sit out overnight at cool room temperature when covered or stored in a cake box.
Any remaining slices should be loosely wrapped and refrigerated for a few days. Let them warm slightly before serving for the best results.
Pro Tips:
Lightly spoon flour into your measuring cup and level it off, or weight your dry ingredients for consistent results every time.
Lightly grease the pan, then line the base and sides with parchment. The grease helps the paper stay in place, not the cake itself.
Use room-temperature ingredients. Butter, eggs and dairy blend more smoothly when they aren’t cold, helping create an even batter and frosting.
A looser batter is expected and helps produce a soft, moist sponge after baking.
This cake is all about details. Working slowly while stacking and piping will give you cleaner lines and a more polished finish.
Buttercream should pipe easily without pressure, if it feels stiff, add a small amount of milk or gently knead the piping bag to soften it.
It’s important to keep your frosting cool while using. If your palms tend to warm up quickly, wrap your piping bag with a thin towel or paper towel. To prevent the frosting from softening too fast.
If shaping the cake feels tricky, refrigerate the stacked layers first. Cold cake crumbs less and holds its shape better.
If the cake or frosting starts feeling unstable, take a break and refrigerate before continuing. Patience leads to a cleaner final result.
If the frosting becomes too loose while piping, refrigerate it briefly, checking every few minutes until workable again.
Despite its show-stopping appearance, this is simply a layered cake built into a cone shape. Each component is straightforward and achievable at home.
A festive cake should taste as good as it looks. Rich chocolate layers paired with smooth fillings create a truly celebratory dessert.
A few round cake pans and a star piping tip are enough. There’s no need for speciality mold or 3D cake pans.
Ingredients:
For Chocolate Sponge:
1 cup All Purpose flour
2 tbsp Cocoa powder
1 cup Powdered Sugar
2 nos. Egg, room temperature
1/2 tsp Baking Soda
1 1/2 tsp Baking powder
1/2 tsp Salt
1 tbsp Instant Coffee
1/2 cup Warm Water
2 tbsp Vegetable Oil
1 tbsp Vanilla
For Simple Syrup:
1/2 cup Granulated Sugar
1/2 cup Water
For Chocolate Ganache:
340 gm Dark chocolate, broken into small pieces
230 ml Heavy cream
For the Buttercream Frosting:
250 gm Butter, room temperature
125 gm Icing Sugar
40 ml Boiling water
2 tsp Vanilla
Green Gel Food Colour
For Decoration:
Sprinkles of your choice
100 gm Dark Chocolate, tempered
Gold Luster Dust
Preparation:
For Chocolate Sponge:
- Step 1: Preheat the oven to 350°F or 180°C and Prepare a 9×13-inch rimmed pan fully lined with parchment paper and greased with oil.
- Step 2: In a small bowl, combine hot water and instant coffee, keep aside.

- Step 3: In a large bowl, add oil and eggs and whisk until well combined.

- Step 4: Then sift the flour, cocoa powder, powdered sugar, baking powder, baking soda and salt and beat just until combined.

- Step 5: Then add the coffee and vanilla, whisk until well combined.
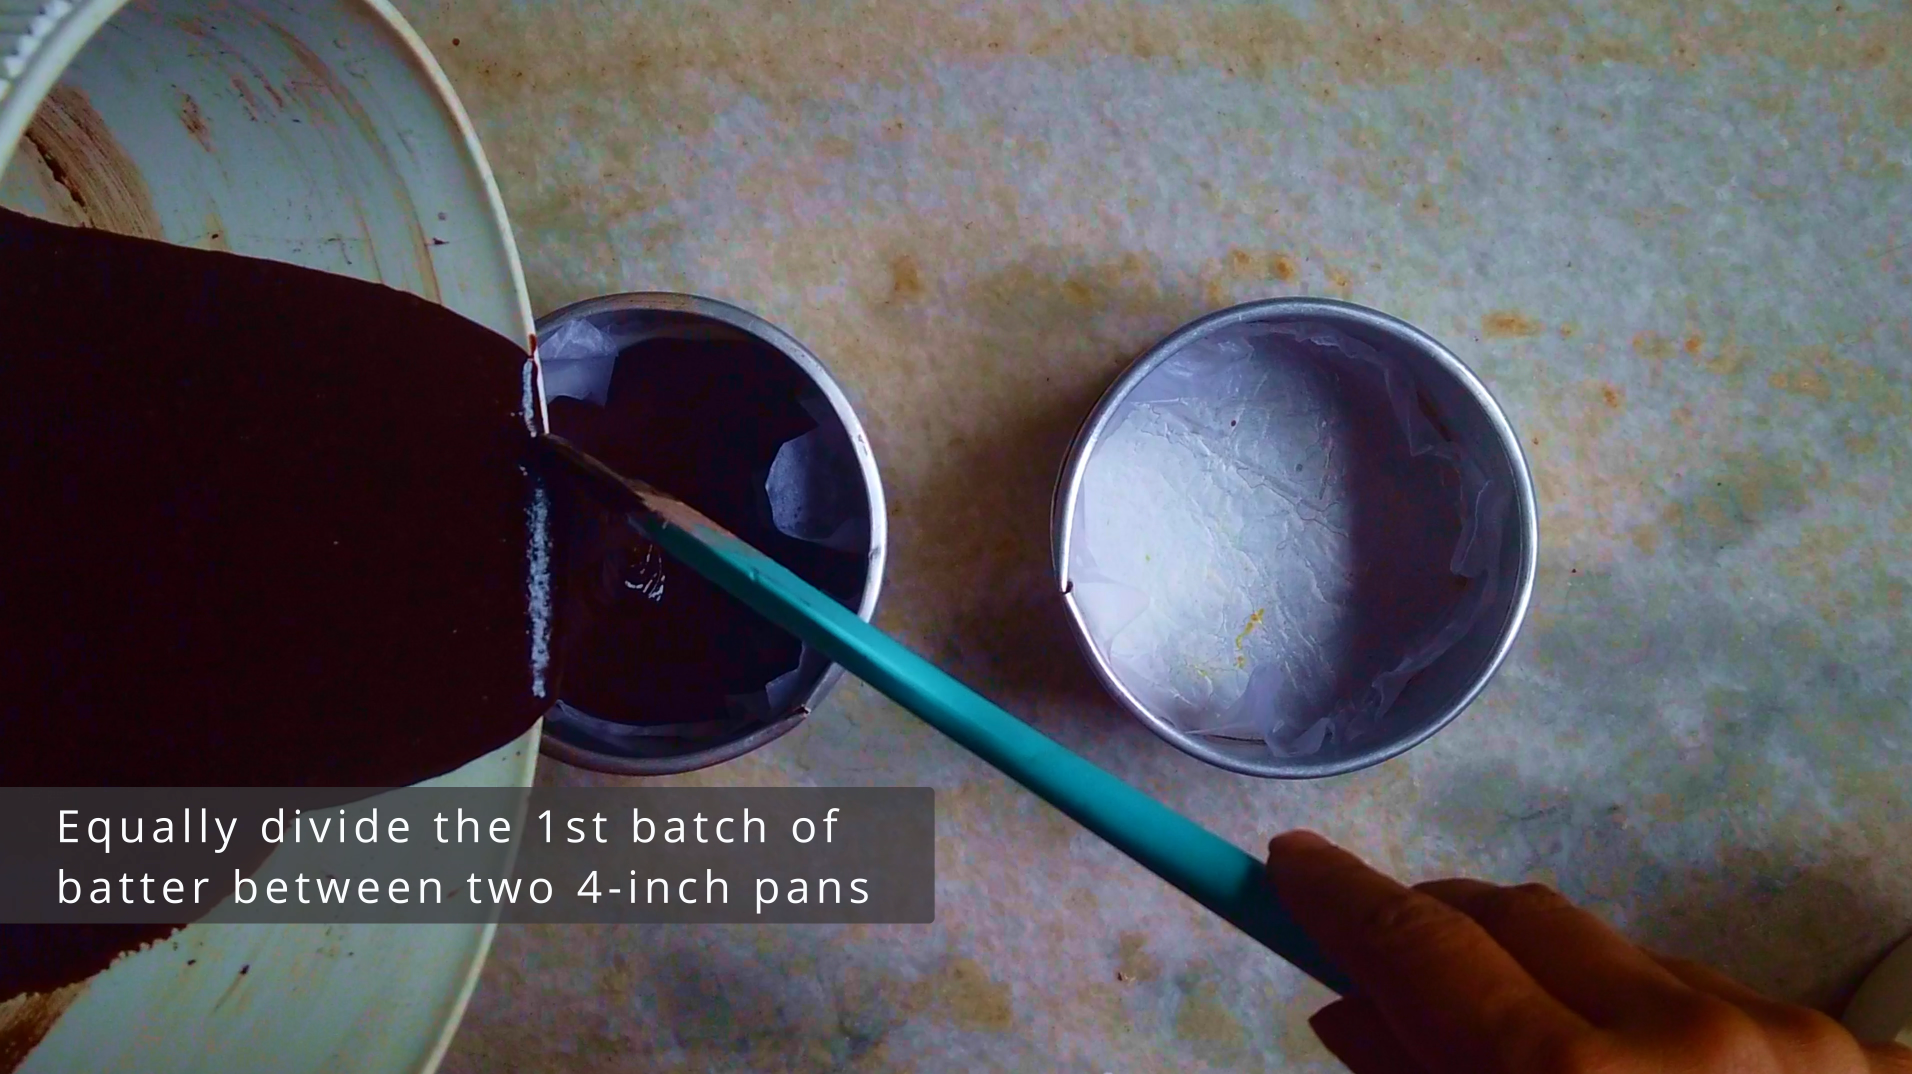
- Step 6: Divide the batter between prepared pans, one 5-inch round pan, two 4-inch round pan and one small round pan.
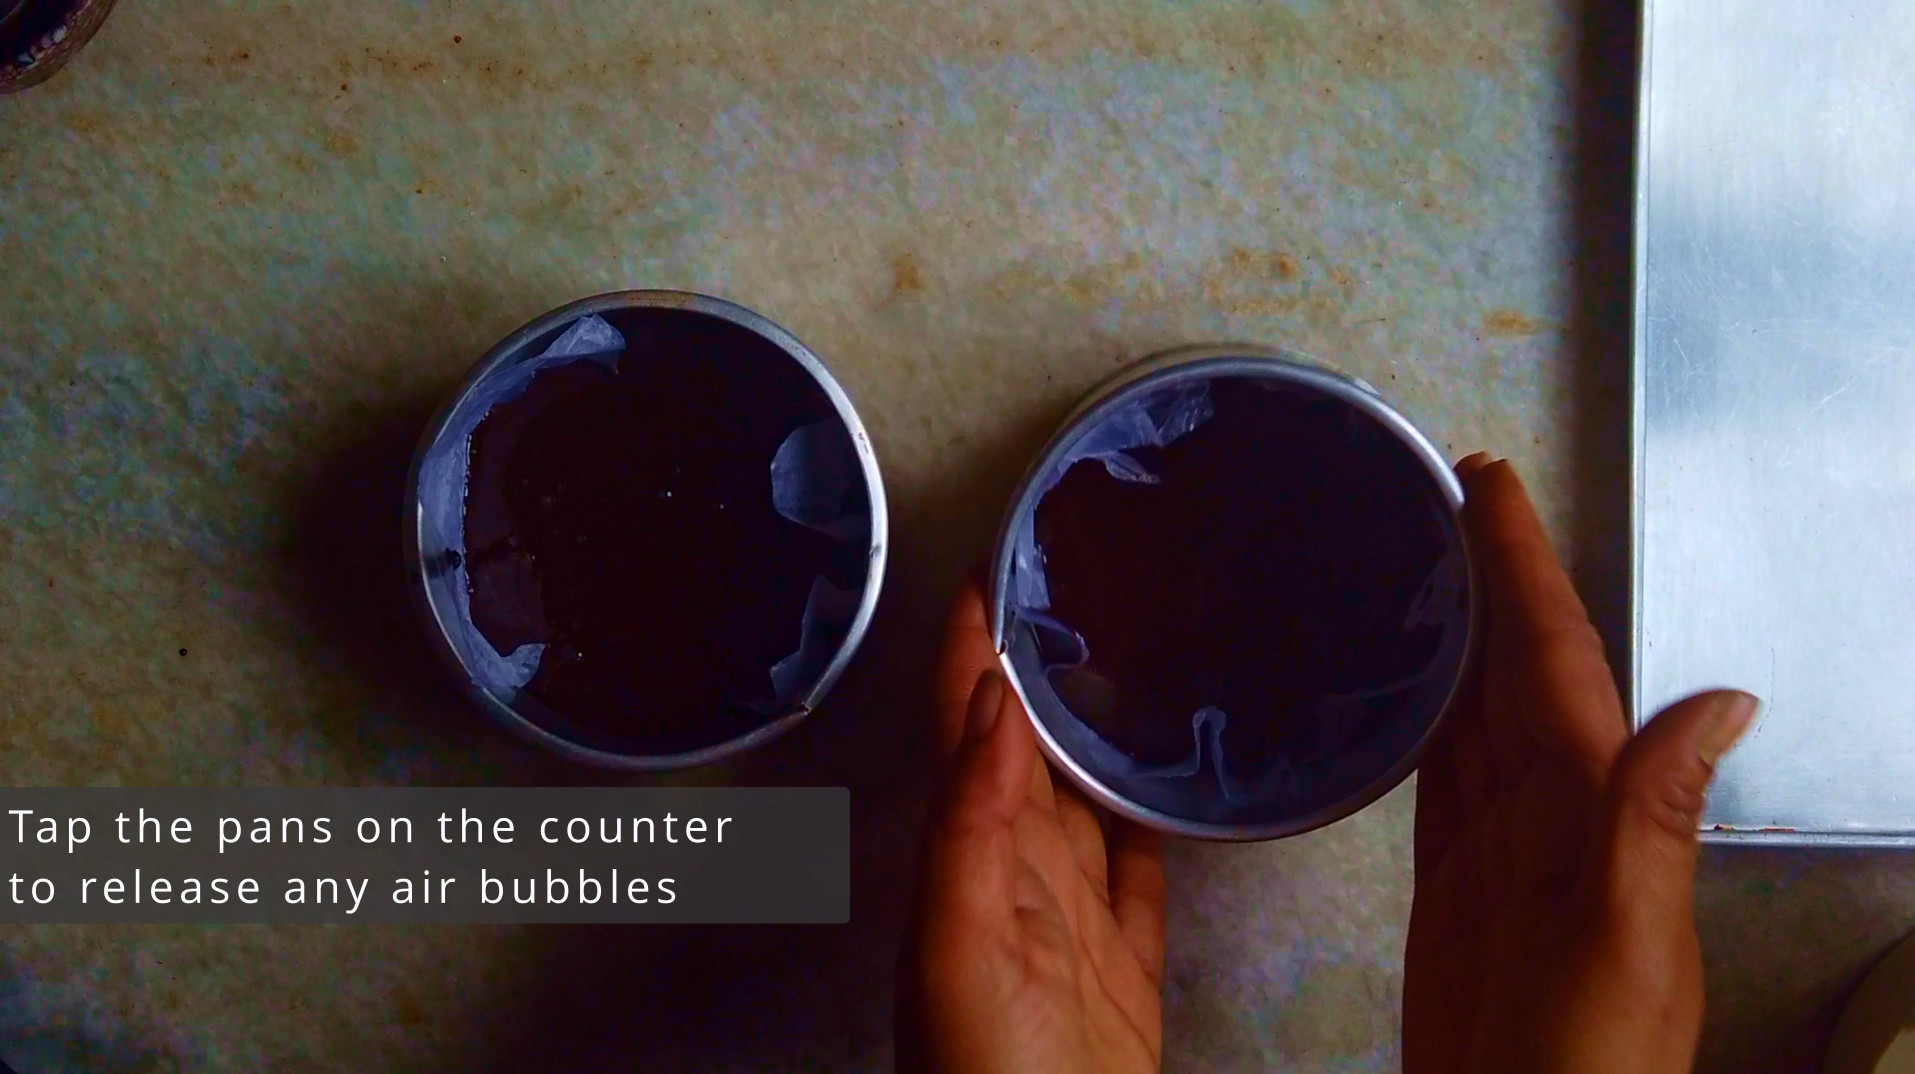
- Step 7: Tap the pans on the counter to release any air bubbles, ensuring a uniform, dense crumb and preventing large holes in your cake. It also helps the batter settle into all the pan’s corners and edges, leading an even bake.
- Step 8: Bake for 25-30 minutes or until the top of the cake springs back when touched and a toothpick inserted comes out clean.

- Step 9: Cool the cakes for about 10-15 minutes before removing them from the pans.

- Step 10: Then remove the sponges from pans and cool them on cooling rack.

For Simple Syrup:
- Step 11: Combine water and sugar in a saucepan over medium heat.
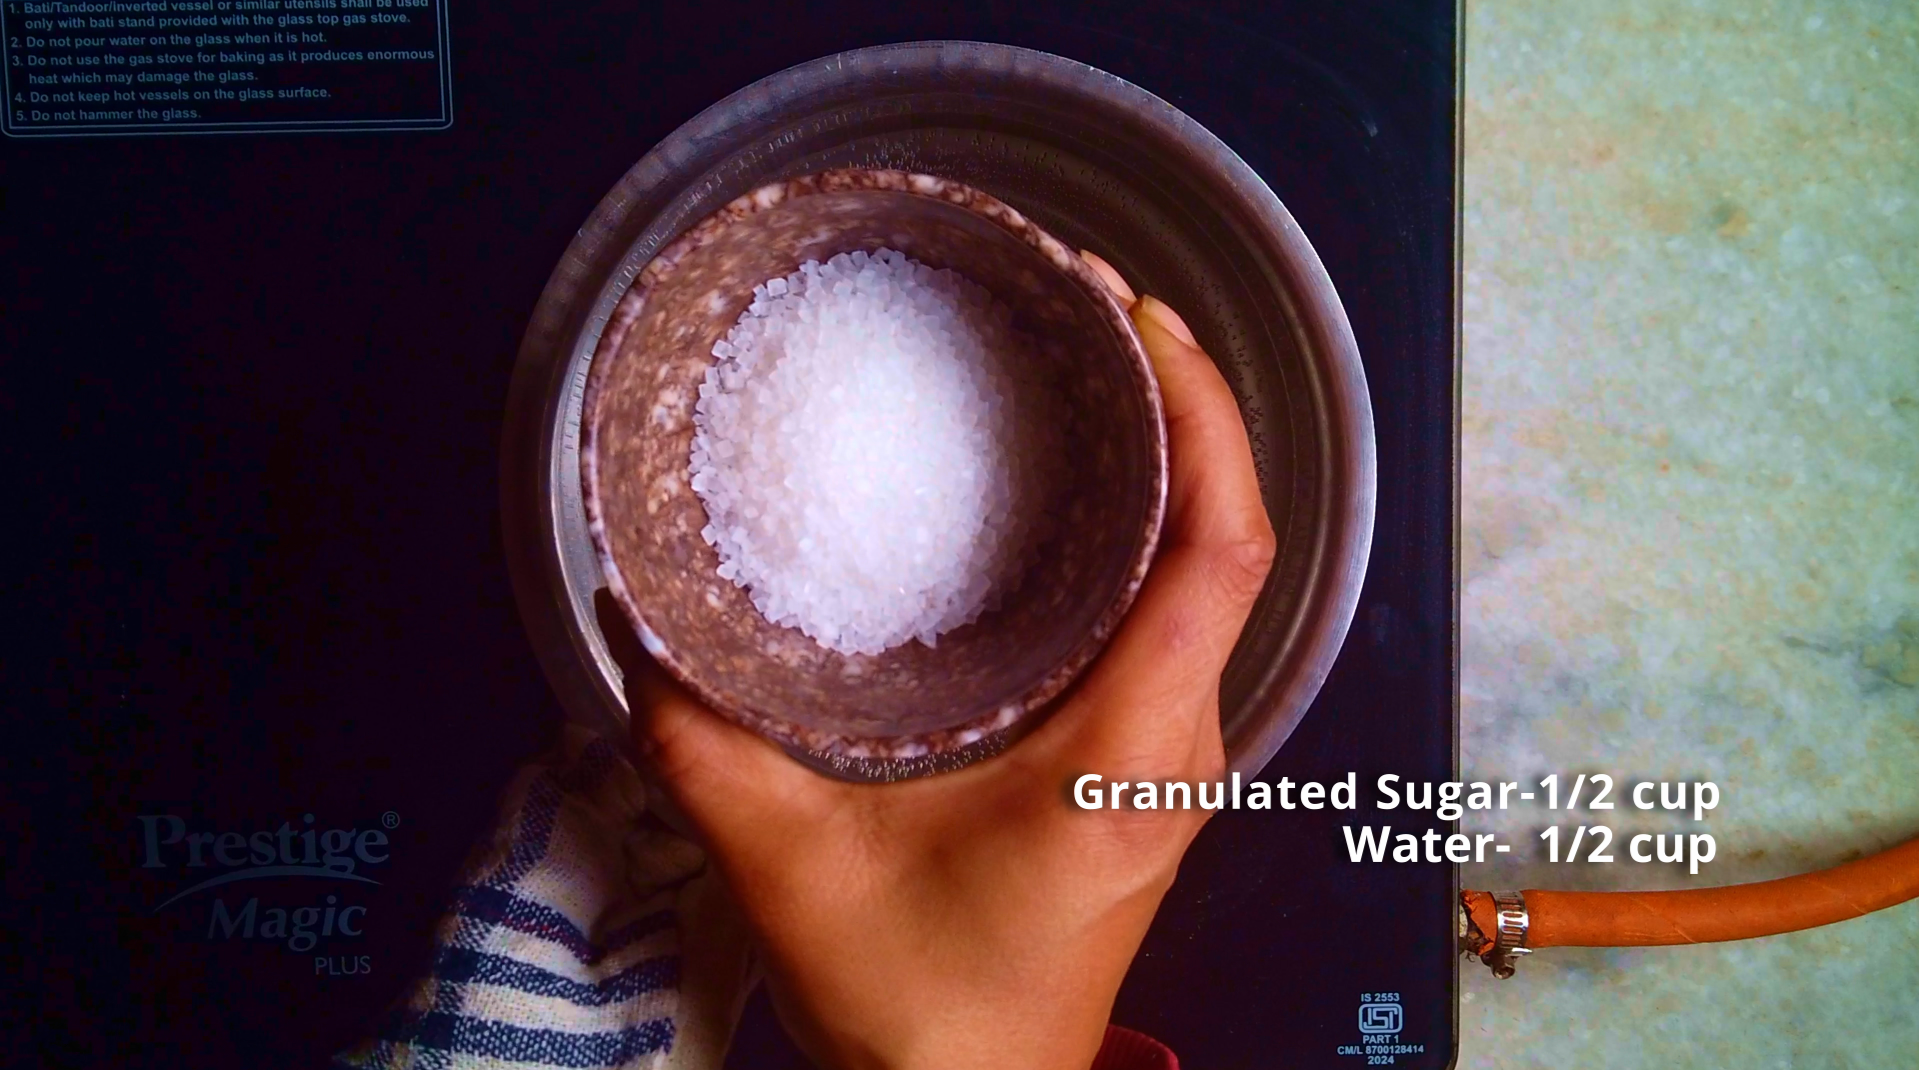
- Step 12: Bring to a boil, stirring, until sugar has dissolved. Allow to cool.

For Chocolate Ganache:
- Step 13: Microwave the chocolate at 30 second intervals for 1 minute, stir the chocolate in between so all of the chocolates are just about melted.

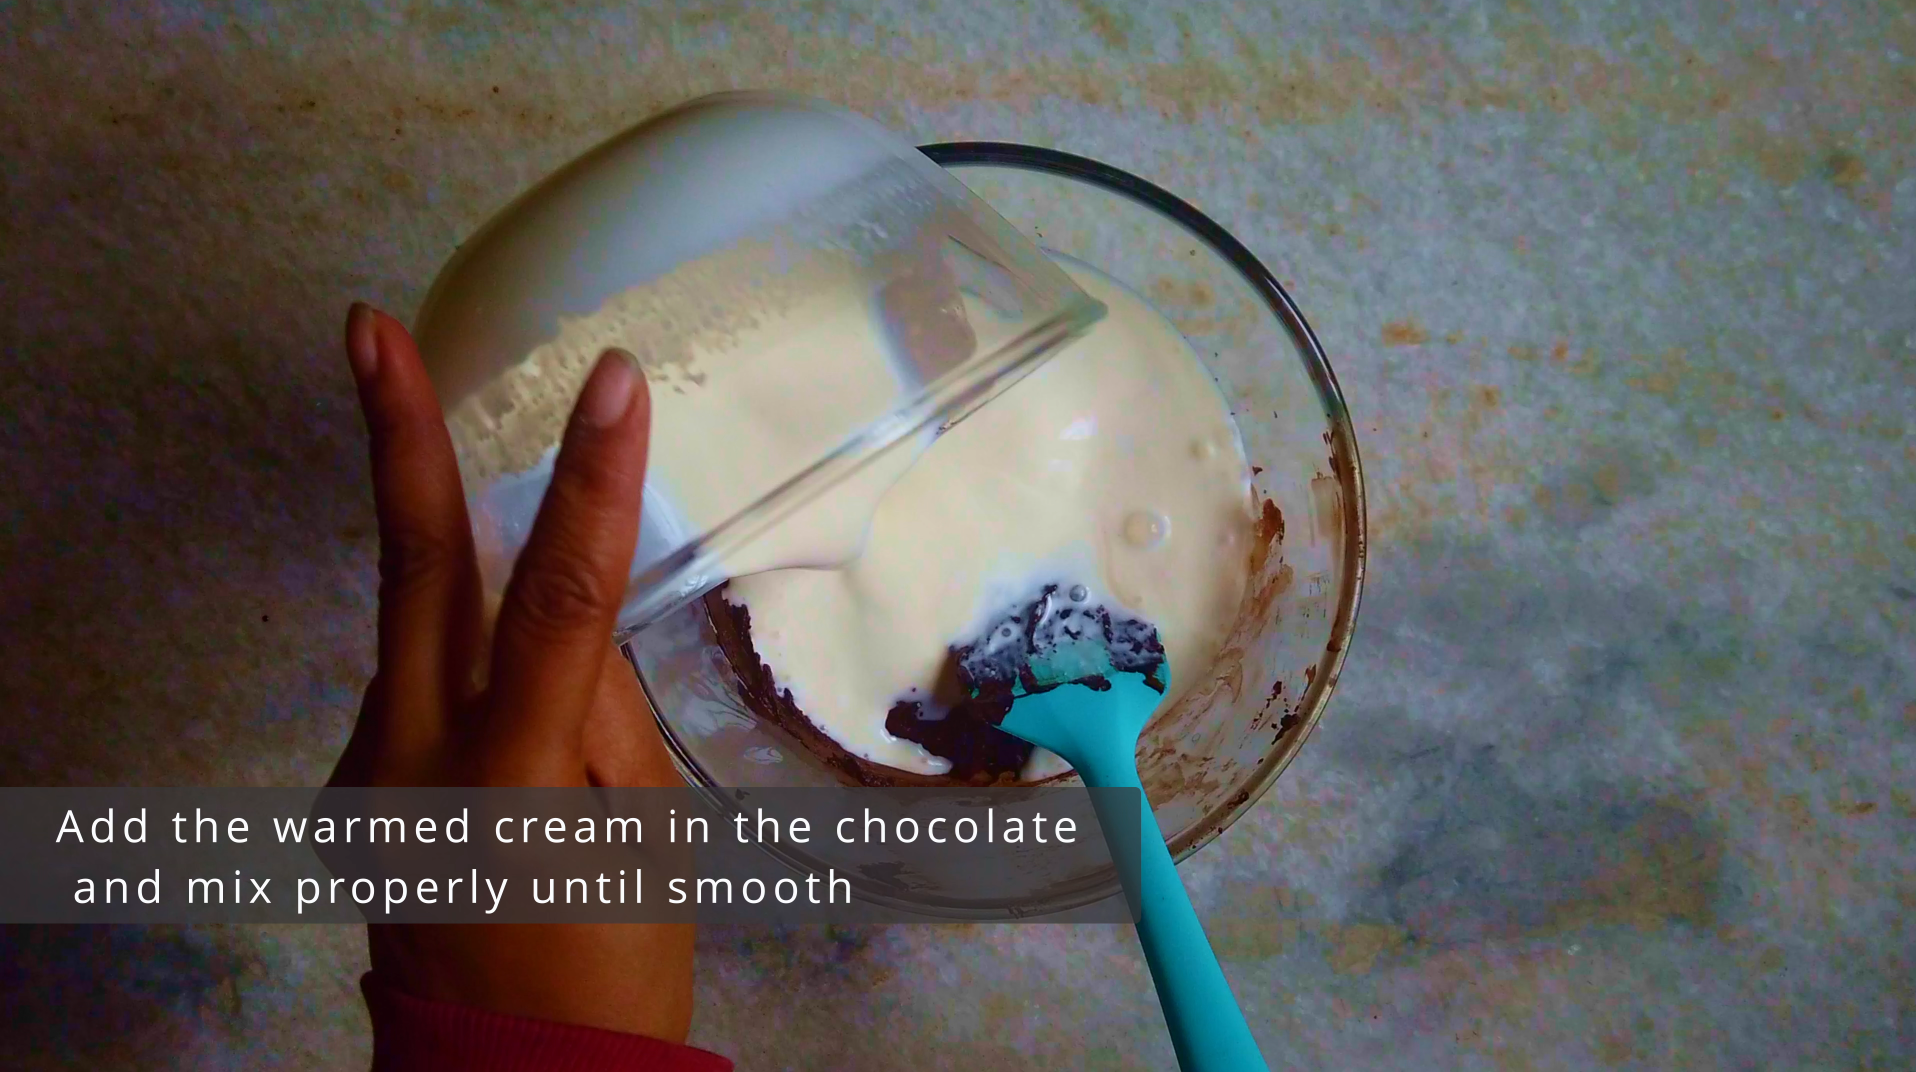
- Step 14: Then heat the cream in the microwave for 45 seconds to 1 minute. Make sure to keep an eye on it so it doesn’t bubble over in the microwave. Then add the warmed cream in the chocolate and mix properly until smooth. Let the ganache cool to about room temperature.
For the Buttercream Frosting:
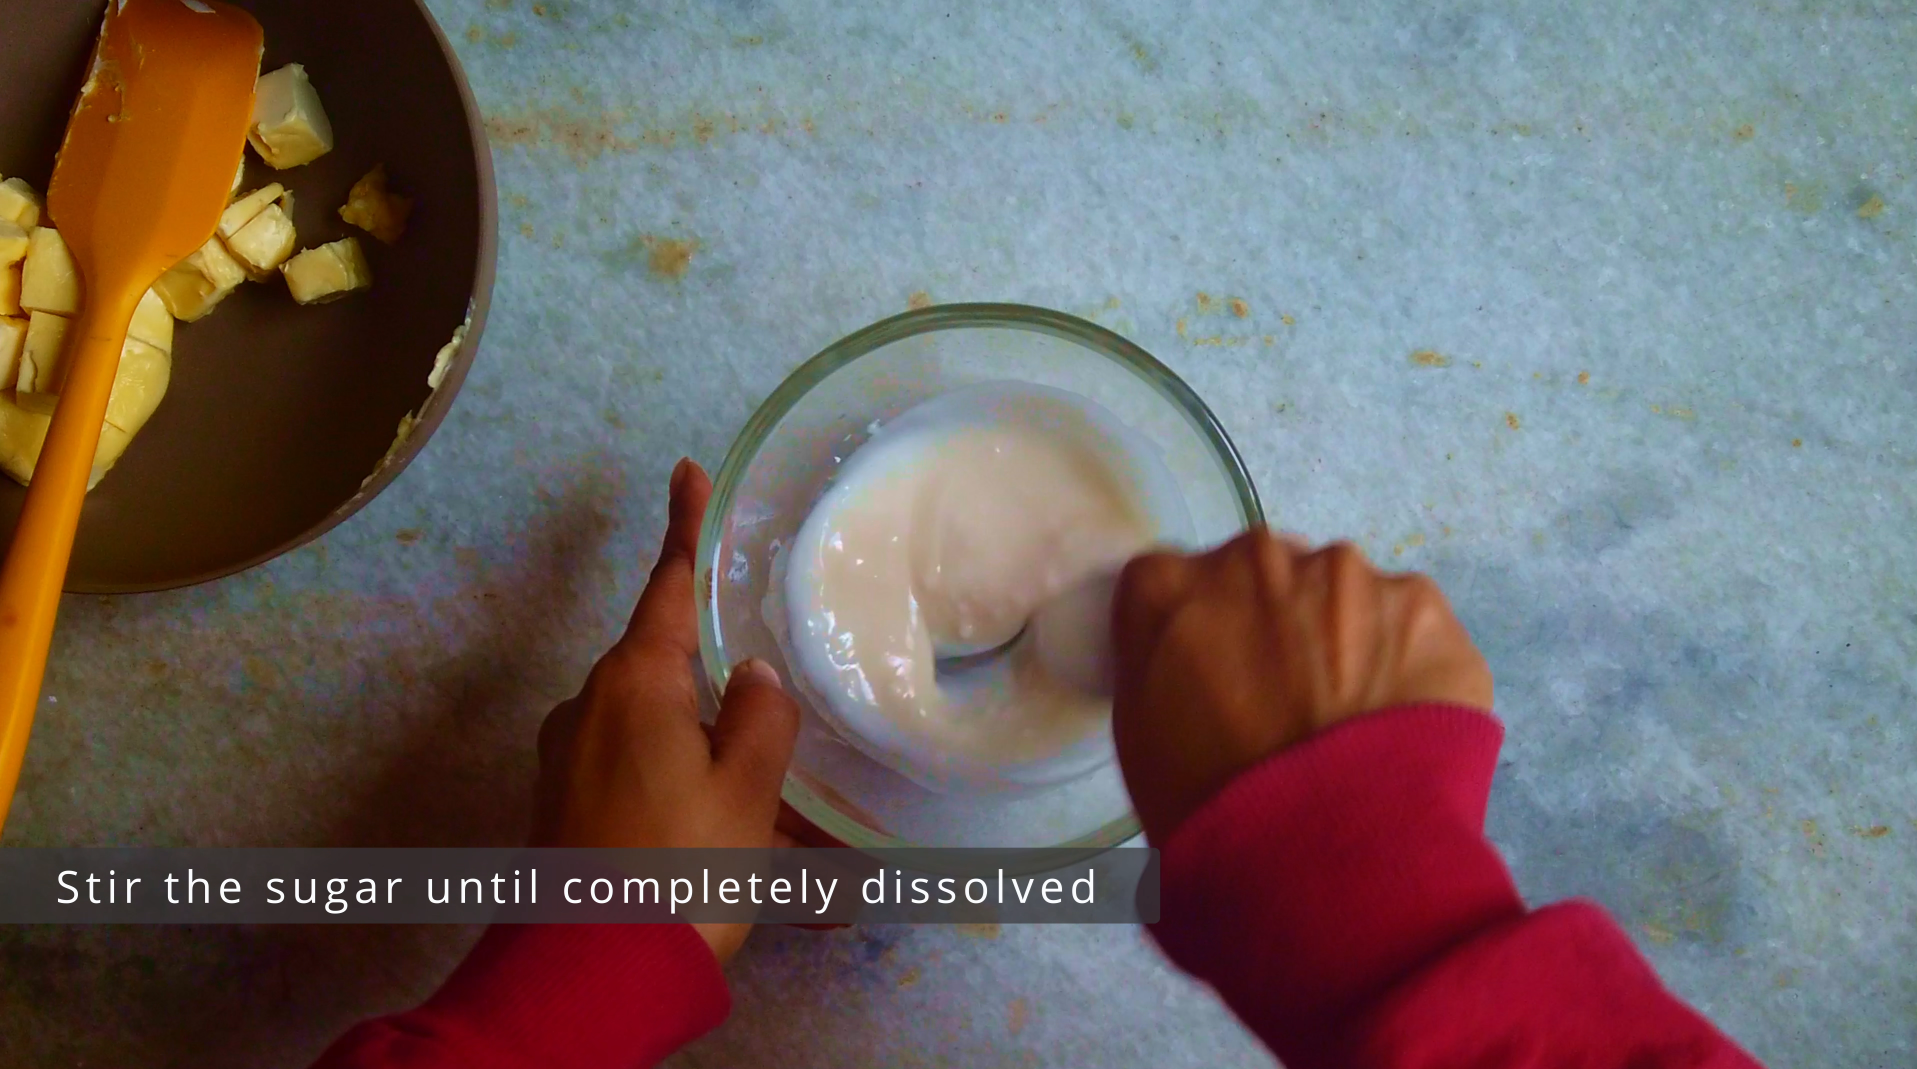
- Step 15: In a bowl combine Icing sugar, vanilla and boiling water, make sure the sugar is completely dissolved. Then whip the butter until light and creamy for about 7-8 minutes on high speed.
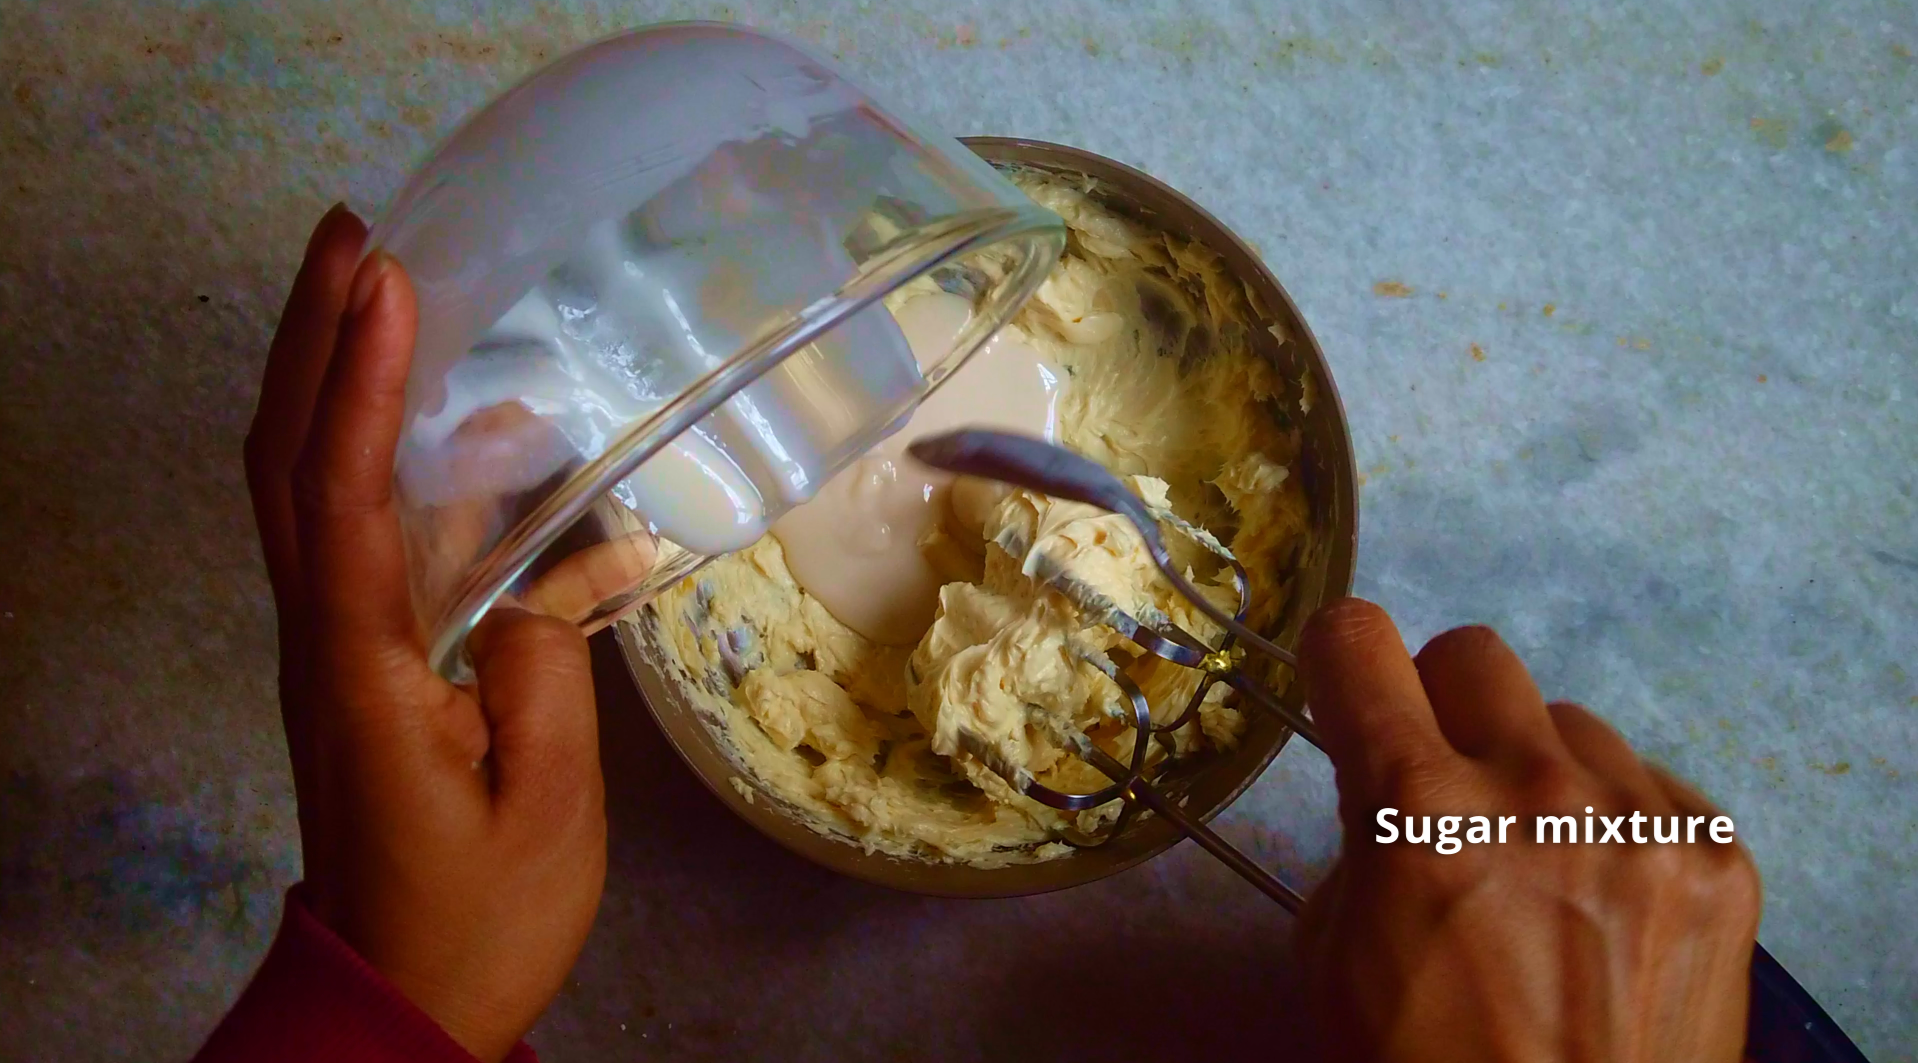
- Step 16: Once the butter is pale in colour, then add the sugar mixture over the buttercream and continue to whip on high speed for 3-4 minutes until very light, creamy and fluffy.
- Step 17: Divide the buttercream and tint with green gel food colouring. Transfer the green buttercream into a piping bag fitted with star nozzle tip.

To Assemble:
- Step 18: Start layering the cakes from bottom to top,
Bottom 1st Layer: Starting with 5-inch sponge, brush with simple syrup and fill each layer with chocolate ganache.
2nd Layer: 4-inch sponge, brush with simple syrup and fill each layer with chocolate ganache.
3rd Layer: 4-inch sponge, brush with simple syrup and fill each layer with chocolate ganache.
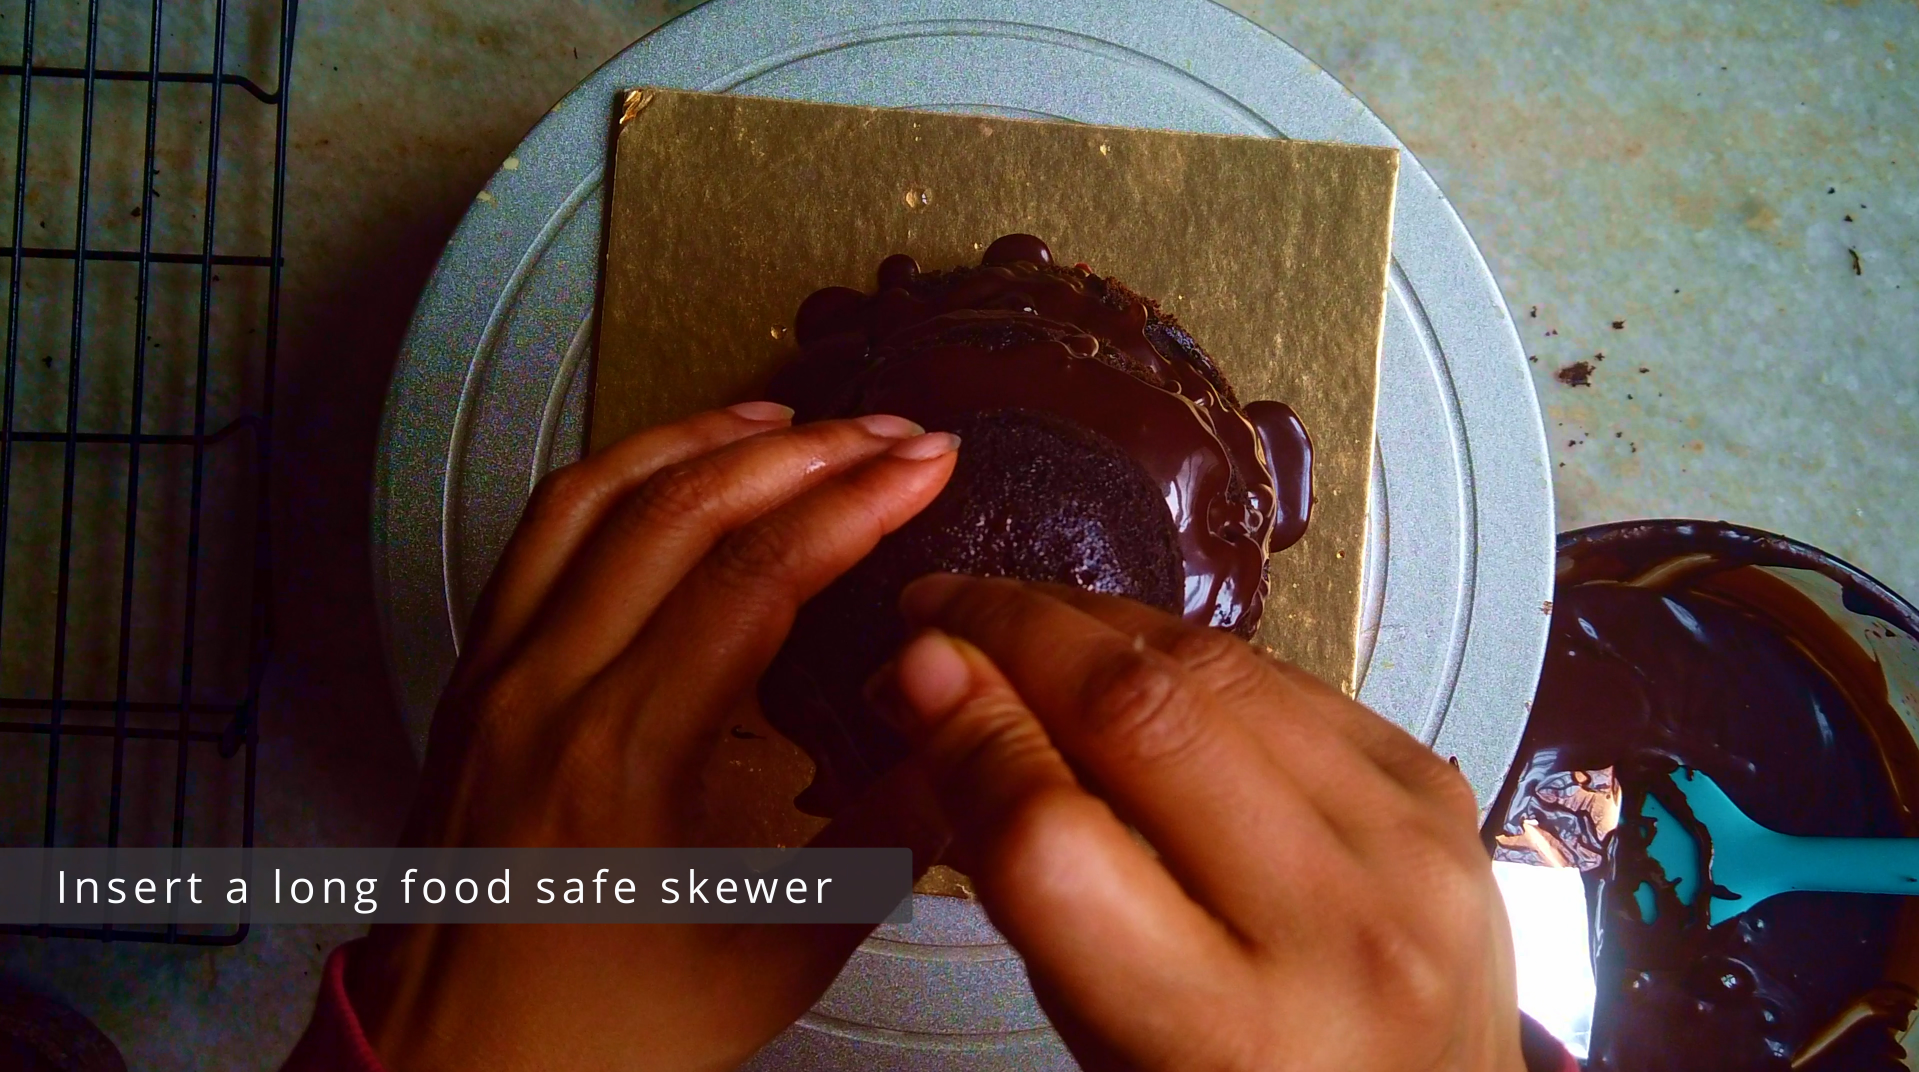
4th Layer: small sponge, brush with simple syrup and cover the top part with chocolate ganache.

- Step 19: After top layer, insert a long food safe skewer top to bottom that helps to stabilize the cake but it is not strictly necessary.
- Step 20: Chill the cake either 1 h in the refrigerator or 15 minutes in the freezer.
- Step 21: After 1 h, use a serrated knife to start shaping and carving the cake into a roughly cone shape. Angle the knife up the side and trim. Save the trimmings.
- Step 22: Frost the cake with chocolate ganache and then smooth it with an offset spatula.

- Step 23: Again chill the cake either 1 h in the refrigerator or 15 minutes in the freezer.

- Step 24: Start piping around the cake starting from the bottom all around moving towards the top.

- Step 25: Chill the cake again in the refrigerator for few hours or overnight.

Decoration:
- Step 26: Make the star shape with tempered chocolate and allow it to harden.

- Step 27: Then colour the chocolate star with gold luster dust.

- Step 28: Use sprinkles of your choice and finally place the homemade star on top. Enjoy!!


About Me

DEBJANI MONDAL
Welcome to Kitchenstagram, the home of delicious recipes, culinary inspiration and cooking adventures. I’m Debjani and I’m thrilled to be your guide through the wonderful world of food. I’m a self-taught professional baker, home chef, recipe developer, author of Kitchenstagram and an aspiring YouTuber.
My passion for food and cooking began at a very young age, when I would watch my mom and dad cook for me and my brother. My dad, in particular is a great cook whose culinary skills made a lasting impression on me. My dad would cook up a storm on special occasions by cooking variety of dishes, from delicious biriyani to samosa, fish fry, rasgullas and kachoris (sweet & spicy deep fried pastry with filling of lentils, meat or fish…>>>>>
FOLLOW ME
My Latest Posts
- post 1
- post 2